Author:
Frank Hunt
Date Of Creation:
12 March 2021
Update Date:
25 June 2024

Content
A jacket is an indispensable part of any suit. Instead of spending money to dry clean your jacket, you can iron it yourself at home to keep it looking its best. Ironing a jacket is a fairly simple process, as long as you set the iron to the correct setting and gently press each section. With a little practice, ironing is a great way to keep your jacket looking like new.
To step
Part 1 of 2: Getting ready to iron
 Check the jacket for stains. Get the jacket you want to iron and check it for stains, sweat stains and dirt.
 - Heat will permanently set the stains into the fabric and be a lot more difficult to remove, so remove all stains and dirty areas before ironing.
 Get your ironing board ready. If you don't have an ironing board, use a bath towel folded in half and place on a flat surface that can withstand heat, such as hardwood or granite countertops. If your iron isn't cordless, make sure your ironing board is upright and close enough to an electrical outlet.
 - You can use a regular ironing board, but you can also use a thinner sleeve board.
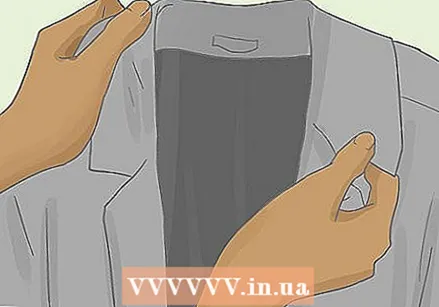
 View the care label. View the jacket lining to read washing instructions and see what material the jacket is made of. The position you set your iron to depends on the material your jacket is made of. Here are some of the most common substances and their temperature settings:
 - Linen or cotton: hot
- Synthetic fabric such as acrylic, nylon or silk and polyester: cold
- Polyester mix, wool: lukewarm
 Make sure the iron is clean. The bottom of the iron can get dirty over time and leave residue on fabrics. If the underside needs cleaning, use a damp cloth or baking soda paste to remove stubborn stains.
 - To make the paste, mix 1 tablespoon of water with 2 tablespoons of baking soda. Spread the paste on the bottom and wipe the iron after a minute.
 Fill an atomizer. While ironing, you will need to spray small amounts of water on the fabric to prevent the fabric from burning. The water also creates steam, so that wrinkles become smooth.
 - If your iron has a steam function, you don't need an atomizer. Make sure to fill your iron with distilled water so that the water is already warm before you start. Use distilled water, as tap water can contain large amounts of lime and minerals that can damage your iron over time.
 Plug in the iron. Set the iron to the correct setting, depending on the fabric from which the jacket is made. Let the iron heat up. This can take several minutes, depending on what kind of iron you have.
 - Most new irons have a light that comes on when the iron is up to temperature.
- Only start ironing when you are sure that the iron is at the right temperature.
 Place a cloth between the iron and the jacket. This helps to protect the jacket during ironing and prevents shiny spots on the jacket. A cotton cloth or towel will work fine, but it is best to use a muslin or drill cloth.
 - It is important to place a cloth between the iron and any part of the jacket that you are pressing. If you don't have a cloth, turn the jacket inside out and press the fabric through the lining. The lining of your jacket is probably made of a different fabric than the rest of your jacket. Don't forget to check the care label to see what material the liner is and set the iron to the appropriate setting.
Part 2 of 2: Ironing the jacket
 Take the jacket and lay it flat on the ironing board. Lay the jacket back up so you can iron the back first. First test the temperature of the iron on a part of the fabric on the inside near the hem. If the iron leaks or stains for some reason, they will not be immediately visible. If necessary, adjust the iron to another setting and proceed carefully.
 - Smooth out any large wrinkles before you start pressing the jacket.
- If the jacket has embroidery, turn it inside out and press it through the lining instead of onto the embroidery. You will need to set the iron to a lower temperature when you press the jacket through the liner.
 Press the back piece. Lay the jacket flat on the ironing board with the back of the jacket facing up and towards you. Do not pull on the seams at the sleeves or stretch them while pressing the back of the jacket. These seams should remain slightly shrunk.
 - Spray a small amount of water on the fabric you want to press. Apply pressure to the different parts of the back with the iron instead of sliding the iron over the fabric. It is important that you press the wrinkles out of the fabric instead of smoothing them out.
- If the jacket has a split, put a piece of stiff paper between the split and the rest of the back piece. This way there will be no stripes on the layer of fabric under the split. Iron the top part of the split, then lift it up while pressing the fabric under the split.
 Turn the jacket over so that the front is up. Now that you have pressed the back you can start with the front and sides of the jacket. Place one half of the jacket on the ironing board so that the other half hangs down. If the jacket has darts, place the darts on one side exactly on the outer edge of the ironing board to avoid wrinkles in the fabric.
 - Iron all large wrinkles out of the fabric and lining before spraying water on the fabric and pressing the fabric.
 Press the front of the jacket. Squeeze the front of the jacket into small areas, applying moderate pressure. There are likely pockets and lapels on the front of the jacket that you will need to pay special attention to.
 - Do not press folds in the lapel unless you want a strict military look. Carefully run the iron over the lapel. If the jacket has shoulder pads, do not put pressure on it or its outline will be squeezed into the jacket fabric.
- Pull the pockets out before pressing those areas so that you don't press the outline of the pockets into the fabric and get wrinkles. If the bags have flaps, use the stiff piece of paper you used with the split to keep the layers separate during the pressing.
 Prepare the sleeves. The sleeves are the trickiest parts of the jacket to iron because of the shape and because you are dealing with two layers of fabric and lining.
 - Place the sleeve on the ironing board and smooth out any large creases in the fabric and lining by hand. If you are using a sleeve board, insert it into the sleeve so that you can turn the sleeve around the board.
- Place a damp cloth on the sleeve. This will help protect the jacket fabric and make pressing easier.
 Iron the sleeves. Start ironing the center of the sleeve. Use the seam in the sleeve as an aid so that you don't make any folds in the fabric. Using a sleeve board is the easiest way to iron a sleeve because you can twist the fabric around the board while pressing without making any wrinkles.
 - If you don't have a sleeve board, you can use a cylindrical object instead to keep the sleeve in shape while ironing. You can use a rolled-up thick magazine or a cardboard tube and tuck it up the sleeve. Make sure to cover the magazine or tube with a cotton towel before tucking it into the sleeve.
 Hang up the jacket. When you're done, hang the neatly pressed and steamed jacket on a clothes hanger with the correct shape. If possible, use a coat hanger with shoulder pads and fabric around it, but if you don't have anything else you can just use a wire coat hanger.
 - Let the jacket hang while it cools.
- Unplug the iron and put your ironing board away. Do not store your iron until it feels cold.
Tips
- After ironing, pour the water from the iron while it is still hot. This reduces the chance that water will remain in the water tank of your iron, which can damage the iron over time.
- If the fabric of your jacket has a protective layer, place a clean piece of cotton between the iron and the jacket so that there are no slippery spots on the fabric when pressing.
Warnings
- If you are not sure what fabric your jacket is made of, always start with a lower setting and set the iron to a higher temperature if necessary.
- Iron around buttons and not over them. When you exert pressure on a button with the iron, a permanent imprint of the button can be left in the fabric.
- Keep your hands away from the steam or it could burn you.


