Author:
Frank Hunt
Date Of Creation:
20 March 2021
Update Date:
22 June 2024
Content
- To step
- Part 1 of 3: Optimize the conditions in which your plant grows
- Part 2 of 3: Germinating and planting the avocado plant
- Start at the pit
- Grafting
- Part 3 of 3: Caring for the avocado plant
- Tips
- Warnings
- Necessities
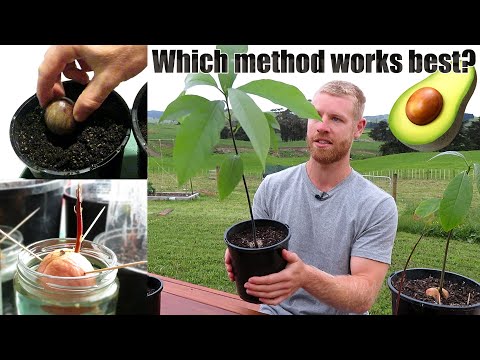
Avocado - that smooth, creamy fruit, packed with nutrients, is an essential ingredient for dishes like guacamole. It can be grown from the kernel left over after you eat the pulp around it. While it can take a long time for an avocado plant grown from the pit to bear fruit (which can take 7-15 years), growing your own avocado plant is a fun and rewarding project that also takes you a long way. beautiful looking plant. When your plant is fully grown, you can wait for the avocados to grow on it, or you can speed up the process by grafting or oculating your plant by growing branches on your plant, which yield a lot of fruit. Whichever method you choose, you can read below how to grow avocados out of thin air!
To step
Part 1 of 3: Optimize the conditions in which your plant grows
 Find a warm, partly sunny spot for your avocado plant. Avocado plants are tropical plants that love the sun. The avocado plant grows in Central America, Mexico and the Caribbean. The plant grows optimally in a warm and humid climate and you try to imitate that. Avocados grow well in sunny areas such as California and need a lot of sunlight. However, young avocado plants can be damaged by too much direct sunlight (especially if they don't have many leaves yet). So if you want to grow an avocado from a pit, it is important that you have a place in front of your plant where the plant only receives sunlight for part of the day, and is not in constant direct sunlight.
 - A sunny windowsill is a great place to grow an avocado plant. Placing your plant on the windowsill not only ensures that you only give the plant sunlight for part of the day, but it also means that you can properly regulate the temperature and humidity.
 Avoid cold, wind and frost. Most avocado plants cannot tolerate inclement weather. Snow, cold winds, and large temperature changes, which can also harm the toughest plants, can kill an avocado plant. If you live in a tropical or subtropical climate where winters are mild, you can probably put the avocado plant outside all year round. However, if you live in an area where the temperature is likely to drop below zero in winter, it is best to put your avocado plant indoors in winter so that the plant is protected from the elements.
 - The tolerance against the cold differs per avocado variety. The species listed below can be damaged by frost at the following temperatures:
- Caribbean: -1ºC
- Guatemalan: -1ºC
- Hass: -1 ºC
- Mexican: -2 ºC
- The tolerance against the cold differs per avocado variety. The species listed below can be damaged by frost at the following temperatures:
 Use well-fertilized soil that drains water well. Like many other plants, an avocado plant grows well in richly fertilized and loose soil. This type of soil provides enough nutrition to help the plant grow strong, while ensuring that the plant does not get too much water and that enough air can circulate through the soil. Try to stock up on this type of soil (one with top soil and compost), and use it as potting soil once there are enough roots and a trunk on the plant.
 - To be clear, you do not need to have the potting soil ready at the start of the cultivation, because an avocado seed is first soaked in water before the seed is put in the soil.
 Use potting soil with a relatively low pH value. Like most garden plants, an avocado plant grows best in soil with a low pH (in other words, soil that is acidic, not alkaline or basic). For optimal results, place the plant in soil with a pH of 5-7. When the pH is higher, it becomes more difficult for the avocado plant to absorb important nutrients, such as iron and zinc, which prevents the plant from growing well.
 - If the pH of the soil is too high, consider doing something about it so that the pH of your garden drops, such as adding compost. Or you can put plants in your garden that thrive in alkaline soil. You can also achieve good results with the addition of substances such as sulfate or sulfur. For more information on pH, see this article.
Part 2 of 3: Germinating and planting the avocado plant
Start at the pit
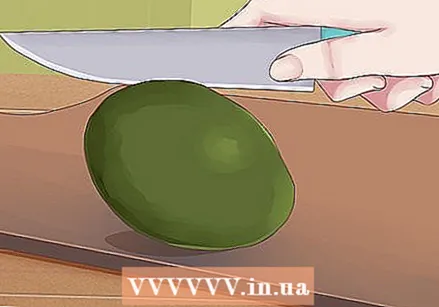 Remove and wash the pit. It's easy to get the stone out of a ripe avocado. Using a knife, cut the avocado in half lengthwise on both sides, then grab the avocado with your hands to pull the halves apart. Remove the wick from the half that it is still in. Then you wash the avocado kernel thoroughly, so that any leftover avocado that is still on the pit is removed and the pit is clean and smooth.
 - Don't throw away the pulp of the avocado - you can make it into guacomole, spread it on a toasted sandwich, or just eat it raw as a delicious nutritious snack.
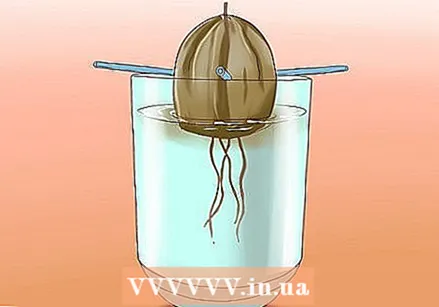 Soak the wick in water. Avocado seeds are not put directly into the soil - it is necessary to soak them in water until enough roots and stems have grown on the pit to support the plant. An easy way to soak the wick in water is to stick three toothpicks into the wick and place the wick in a large bowl or cup so that it sticks to the edge. Don't worry - this won't damage the plant. Fill the cup or bowl with water until the bottom of the wick is just submerged.
 - Make sure the wick is pointing straight up while the wick is suspended in the water. The top of the wick is a little round or pointed (like the top of an egg), while the bottom, which hangs in the water, is a little flatter, and often blotchy and dark, compared to the rest of the wick.
 Place the bowl with the water and the wick near a sunny window and change the water if necessary. After a while, place the wick in the bowl of water where it gets occasional sunlight (and almost no direct sunlight), such as a windowsill that only receives a few hours of sun a day. Once a week, empty the bowl and fill it with fresh water to keep it clean. After a few days, pour in some water as the water drops below the bottom of the wick. After a few weeks to about a month and a half, you will see roots growing at the bottom of the pit and a small trunk growing at the top.
 - The first phase in which nothing seems to be happening often lasts two to six weeks. Still, the avocado has been working hard all this time to form roots, even if you don't always see it. It may seem like the pit is not doing anything, but be patient - you will eventually see the first roots and the stem growing out of the pit.
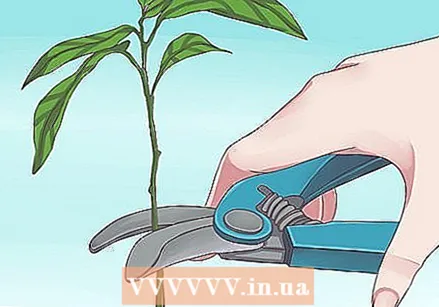 When the trunk is about 6 inches high, cut the trunk. When you see roots and a trunk growing on the avocado, continue to observe its growth and water as needed. When the trunk has grown to about 6 inches (15 cm) high, cut it back to about 2 inches (7-8 cm). Within a few weeks, if all goes well, you will see that new roots are growing on the pit and that the trunk is busy becoming a wider, fuller plant.
 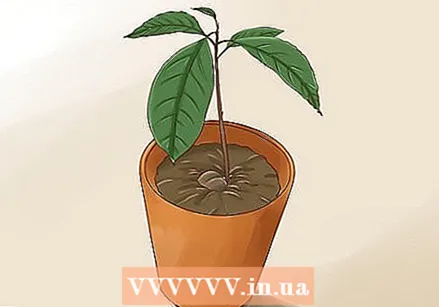 Plant the avocado seed. A few weeks after you prune the trunk, when the roots of the avocado are firm and grown enough, and when the trunk has formed new leaves, plant the avocado in a pot. Remove the toothpicks from the pit and plant the pit with the roots down in soil that is rich in compost and is quite loose so that the water can drain well. For optimal results, take a pot of 25-30 cm in diameter. With a smaller pot you run the risk that the roots will not get enough space, which will inhibit the growth of the avocado if you do not repot the plant in time.
 - Don't cover the pit completely with soil - cover the roots, but leave the top half of the pit free.
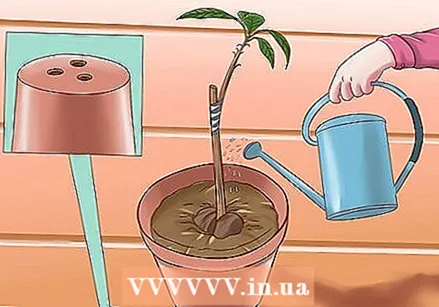
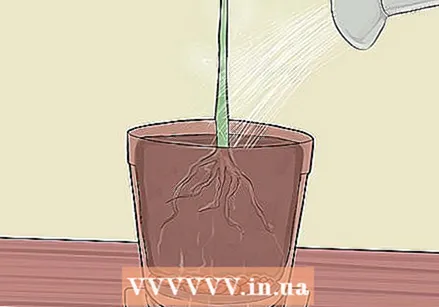 Water the plant regularly. Just after planting the avocado, water the plant. You carefully pour the water into the pot, until the water has been absorbed by the soil. The goal is to moisten the soil a little and prevent the soil from becoming too wet or muddy.
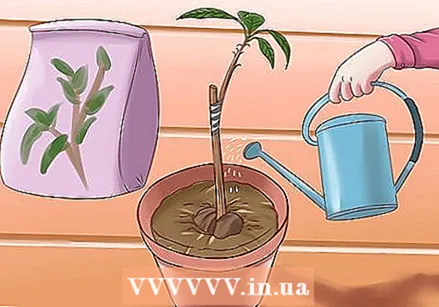
 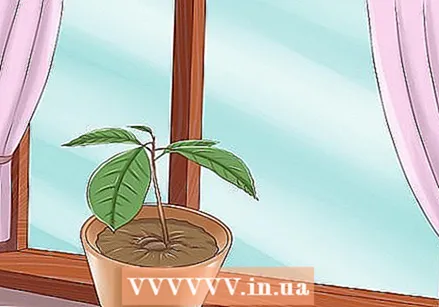 Hard the avocado plant. If you are going to put a plant outside, it helps if you gradually adjust the plant to the weather conditions outside, either you let the plant harden. First you put the pot in a place where the sun shines indirectly almost all day long. Move the pot gradually to places where it is lighter and lighter. Ultimately, the plant is ready to stand in constant, direct sunlight.
  Whenever the plant has grown 15 cm, you remove the leaves. Once your plant is in a pot, continue your habit of watering the plant regularly and in bright sunlight as the plant grows bigger. Measure growth occasionally with a ruler or tape measure. When the trunk of the plant has grown to about 12 inches (30 cm) high, pull off the leaves that grow from the top of the trunk. You leave the rest of the leaves intact. As the plant continues to grow, remove the youngest leaves that grow highest on the trunk each time the plant has grown back 15 cm.
 - This encourages the plant to form new branches, ultimately making the avocado plant appear fuller and healthier. Don't worry about hurting your plant - avocado plants are tough enough to recover from regular pruning without a problem.
Grafting
 Grow the avocado plant half to 1 meter high. As mentioned above, growing an avocado from the pit does not mean that you will be harvesting avocados in the foreseeable future. Some avocado plants take a few years to bear fruit, but others take longer and sometimes even don't produce fruit at all. To ensure that the plant gives fruit quickly, and to ensure yourself that the fruits are beautiful and tasty, you can apply the technique used by professional growers - grafting. To graft you need an avocado plant that is already producing beautiful fruits, and an avocado seedling, which is at least 60-75 cm high.
 - Try to find a graft that is not only hardened and healthy, but also produces beautiful avocados. In grafting, the intention is that two plants become one plant, so it is important that you find the healthiest graft possible, so that the plant does not suffer from diseases in the long term.
 Start in the spring. It is easiest to let the two plants become one while they are actively growing and before the weather gets too dry. Start in the spring, and expect the grafting process to take about four weeks.
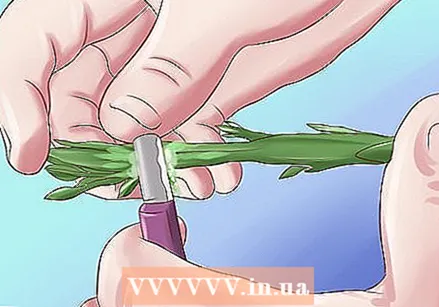
  Make a T-shaped cut in the stem of the seedling. Using a sharp knife, make a T-shaped cut in the stem of the plant about 20-30 cm from the ground. Cut horizontally through about a third of the thickness of the trunk, then turn the knife and cut about an inch deep into the trunk, down toward the earth. Use the knife to cut the bark off the trunk there.
 - Of course you have to be careful not to cut too far into the trunk. The purpose of the cutting is to open the bark along the trunk so that you can place a new branch in it, without damaging the seedling (rootstock).
 Cut a branch from the graft. Now look for a healthy looking branch on the graft you have chosen that is already bearing fruit. Remove it from the plant by cutting the branch diagonally, about 1 cm below the start of the branch, and ending about 2.5 below the start of the branch. If the branch in the middle of another branch or twig, instead of on the trunk, cut 2.5 cm above the start of the branch, so that you can remove the branch well.
  Merge the branch with the seedling (the rootstock). Then slide the branch you just removed from the graft into the T-shaped cut of the rootstock. The green area under the bark of the two plants is intended to touch - if not, grafting may fail. Once the branch is in the cut of the seedling, secure it in place with a rubber band, tie wrap, or grafting tape (available at most garden centers).
 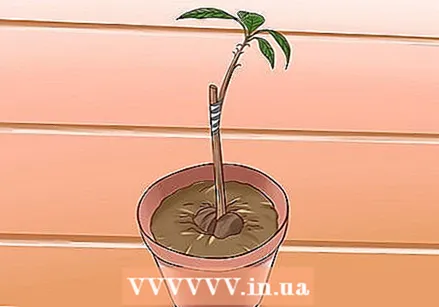 Wait for the branch to attach to the seedling. If the grafting is successful, the branch and seedling will eventually both heal so that they merge seamlessly together and become a plant. If this is done in the spring, it usually takes less than a month. When the plant is completely healed, you can remove the rubber band, grafting tape or tie wrap. If you want, you can cut the trunk of the rootstock about 2 to 5 cm above the new branch so that the last one has the tribe is becoming.
 - Keep in mind that avocados grown from the pit do not flower and bear fruit until 5-13 years.
Part 3 of 3: Caring for the avocado plant
 Water the plant regularly, but not too much. Compared to many other plants in your garden, the avocado plant probably needs a lot of water. It is important to realize that too much water is detrimental to the plant, and that applies to almost all plants, including avocados. Try to keep the soil from looking watery or muddy from over or over watering.Use potting soil that can drain excess water well (one with a lot of compost in it usually works well). If your avocado plant is in a pot, make sure the pot has holes in the bottom of the pot to allow water to flow out. If you follow these simple tips, you can be almost certain that your plant is not getting too much water.
 - If the leaves of your plant are turning yellow and you have watered the plant regularly, it may indicate that you have over-watered. Stop watering immediately and only water again when the soil is dry again.
 Don't add compost too often. In fact, you may not even need compost at all to keep your avocado plant strong and healthy. But if you give the compost the right way, it really gives a boost to the growth of a young plant. If the plant is already strong and fairly large, you can add citrus fertilizer to the soil during the spring when the plant grows most. Follow the instructions on the fertilizer packaging. Don't give too much of it - if it's traditional fertilizer, it's best not to give too much. Always water the plant after fertilizing so that the fertilizer can be properly absorbed by the soil and can flow straight to the roots of the plant.
 - Like many plants, avocado plants should not be fertilized when they are still young, because then they are very sensitive to the combustion of leaves and small roots, which can occur through fertilization. Try to wait at least a year before switching to fertilizing.
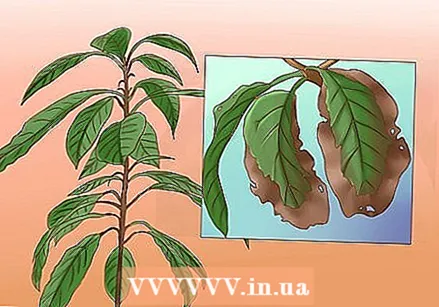 Be on the lookout for signs of soil salinization. Compared to most plants, avocado plants are very sensitive to the accumulation of salt in the soil. Avocado plants that suffer from too high a salt content in the soil often have withered leaves with burnt, brown ends, where the excess salt has all accumulated. To prevent soil salinization, you can adjust the way you water the plant. At least once a month, try to give the plant extra water, completely submerging the soil. The heavy flow of water carries any accumulated salt deep into the soil, through to under the roots, where the salt can do less damage to the plant.
 - Plants in pots are especially sensitive to soil salinization. Once a month, put the pot in the sink or somewhere outside, and let water run generously through the pot, then let it flow out through the bottom.
 Know how to deal with common pests and diseases in avocado plants. As with any cultivated vegetable, avocado plants can suffer from a variety of pests and diseases, reducing the quality of the fruit and causing serious damage to the entire plant. It is crucial to handle this properly if you want to grow a healthy and productive avocado plant. Below we list the most common avocado pests and diseases - if you want more information, consult a botanical association or search the internet:
 - Fire blight - "Rust-colored" sunken rotten spots, sometimes with gum seeping out. Cut off affected spots on branches. Fire blight on the trunk can cause the plant to die.
- Root rot - This is usually caused by too much water. The leaves then turn yellow, droop, and eventually fall off, even if the plant is otherwise in optimal condition for good growth. Stop watering right away, and, if it is severe, dig out the roots and expose them to air. Root rot can be fatal to the plant.
- Mold and mildew - Dead spots on the plant. Fruits and leaves in these areas wither and die. Immediately remove the affected areas from the plant and wash the garden tools you removed them with right away before using them again.
- Spider mites - this causes yellow spots on the leaves that dry out quickly. Damaged leaves can die and fall from the branches. Use a chemical pesticide or natural insecticide. Both types of resources are available at garden centers.
- Boron Beetle - These bore into the trunk, making small holes for sap to seep out. Preventive care is best with this pest - make sure the plant is healthy and gets enough nutrients, as this will make the plant less susceptible to the pest. If the beetles are already on the plant, remove the damaged branches so they don't spread.
Tips
- You can buy compost that works particularly well for avocado plants. If you use this kind of compost as indicated on the packaging, it will almost always have a good effect on the plant. Other compost can also work well, especially if the soil the avocado is in is, for some reason, not optimal for the plant's growth. Since you will be eating the result of the cultivation, it is advisable to buy organic compost rather than chemical.
Warnings
- While it is true that you can grow an avocado plant yourself from the pit, it is important that you know that a plant grown from the pit will be different from the mother plant, and it can take 7-15 years for the plant to is going to give fruit. Fruits of a plant grown from the pit often have a slightly different taste than the mother plant.
- If the leaves turn brown and withered at the tips, then too much salt has accumulated in the soil. Let water flow into the pot and let it run through the soil for a few minutes.
Necessities
- Avocado seed
- Bowl or cup to start the seedling in
- Toothpicks
- Pot to plant the seedling once it has sprouted.
- Compost
- Knife
- Elastic / tie wraps or graft tape
- Organic pesticide (optional)


