Author:
Sara Rhodes
Date Of Creation:
10 February 2021
Update Date:
16 May 2024

Content
- Steps
- Method 1 of 7: Take a screenshot of the entire screen
- Method 2 of 7: Take a screenshot of a portion of your screen
- Method 3 of 7: Save the screenshot to the clipboard
- Method 4 of 7: Taking a screenshot of an open window
- Method 5 of 7: Taking a Screenshot Using the Grab Utility
- Method 6 of 7: Change the location of the saved files
- Method 7 of 7: Complementary Methods
- Tips
- Warnings
If you need to take a snapshot of a funny chat conversation, show a technician a system error message that appears, give instructions on how to complete a task, or even add an image to an article on wikiHow, the best way to show what's on your monitor is a screenshot. Taking a screenshot on Mac OS X is easy, and there are several ways to select only the part of the image that you need.
Steps
Method 1 of 7: Take a screenshot of the entire screen
 1 Before taking a screenshot, make sure that the screen shows exactly what you want to show in the screenshot. Make sure all required windows are visible.
  2 Press the key combination Command + Shift + 3. If you have sound turned on, you will hear a click like a camera shutter.
  3 Find the screenshot you took on your desktop. The image will be saved under the name “screenshot”, and the date and time will also be noted in the file name.
 - In earlier versions of OS X, images will be saved as "Picture #". For example, if this is the fifth screenshot on your computer, the file name will be "Picture 5".
- In earlier versions of OS X, images will be saved as "Picture #". For example, if this is the fifth screenshot on your computer, the file name will be "Picture 5".
Method 2 of 7: Take a screenshot of a portion of your screen
 1 Press the key combination Command + Shift + 4. Your cursor will turn into a selection cross cursor.
  2 Click and drag the cursor to highlight the desired part of the image. When dragging the cursor, the desired area should be highlighted with a gray rectangle. If you need to customize all windows, press the key esc... This will deselect the image and return to normal cursor mode.
  3 Release the mouse. If your computer has sound enabled, you will hear a click like a camera shutter. This will signal that you have taken a screenshot.
 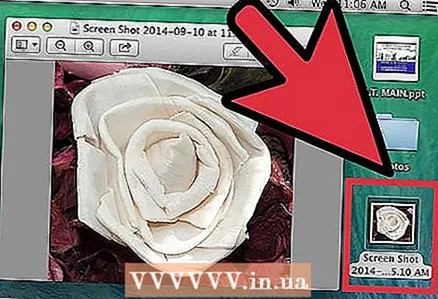 4 Find the screenshot on your desktop. The image will be saved under the name "screenshot" and the extension .png, the date and time will also be marked in the file name.
 - In earlier versions of OS X, images will be saved as "Picture #". For example, if this is the fifth screenshot on your computer, the file name will be "Picture 5".
- In earlier versions of OS X, images will be saved as "Picture #". For example, if this is the fifth screenshot on your computer, the file name will be "Picture 5".
 5 Use the screenshot. After you take a screenshot, you can use it however you want. You can attach a screenshot to an email, upload it to the Internet, or drag and drop it into an application, for example, into a text editor.
Method 3 of 7: Save the screenshot to the clipboard
 1 Click on the key combination Command +Control+ Shift + 3. This method works exactly the same as the one described above, except that you do not immediately create the screenshot file. Instead, the image will be saved to the clipboard, a temporary storage location where the computer stores the text you copied.
 - Using this method, you can also take a partial screenshot by clicking Command +Control+ Shift + 4 and by dragging the cursor over the desired area of the screen, just like in the method with a screenshot of a specific part of the screen.
- Using this method, you can also take a partial screenshot by clicking Command +Control+ Shift + 4 and by dragging the cursor over the desired area of the screen, just like in the method with a screenshot of a specific part of the screen.
 2 Click on Command + V or Edit> Pasteto insert your image. The screenshot you take can be pasted into any suitable application, such as a Word document, an imaging program, or most email services.
Method 4 of 7: Taking a screenshot of an open window
 1 Press the key combination Command + Shift + 4 and press the key Space. The cursor will turn into a small camera. Pressing the Space key again will return the cursor to a cross-shaped view.
  2 Move the cursor over the window you want to take a screenshot of. When you move the camera over the windows, the latter will be highlighted in blue. While in this mode, you can flip through the windows using the keyboard shortcut Command + Tab.
  3 Highlight the window. The image of the selected window will be saved to the desktop by default, just like with other methods.
Method 5 of 7: Taking a Screenshot Using the Grab Utility
 1 Go to Applications > Utilities > Grab. This will open the Grab application. In the upper left corner of the screen, you will see several options.
  2 Click on the option "Capture" and choose between four different options.
- To take a screenshot of the entire screen, press "Screen" (or just the key combination Apple Key + Z). A window will appear, explaining to you where to click and that no window will appear in the frame.
- To take a screenshot of part of the screen image, press "Choice"... A window will appear instructing you to highlight the portion of the screen you want to capture.
- To take a screenshot of a specific window, click on the item "Window"... Then click on the window you want to make an image of.
 3 When a new window appears, click "Save". You can also click Save as… to give the file a different name and / or save it in a different folder. Remember that an image can only be saved in the .tiff format and that it is not automatically saved.
Method 6 of 7: Change the location of the saved files
 1 Create a new folder. Go to Finder and click File > new folder.
 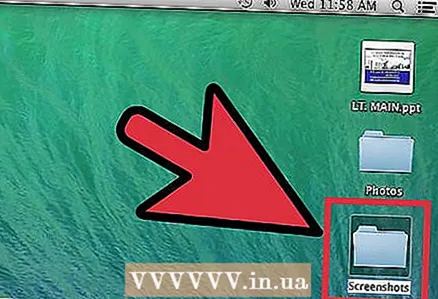 2 Name the new folder. Select a new folder and enter the desired name in the field, for example, "Screenshots".
  3 Open a terminal window. Terminal is in Finder, under utilities.
  4 On the command line, copy defaults write com.apple.screencapture location , don't forget to add a space after the word "Location".Don't press Return.
  5 Drag the folder you want to the terminal window. This will add the new location of the screenshots to the command line.
 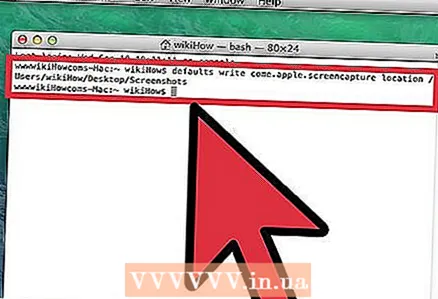 6 Press the key Return. A new command line will appear.
  7 In the command line, enter killall SystemUIServer and press Return. This will reset the terminal settings, allowing the changes to take effect immediately.
  8 See do not delete the folder. Otherwise, you will either have to re-create the folder or repeat the entire process to assign a new location for the screenshots.
Method 7 of 7: Complementary Methods
 1 Skitch utility. This program will allow you to make minor changes to your screenshots and upload them to the Internet.
  2 Monosnap a powerful tool for working with screenshots. Take a screenshot, write notes to it and upload to the cloud service, save or open it in any external editor.
  3 Jing utility. This utility is somewhat similar to Skitch. With its help, it is also possible to take a screenshot and upload it to the Internet. With Jing, you can also record a video of what is happening on your screen.
Tips
- Advanced users with knowledge of the MAC OS X Lion Terminal application can also use the screen capture command to take a screenshot from the command line.
- Screen capture images are saved to the desktop with a .PNG extension by default. This is not the most convenient method as it clutters up your desktop if left unchecked. The easiest solution to this problem is to create a special folder for screenshots, the creation of which is described in the section "Change the location of saved files".
- An alternative, but more boring method of taking screenshots is available through the Mac OS X Lion's Preview app. The option for taking screenshots in the File menu corresponds to the combination of the required keys.
Warnings
- When you take a screenshot in order to later show it to other people or post it on the Internet, make sure that it does not capture personal and confidential information.
- Posting screenshots containing copyrighted information may have legal implications. Make sure that you are allowed to take a screenshot of the information that is displayed on your screen.


