Author:
Laura McKinney
Date Of Creation:
1 August 2021
Update Date:
9 May 2024

Content
If you want to try out a new color for your hair but don't want to last long or use harsh chemicals, there are a few "home remedies" available. This article will show you how to dye your hair at home with Kool-Aid drinking powder. The color will last for a few days and your hair won't be damaged by chemicals even if you use temporary dyes!
Steps
Method 1 of 6: Prepare
Wear gloves to prevent color staining. If you don't wear gloves, be aware that your skin will stain, but you can still remove the Kool-Aid color.

Wrap a large, securely clip in a towel or trash bag around your body that will help dye your hair to avoid color staining. Note that Kool-Aid can stain fabrics so please use an old cloth or towel. advertisement
Method 2 of 6: Prepare the Kool Aid dye
Pour Kool Aid powder pack into small bowl. You should use the sugar-free type to avoid sticky hair. Also, don't use sweeteners, as the chemicals will cause eye irritation. You may need to use more powder packs depending on the length of your hair and the intensity of the color you want. Suggestions for using Kool Aid to create the correct color are as follows:
- The Tropical punch gives a bright red color.
- The cherry taste will be dark red.
- Black cherries combine with strawberries for a bright red color.
- Combine strawberries with grapes for a reddish-purple color.
- Try out the different Kool Aid colors you like to create a unique color.

Add a few drops of conditioner and a little hot water to help the Kool Aid color penetrate evenly into the hair. In addition, the conditioner will create a thick powder mixture that makes it easier to handle.
Stir 3-6 packs of Kool Aid powder into water and conditioner until a smooth thick paste is formed. Stir well to dissolve any lumps. advertisement
Method 3 of 6: Dye the entire hair
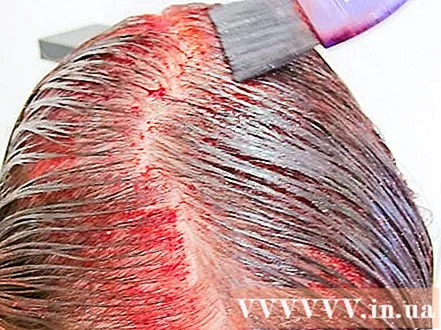
Apply Kool Aid thick powder to hair, start to apply near hairline. This is the fun part, but you will need help if you dye your hair yourself.
Continue to apply Kool Aid powder mixture to the middle part of hair.
Apply Kool Aid all the way down to the ends. Your entire hair will be very wet and sticky, otherwise the powder will be washed away, affecting the color of the hair.
Comb your hair back up above your head so that you can apply color to the hair below.
Use plastic wrap to wrap your hair several times around or put on a shower cap. You will go to bed after wrapping your hair so do it carefully! This step is important because not only does it keep pillows and sheets clean, but it also helps retain moisture so that hair can turn darker. It's best to use an old towel to wrap around the pillow to prevent the plastic wrap from shifting during sleep.
- You can carefully hold the plastic wrap in place with tape.
After one night, you will remove the plastic curtain. Don't be alarmed by stained skin - you can remove it. See instructions for removing Kool Aid color from skin if it is sticky.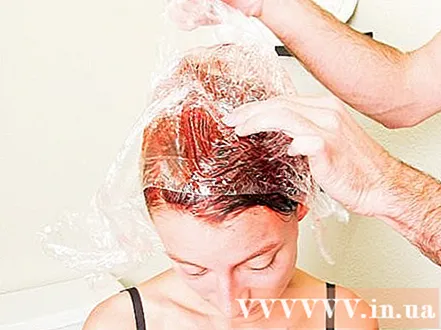
Discharge Clean hair with warm water. Don't use shampoo! If using shampoo, the color will be washed away immediately. Use conditioner if you want, then rinse it off again. Comb and wait for it to dry. The color of the dye will not show up while the hair is wet.
Show off your newly dyed hair color with confidence with the Kool Aid! Dark hair will be lighter in color, but light hair will show a noticeable change in hair color. You will need to experiment a few times to balance your hair color - remember that the darker your hair, the harder it will be to color it. advertisement
Method 4 of 6: Staining highlight
If you want to dye the ends or highlight the hair, use a highlight dye and wrap the dyed hair in foil.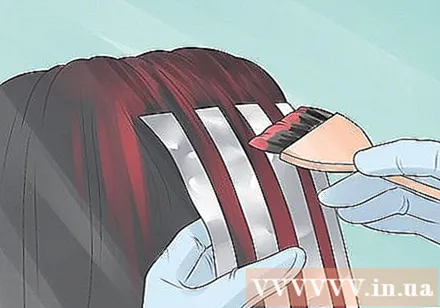
Roll all the hair (or the amount of highlight you want) with foil and hold it in place with clips. Make sure the clamp is so that the foil does not fall off.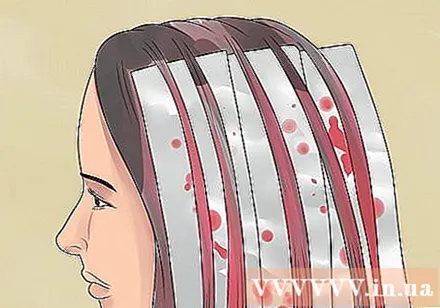
Follow the instructions above to wrap your hair with plastic wrap at bedtime and rinse your hair the next day. Note, this is only a temporary method of hair coloring. advertisement
Method 5 of 6: Only dye the ends of the hair
Put a few packets of Kool Aid powder you like into the water (depending on the color of your hair you want).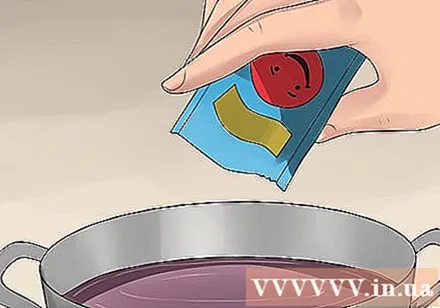
Boil water. After the water boils, remove the pot from the stove and let the water drop to room temperature.
Wait for the water to cool. Then, place the chair near the pot of water, sit down and dip the ends of your hair soak for the length of time depending on the intensity of the hair color you want to create, what color your hair is and how long you want it to be. keep color in hair.
When dyeing is finished, rinse it off with cold water. DO NOT use shampoo. If your hair doesn't color when it's wet, don't worry. Color will not show up on wet hair as it is when hair is dry. After rinsing hair, dry it. advertisement
Method 6 of 6: Alternative methods
Boil about 2-5 cups of water.
After the water boils, pour the water into the heat-resistant bowl. Wait 3-5 minutes for the water to cool. Add a few sachets of Kool Aid without sugar (use 2 for the golden color, 3 for the brown color). Stir the flour.
Divide your hair into two parts. Place each piece on each shoulder.
Dip the ends of your hair in a bowl of water. Leave it on for about 15-30 minutes depending on the intensity of the color you want and how long you want to keep the color in your hair. Prepare a magazine or book to read while you can't move! (Or listen to music, podcasts or audio books.)
After soaking your hair in the bowl, absorb the water with a towel. Then, rinse hair with cold water and conditioner (conditioner not required). You should see the water color Kool Aid but this is normal.
Let your hair dry. Now you're ready to show off your new hair color! advertisement
Warning
- Do not wet hair before dyeing. Hair will be greasy and wet until the color is gone.
- If you have dark hair, use the Tropical punch flavor for a magenta shade or lemon juice with blueberries for a blue color.
- The red dye can stick to the tub when you shower (the best way to clean it is with a Mr. Clean sponge or similar product).
- If you have a sensitive scalp this method may not be suitable; Test on small areas first to see how skin is reacting.
- Should be done at the hand sink for easy cleaning.
- The cherry flavored Kool Aid powder cannot be removed, so don't spill the mixture onto the carpet or stick it somewhere. Red types can fade quickly with ultraviolet rays, but this can also affect fabrics.
- Kool Aid is also very effective with chemically treated hair such as curling, bleaching, and straightening. However, you still need to be aware when dyeing your hair and the time to hold the dye is only equivalent to the colorless dye if your hair is porous and damaged.
- There are many hair dyes on the market such as temporary, semi-permanent, and demi-permanent. You will enjoy the results of these products more. However, many people do not like chemical products so Kool Aid is a suitable alternative.
- The color should disappear after a few days.
- The Kool Aid powder used to dye leaves an odor on the hair; Usually, your hair will smell strong if you use the sugary type.
- Before dyeing your hair, protect the edges near the roots to prevent staining by applying grease wax or Vaseline where needed.
What you need
- 3-6 packs of Kool-Aid powder without sugar, depending on the length of your hair and how long you want to keep the dye
- Conditioner (prevents hair from sticking)
- Comb (wide tooth comb is most suitable)
- Paintbrush (or toothbrush) or anything else you can use to highlight. Using a paint brush is most appropriate.
- Banknote (for highlight dyeing)
- Plastic wrap or shower cap
- Bandage
- Gloves (Koold Aid will stick to the skin and are difficult to clean)
- Fabric (to clean hands and clean the area used to dye hair)
- Plastic box


