Content
- Steps
- Method 1 of 3: Removing a Sliding Screen Door
- Method 2 of 3: Removing doors that open in both directions
- Method 3 of 3: Replacing the mesh
- Tips
- Warnings
- What do you need
A screen door is a great way to keep out insects while allowing fresh air to enter. The material from which most of the mosquito nets on these doors are made is durable fiberglass that does well in daily use. Unfortunately, it lends itself well to stress and can break if you put strong pressure on it. If this happens, simply replace the mesh on the door, not the door itself.
Steps
Method 1 of 3: Removing a Sliding Screen Door
Sliding patio doors lift out of the rails so they can be easily repaired.
 1 Grasp the door firmly on both sides.
 2 Lift it up to remove it from the frame.
 3 Rotate the bottom of the door towards you.
 4 Pull the door downward at an angle so that the bottom of it moves towards your feet, thereby exiting the frame.
 5 Place the door flat on a flat surface.
 6 Use a screwdriver to unscrew the hinge and handle from the door.
 7 Set the handle aside.
Method 2 of 3: Removing doors that open in both directions
These doors are often installed in conjunction with conventional front doors. They must be removed from the doorway before being repaired.
 1 Unscrew the hinges from the doorframe.
 2 Remove the door from the doorway.
 3 Place the door on a flat surface.
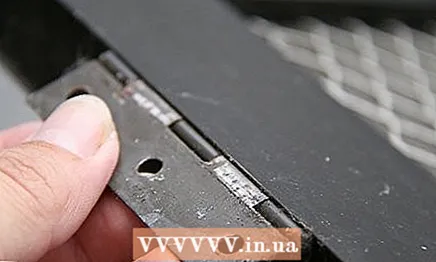 4 Examine the hinges on the door. If they somehow cover the net itself, unscrew them and set them aside.
Method 3 of 3: Replacing the mesh
After you remove the doors from the opening, you can replace the mesh.
 1 Lay the door down on a flat surface and then inspect the edges of the mesh where it is attached to the frame. You will see a thin flexible strip that connects the mesh to the frame.
  2 Find one of the split ends of the rail.
 3 Insert the end of an awl or flathead screwdriver under the split end of the rail.
 4 Gently lift the edge of the rail.
 5 Grasp the rail with your fingers and pull gently to remove it from the door frame.
 6 Set the rail aside.
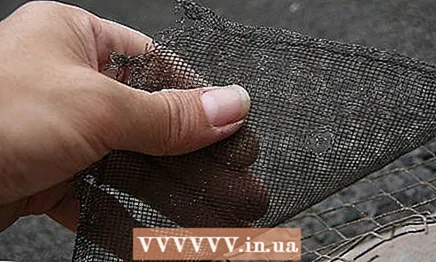 7 Pull the old mesh from the door and set it aside.
 8 Place the new mesh over the entire door and line up the edges of the new mesh with the outside edge of the frame.
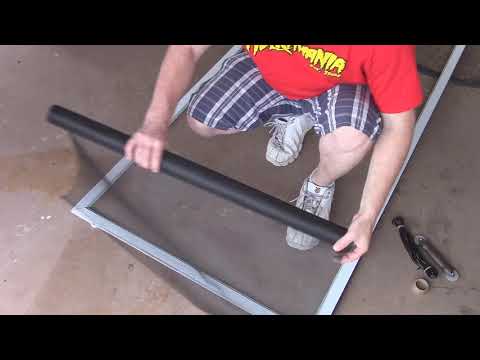
 9 Using a special tool with a curved profile, insert the mesh into the groove in the frame.
 10 Run the tool like a roller along the entire perimeter of the door frame groove, placing the mesh in place.
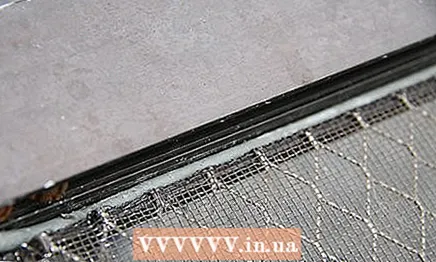 11 Place the batten on top of the mesh, just behind the groove.
 12 Using a concave tool, press the bar into the groove in the frame.
 13 Run the tool along the top of the rail to insert the rail into the slot. When inserting the rail into the slot, hold the tool at a slight angle towards the slot to help the rail slide into it more easily. This will secure the mesh firmly.
  14 Use a utility knife to cut off the excess mesh from the door.
- Hold the tip of the knife just above the groove.
- Run your knife along the mesh just above the groove to cut off any excess.
 15 Screw the handle and hinges back onto the door.
 16 Screw the hinge to the door frame and install the rollers in the sliding door guides. Then insert the top of the door into place.
Tips
- If the rail looks brittle or dry, replace it with a new one. Take the old rail with you to the building materials store and have a new rail of the same size cut off for you.
Warnings
Be careful when cutting off excess mesh to avoid putting your free hand in the path of the knife. Always keep your free hand above or behind the knife to avoid irreparable damage.
What do you need
- Screwdriver
- Awl
- Stationery knife


