Author:
Florence Bailey
Date Of Creation:
20 March 2021
Update Date:
14 May 2024

Content
- Steps
- Part 1 of 3: How to Remove the Chain
- Part 2 of 3: How to shorten the chain
- Part 3 of 3: How to Assemble the Chain
- Tips
- Warnings
- What do you need
If you bought a new bike chain that is too long, you will need to shorten it first for safe riding. Also, the chain can "stretch" over time, but shortening it in this case is unreasonable. This is a sign of wear and if excessive wear occurs, the extended chain should be replaced with a new one.
Steps
Part 1 of 3: How to Remove the Chain
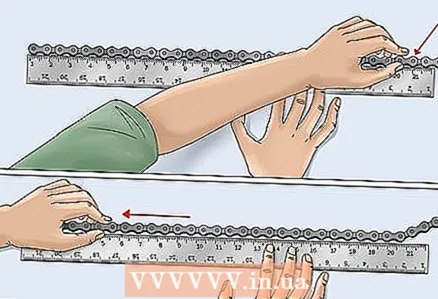 1 Change the chain promptly. Count 12 links to measure their length from the first to the last bead. The distance between the rollers should be 30.5 centimeters. If this distance exceeds 30.8 centimeters, then the chain must be replaced. The need for replacement is due to the wear of the rollers, as a result of which the chain becomes longer.
 - If the 12 links are normal and you have an old bike, try loosening the rear wheel and pushing it back a little. This usually resolves the problem of chain slack.
 2 Buy a universal chain squeeze. This tool pushes the pins out of the chain to make it easier for you to remove the links. You can also buy a squeeze for a specific bike or chain.
 - Some chains, like most Shimano and Campagnolo models, require special pins for assembly. If you do not have such a roller, then do not start disassembling the chain, since without it you will not be able to assemble the chain back.
 3 Place the bike on a rack. If you do not have a rack, then you will need a hard stop (it is advisable to turn the bike with the wheels up).This will make it easier to remove the chain.
 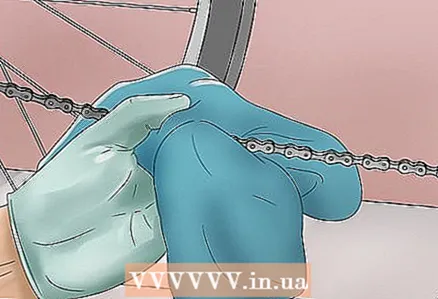 4 The dirty chain must be cleaned. Use a high quality, environmentally friendly product to dissolve dirt and grease. After that, it will be easier for you to work with the chain and find the master link.
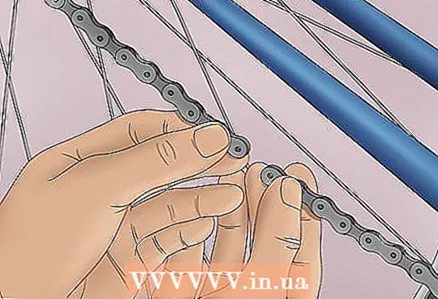
  5 Find the master link. Some chains have a master link. The link is fairly easy to spot as it is usually slightly darker or lighter than the rest of the chain. It may also have protruding rollers that are held together by an outer plate. This plate usually has a large oval hole around one or two ridges.
  6 Rotate the pedals so that the master link is between the front and rear gear for easy access. The link is fairly easy to spot as it is usually slightly darker or lighter than the rest of the chain. It may also have protruding rollers that are held together by an outer plate. This plate usually has a large oval hole around one or two ridges.
 - If there is no master link on the chain, use a squeeze to separate the chain. These steps are described in the next section.
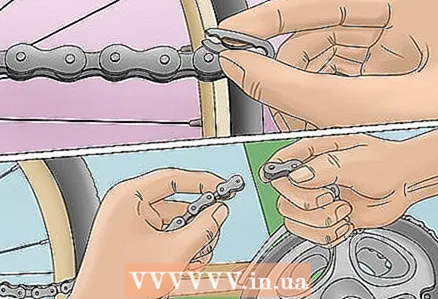 7 Open the master link, remove and set aside in a safe place. There are several design options for such a link. Some rotate on a hinge and allow you to remove the roller, while others can be opened when bent. Some of the master links are disposable and can be removed with needle-nose pliers or a special tool.
Part 2 of 3: How to shorten the chain
 1 Determine the number of links to be removed. It is better to remove fewer links than more than the required number. Removing a couple more links is always easier than putting them back on the chain.
  2 Secure the next link in the chain. Start at the end of the chain that is not attached to the master link. Secure this link with a clamp or chain release clamp.
 - If there is no master link on the chain, start with any link in the chain.
 3 Press the roller out of the hub. Place the pin exactly over the link shaft. Slowly rotate the squeeze knob clockwise and stop when the roller appears outside but is still locked inside the link. It is not necessary to fully wring out the roller, otherwise it will be extremely difficult for you to assemble the chain. If you accidentally squeeze the pin completely out of the bushing inside the chain link:
 - Insert the roller into the center of the link.
- Pull off the top of the connecting link using a chain pull.
- Using a chain wringer, reinsert the roller into the link and push in until the roller head is flush with the center of the link.
- Replace the top of the link, then press the roller back down with a squeeze.
- Adjust adjacent link if necessary.
 4 Repeat for the second roller and disassemble the link. Move on to the next roller of the same link. Squeeze it just enough to remove the outer plate, followed by the center piece that attaches to the next link.
 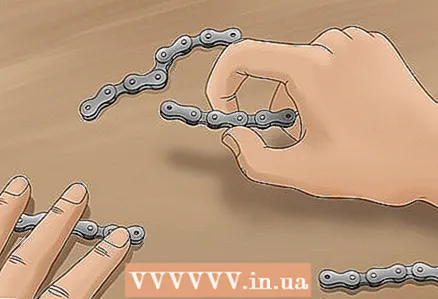 5 Remove other links to shorten the chain. Remove the minimum number of links required (usually less than five). The shorter the chain, the higher the stress on the links.
 - As before, partially squeeze the rollers out of the bushings and remove the excess parts.
- Do not discard removed links and save them for future chain repairs.
Part 3 of 3: How to Assemble the Chain
 1 Install a master link on both ends of the chain. This may require pliers or a screwdriver. Align the two links so that you can snap the rollers into the master link between them.
 - If your chain uses a disposable master link or special roller, you should purchase a spare replacement part in advance. Most often, special rollers consist of two elements that are inserted from opposite sides, but it is better to familiarize yourself with the instructions for a particular model.
 2 Connect the chain with a squeeze. Reinstall the two chain links into the outer slot on the squeeze. Make sure the rollers point towards the wringer pin.Rotate the knob counterclockwise. At this time, the squeeze pin will press the rollers into the link. Wait until the roller head appears on the back side. The roller should protrude the same length on both sides of the link.
 - Pliers may be required to install the quick disconnect link.
 3 Loosen the chain. Sometimes the chain links become too stiff after reinstallation. In this case, insert the link into the inner slot of the squeeze. Press the wring pin straight against the roller in the chain, then turn the wringer knob a quarter turn, remove and check the chain. Repeat if it is still too stiff.
 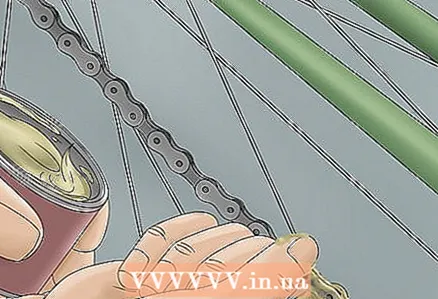 4 Apply a high quality lubricant. This will increase the life and mobility of the chain, as well as improve the operation of the gearshift mechanism, and reduce wear on the derailleur and sprocket teeth.
Tips
- There are recommendations to knock out rollers with a hammer. This is not a good idea as it increases the likelihood of knocking the roller out of the bushing completely.
- If you need help, ask a bike shop for advice. They won't charge you money for a question, but they may recommend a cycling community or a workshop.
- Lubricate the chain to extend its life.
- If you are cycling regularly, check the chain every few months. The more the chain is worn, the higher the danger.
- If the chain is too tight, move the shift mechanism forward to loosen the chain.
Warnings
- Be careful not to remove the roller completely from the hub.
- If you do not have the required replacement part, you should not rely on DIY solutions. Do not try to push the rollers by hand. You may then be able to get home if a breakdown occurs on the road, but such a connection is unreliable and dangerous during long driving.
What do you need
- Universal chain release
- Trailing link or special replaceable roller (for some models)


