Author:
Clyde Lopez
Date Of Creation:
26 June 2021
Update Date:
11 May 2024

Content
- Method 2 of 4: Plastic wrap cover
- Method 3 of 4: Fabric cover
- Method 4 of 4: Felt cover
- Tips
- What do you need
- The paper can be left as it is, or you can decorate it with prints, patterns, clippings and stickers. You can also use other types of paper: wrapping paper, Whatman paper, or any other paper that is strong enough to fit a book cover.
 2 Measure your cover. Spread the wrapping paper out on a flat work surface. Place the book in the center of the paper.
 - If you are using a paper bag, cut it open so that the paper can be laid out in one layer on the table. Also remove the bag handles.
- The sheet of paper should be larger than the book itself, so that the book can be completely wrapped in paper, while still leaving room for internal folds.
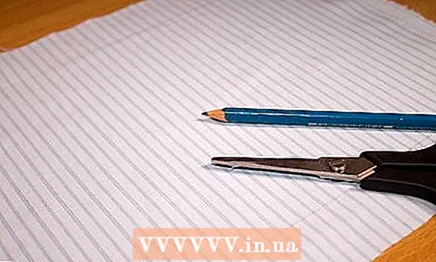
3 Draw horizontal lines along the top and bottom edges of the book. Use a ruler and pencil for this. - Along these horizontal lines, you will fold the paper so that it fits around the book.
4 Remove the book. Fold the paper along both horizontal lines, top and bottom. - Smooth down the folded paper, making even folds along the horizontal lines.
- Note that the folds will be much straighter and neater if you use a special paper folding tool called the folding bone. It is a piece of plastic shaped like a knife. The folded bone is used to create even folds and folds on paper without cutting it.
5 Place the book back on the folded paper with the back side. Place the book in the center of the paper. - Make sure that the paper protrudes from under the book the same distance on both sides. Then make sure the top and bottom edges of the book line up with the horizontal folds on the paper.
6 Open the front cover of the book. Fold the left edge of the paper into the inside of the book, under the cover. - Keeping the front cover open, wrap the left edge of the paper around it. If this edge is too wide, trim off the excess paper.
7 Close the book by holding the paper around the front cover. Hold the folded left edge of the paper against the cover. - The paper should wrap tightly around the front cover. You may need to slide the book slightly to the right to close it without tearing the paper.
- If the paper is too tight, slide the book, releasing the tension. Be careful not to tear the paper.
8 Open the back cover of the book. Fold the right edge of the paper inward. - As with the front cover, wrap the right edge of the paper around the back cover. If the paper protrudes too far, cut it.
- Close the book, making sure the paper wraps tightly around it.
9 Slide the book cover into the paper pockets you made. Thread one half at a time. - After the previous steps, the folds of the paper form a kind of pockets. Now you can thread the edges of the book cover into these pockets.
- If the paper is thick enough and you've ironed the folds well, you won't need tape to secure it. However, if necessary, you can secure the folds of the paper with tape.
10 Color or apply stickers on the cover. Unleash your imagination. You can paint on the cover or print on it with potatoes (this should be done before you put the cover on the book). Or you can just stick a label, writing the title of the book on it. - You can decorate and strengthen the cover by gluing ribbons or braid along the spine of the book. This is perfect for a wedding book, guestbook, and other memorabilia.
- You can also write the title of the book or the name of the subject on the cover.
Method 2 of 4: Plastic wrap cover
 1 Take some plastic wrap. Plastic sheeting is perhaps the most popular material for book covers. You can use both transparent and colored adhesive films. You can also choose some kind of special, non-glue-less plastic wrapping.
 - Any of these types of plastic sheeting will protect your book. Keep in mind, however, that glue-free wrapping will do less damage to the original cover of the book over extended use. The non-adhesive film is easier to remove from the cover of the book. You can also make a protective cover out of a thicker plastic wrap.
- Chemicals in the adhesive film will tarnish the book cover. In addition, this is not the most environmentally friendly way to make a cover, as we have not yet found a method for such a film to be reused.
- It takes a little more time to make a cover out of ordinary plastic film without glue, but this cover is easily removed.
- Make an adhesive plastic cover. These book films are sold in rolls and can be found at any office supply store. Typically, this tape has markings on the back to help you adhere it smoothly.
- 2 Unfold a piece of plastic wrapping that is large enough to hold the book. Place the book on it.
- Place the book on a protective sheet (on the adhesive side if using adhesive plastic). Align it in the center using the lines on the film, if any. If not, use a ruler.
- 3 Cut the wrapping paper at the base of the book, leaving a small margin at the edge to wrap into the base of the book. This will peel off the sheet of film you want and can set the roll aside.
- You can now place your book on a flat sheet of plastic wrap. In this case, the film should protrude from the edges of the book.
- 4 Remove the book from the tape. If necessary, remove the protective paper from the plastic.
- If you are using adhesive plastic with protective paper, peel off the paper to expose the adhesive surface. Then place the book on this surface. The plastic film will stick to the cover of the book.
- 5 Place the book on plastic wrap. Open the front cover of the book and place it on the film.
- Wrap the plastic wrap inside the front cover. Secure the foil with tape. Wrap the plastic around the back cover without using any tape at the moment.
- 6 Cut out triangles at the corners of the film. Fold back the film around the corners of the book cover and trim off the protruding edges.
- First, make two cutouts in the film at the top and bottom of the book spine. Then cut off the corners of the film at the top and bottom of the book cover. Be careful not to damage the cover of the book.
- Trim the corners of the film so that it can be easily wrapped around the book. Then fold the edges of the film into the inside of the book cover.
- 7 Cut off the protruding edges. After you wrap the film, extra ridges and folds form on it.
- Remove these folds so that the film wraps snugly around the cover of the book.
- 8 Lift the back cover of the book while still pressing the front cover against the film. This is to release the cutouts along the spine of the book.
- Fold the center cutouts against the spine of the book. Place the book carefully on the film.
- 9 Fold the top and bottom edges of the film. Unfold the side pockets and insert the book cover into them.
- Tape the plastic wrap so as not to hit the book. Be careful not to damage the book, as the tape is hard to peel off the paper.
- Check for air bubbles under the plastic wrap. You can get rid of them by running a ruler across the cover. Ready!
Method 3 of 4: Fabric cover
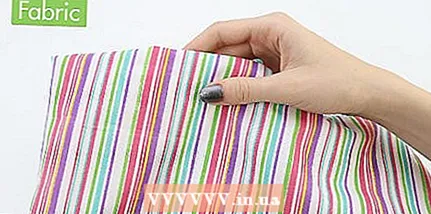 1 Take a small piece of fabric. A piece of fabric left over from sewing will do. You can also purchase a small piece of fabric you like.
 - Whichever fabric you choose, the cover will protect the book and help keep it in good condition. In addition, the fabric cover is comfortable and original.
 2 Choose a fabric. It should be tight enough to protect the book.
 - Take also a thin low-melting non-woven fabric. It will act as a spacer between the book and the fabric and will give the fabric a stiffness.Later, you will place the non-woven fabric on the back of the fabric that will face the book.
- 3 Smooth out the fabric. Take an iron and iron the fabric to avoid wrinkling.
- Be careful to smooth out any wrinkles, otherwise they will remain on the cover.
- To make your work easier, use a wrinkle-resistant synthetic fabric.
- 4 Measure out the cover. Place the fabric on a flat work surface. Place the book in the center of the fabric. Check if you have enough fabric.
- Draw two horizontal lines along the top and bottom of the book. Extend over the edges of the book so you have enough fabric for the pockets on both sides.
- For a regular format book, the pockets should be about 5 cm wide. If you have a large book, make the pockets wider.

- When cutting fabric, leave small seams above and below the horizontal lines.
- 5 Set the book aside. Cut the fabric along the marked lines so that the cover is slightly wider than the book.
- Cut off the fabric with a margin. The protruding edges are useful for attaching the non-woven liner to the fabric. You will fold the edges of the fabric inward so that they wrap around the padding.
- 6 Attach the non-woven fabric to the back of the fabric. This side will be in contact with the book.
- Place the rough side of the non-woven fabric on the fabric with a smooth surface facing the book.
- Take a damp rag and press the non-woven fabric against the fabric. Then put a hot iron on the non-woven fabric for 10-15 seconds. If you need to move the iron, lift it up and move it to another place. Do not move the hot iron over the non-woven fabric to avoid crumpling.
- 7 Place the book on the non-woven side of the fabric with the cover facing down.
- The non-woven film should be on the inside. You should put a book on it. Thus, when you wrap the book, the non-woven liner will be inside and will not be visible.
- 8 Open the front cover of the book. Fold the left edge of the fabric inward and secure with a pin.
- Fold the left edge of the fabric so that it forms a pocket, then secure the edges of the fabric with a pin.
- The top and bottom edges of the fabric should protrude slightly from the book cover. This will allow you to pinch the fabric without piercing the cover of the book.
- 9 Open the back cover of the book. Fold the right edge of the fabric inward.
- Repeat what you did earlier for the front cover of the book, securing the fabric with a pin.
- 10 Take the book out of the pockets. At this stage, the cut of the fabric will already take on the shape of the cover.
- Fold over excess fabric protruding from the vertical edges of the book cover and secure with pins.
- 11 Sew the fabric. Stitch along the top and bottom of the cover.
- An overlock stitch is a sewing technique used to secure the edges of a fabric with a thread. Sew the top and bottom edges of the cover.
- 12 Hold the pockets while sewing the fabric. The seam will hold them in place.
- Tie back the folds and pockets you made earlier. As a result, you will have one pocket on each side, into which you can insert a book cover.
- Stitch the pockets on both sides with a seam. You should have two pockets, one on each side.
- 13 Place the cover on the book. The cover is ready for daily use!
- You can use the same cover for other books of a similar format.
Method 4 of 4: Felt cover
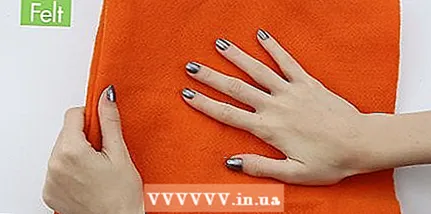 1 Take a piece of colored felt. Felt is a sturdy and durable fabric that can be used as a book cover. It is suitable material for children's books and for notebooks, which are often carried in briefcases.
 - If possible, use wool felt instead of synthetic, as it is much easier to work with. True, woolen felt is slightly more expensive than synthetic.
- 2 Get a sheet of felt large enough to wrap the book in. A standard size book (notebook, notepad) measures 21.5 cm x 30.5 cm. The felt should be slightly larger so that you can wrap the edges around the book cover.
- The sides of the felt should be long enough to wrap around the edges of the book and create pockets.
- 3 Place the book on the felt. Open the cover of the book. This way you can determine exactly how much felt you need.
- Place the open book in the center of the felt, cover side down.
- 4 Trace the top and bottom edges of the book using a fabric pencil. Along these lines, you will bend the felt at the bottom and top of the book. Do not draw vertical lines as you will need extra felt for the pockets.
- On the sides of the book, you need a certain width for the pockets. If you are making a standard size book cover with the dimensions shown above, leave about 5 cm on each side.
- Also add 6mm to the edges above and below the horizontal lines. You can later bend or trim the excess felt inward.
- 5 Cut out a measured piece of felt. Place it on a flat work surface.
- You will need a piece of felt that is slightly larger than the open book.
- 6 Place the book on the felt. Open the book and place the cover side down on the felt.
- Place the book in the center of the felt sheet so that the material protrudes from all sides of the book.
- 7 Fold in the left side of the felt. Take the left edge of the felt protruding from under the book and fold it inward around the left edge of the book cover. Secure the felt with a pin.
- The felt should protrude slightly from the bottom and top edges of the book, so you can pinch it off without piercing the book cover.
- Do the same for the right side, also securing the felt with a pin. As a result, you will get book pockets around the edges.
- Carefully remove the felt from the book. Release the book from the felt so that the pins remain in place.
- 8 Sew felt along the top and bottom edges. Fold over the top and bottom of the fabric and sew so that the side pockets remain intact.
- You can either sew the felt by hand or use a sewing machine, depending on how neat the seam you want.
- 9 Cut off excess felt above the top and bottom seams. Be careful to leave some fabric behind the seams.
- Do not cut the felt too close to the seams, or you may touch the thread and the seams will come loose.
- 10 Slide the book into the pockets. Close the book to make sure the cover fits well. Now your book is securely protected!
Tips
- Book covers are a great gift for your book-loving friends.
- If you're using craft tape, you can use it to make a book cover. For information on how to do this, see How to make a book cover with duct tape.
- If desired, the cover can be decorated with additional pockets. This is better for fabric or felt covers: you can carry pens, an eraser, or a bookmark in the pockets.
- If you are using paper, print some kind of pattern or picture on it, decorate it before making the cover.
- You can also decorate the fabric before making the cover. You can sew on your favorite pictures of animals or plants, the title of a book, or anything else. The center of the cover should be determined first so you know where you need to sew, so embroider after measuring and cutting the fabric, but before sewing the pockets. If you are using non-woven fabric, sew on embellishments before connect it to the fabric.
What do you need
- Cover material listed above
- Smooth work surface
- The book you are doing the cover for
- Scissors
- Ruler
- Marker (if you are working with fabric, then a fabric marker)


