Author:
Bobbie Johnson
Date Of Creation:
5 April 2021
Update Date:
14 May 2024
Content
- Method 2 of 3: Using origami paper
- Method 3 of 3: Using an Alternative Technique
- Tips
- What do you need
 2 Fold the top left corner to the bottom right of the sheet. Iron the fold of the paper. The left side of the sheet now has a sharp corner. 3 Bend the left corner to the opposite corner. As a result, you should get a rectangle without one corner. 4 Fold the top down. Align the top edge with the diagonal. You should have a square. Position the paper so that the top corner of the future triangle looks up, away from you. 5 Make a triangle. Fold the square diagonally. You should now have a triangle. 6 Fold the paper in half. Imagine a vertical line that cuts the triangle in half, from the top to the center of the base. You are making a right triangle.
 - The first few times you can draw this line with a pencil. Use a rectangular ruler to draw a line at right angles to the base.
- This fold should create a fold that will be important for the next step.
7 Bend the left side of the triangle to the midline. Expand the newly formed right triangle and fold both outer sides to its center line. The outer edge of the fold should be down, perpendicular to the base, and even extend beyond it. 8 Repeat the previous fold twice more. Tuck each side under you again. You should see a claw forming. - Carefully match each fold with an imaginary pencil line.
- Make sure each fold is flattened tightly and at the correct angle. If the fold is displaced from a straight line, then the claw will not be strong enough.
9 Fold the lower protrusion up. You may need to open the hole with your finger. Hold it so that the hole is visible and you can easily fill in the protruding part. 10 Open the smaller triangle in the middle of the folds. Just insert your finger into the smaller triangle to open it. It will resemble a claw joint. - Initially, the claw may fit tightly on the finger.
- The deeper you fix the claw on your finger, the more likely it will remain on it.
Method 2 of 3: Using origami paper
 1 Buy or make origami paper. To do this, you will need to orient a standard sized sheet of paper (21.25 x 27.5) along the long side and fold the corner to the far opposite edge. Cut off the protruding part of the paper. This will give you the square you want.
 - Thick paper will prolong the life of the claws.
- 2 Fold the paper in half. Imagine a line going from the top left corner to the bottom right. Fold the paper along this line to form a right triangle.
- 3 Fold the paper diagonally. You turn your right triangle into an isosceles triangle. Make sure to iron the fold well.
- 4 Fold the paper diagonally again. The line you are following now will start at one corner and end in the middle between the other two. Be sure to smooth out the folds.
- 5 Fold the vertical gap. Place the claw in front of you so that the sharp part of the “claw” faces to the left. Imagine a line that runs from the top of the tip of the claw to the base. Fold the smaller corner towards the "claw". Then unfold that fold.
- 6 Tuck the right tip into the resulting pocket. By folding the vertical gap, you will form a pocket. This will be the location of your finger.
Method 3 of 3: Using an Alternative Technique
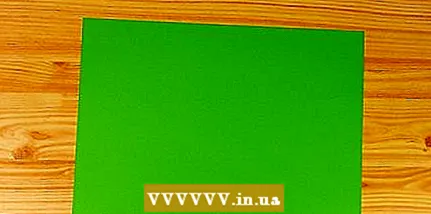 1 Place the paper on a flat surface. Lay the paper horizontally. You can use any paper you find at home. If you want strong nails, then use thicker paper.
 - 2 Roll the top left corner down. Align the fold with the base line. The left side now has a corner.
- 3 Fold two corners on the right side. Fold them to the line of the previous fold. This will give you two smaller triangles.
- 4 Bend the left corner. Imagine a right-angled triangle without the other two. Just bend the tip of the right corner towards the opposite tip of the right triangle.
- 5 Use an extra strip. Fold the emerging strip with two smaller triangles into another triangle. This will form a triangle with this recent fold at the top.
- 6 Fold the paper in half. Imagine a line dividing a vertical triangle in half, from a point in the middle of the base. You should end up with a right-angled triangle.
- This will form the fold required for the next step.
- 7 Fold the left side into a fold. Expand the newly formed right triangle, and fold the two edges directly to the line dividing the triangle in half. The outer edge of the fold should go straight down, perpendicular to the base, and even protrude below the base of the triangle.
- 8 Repeat the previous fold twice more. Fold the same side towards you again. You will see how the claw is formed.
- 9 Fold up the bottom fold at the end. You may need to use your finger to open the hole. Hold it so that the hole is visible and you can easily insert the fold.
- 10 Open the smaller triangle in the middle of the fold. Just keep your finger in the smaller triangle to open it. It will look like a claw joint.
Tips
- Make the folds as precise as possible. Consider using a scoring stick or ruler. Straight, precise folds are the key to success in any origami project.
- It's difficult. With practice, your claws will get better and better.
- Practice on thin, cheap paper before using any expensive materials.
- Some people may have very large or very small fingers. You can always use more or less paper, just keep the proportions.
- Buy black gloves from a thrift store or find old ones at home. Cut off the ends at the toes, and slide the claws on top of these gloves for a more dramatic look.
- You can change the color using black paper or even paint. Thick paper is harder to work with, but the claws will be stronger and you will have a wide range of colors available.
- Young children are more likely to need help.
What do you need
- A 21.25 x 27.5 sheet of paper is the standard paper size for letters in the United States.
- Solid surface for work
- Creasing stick or ruler (optional)
- Rectangular ruler (optional)
- Origami paper (optional)


