Author:
Ellen Moore
Date Of Creation:
16 January 2021
Update Date:
17 May 2024
Content
- Method 2 of 4: A Simple Notepad
- Method 3 of 4: Playing Cards Notebook
- Method 4 of 4: Try making different notebooks
- Tips
- What do you need
- Simple notepad
- Decorative notepad
- Playing card notebook
- Load more than six sheets if you wish, but remember that the number of pages will double as the paper is folded in half. For example, if you take eight sheets, you get 16 pages.
 2 Make three holes in the fold of the paper stack. You can use both a manual single-hole punch and an awl. Open the paper stack so that all the edges are aligned and the stack opens like a book. Your holes should line up along the fold in the middle of the sheets. Measure an indent of three centimeters above and below along the fold line.
 - This step can be simplified with a stapler that can staple inner pages. Insert the stapler with the staple parallel to the center fold. Punch three paper clips so they are evenly spaced.
3 Pass the tape through the holes you made. You can thread the ribbon through the bottom hole on the front side and down through the top hole so that both ends of the ribbon are on the inside of the page. Take the ends and thread them through the center hole. Tie them over the front with a knot or bow. - Also, if you only made two holes, thread the tape through the bottom hole starting at the back of the page, pull it out, and then pass it through the top hole so that the ends of the tape hang from the front of the pages.Tie a ribbon with a knot or bow in the center of the fold on the outside of the pages.
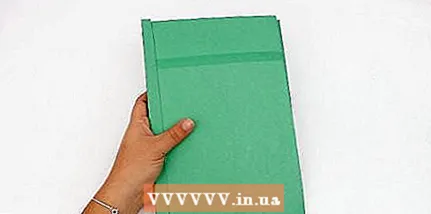
4 Find medium-sized paper that you will use as the cover. The sheet you will be using for the cover must be larger than the inner sheets. For example, if the inner sheets are 20x26 centimeters, the cover should be 20x30 centimeters. Lay the sheet of paper so that it is horizontal and use a ruler to find the center of the sheet. Mark it carefully with a pencil so you know exactly where to fold the paper. - The paper you use for the cover should be slightly heavier. You may need paper that is thicker than cardboard.
5 Decorate your cover. A wonderful and very simple way to decorate this notebook is to take a small 20x20 centimeter paper with a beautiful design on it. You can find this type of paper at your local art store. Measure out the paper and mark the center. Fold it in half and then place it on the spine of the cover. Glue it so that the edges line up with the cover. Decorated paper should cover about three-quarters of each side of the cover, leaving room for other decorations you may want to use. 6 Open the folded cover. Arrange the pages so that the spine is inserted inside the center of the cover. Apply glue to the front and back of the sheet, line up the sheets with the inner cover, and then press them down well. Your cover and sheets should now be stapled together. Method 2 of 4: A Simple Notepad
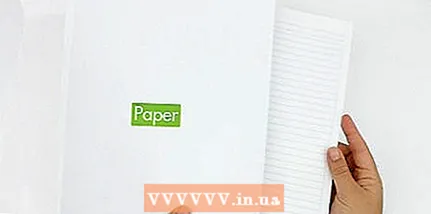 1 Collect your individual sheets of paper. This is the paper that you will use as the inside sheets of your notepad. You can take both lined and clean - it all depends on what you plan to use this notebook for. Place all the sheets together, making sure they are perfectly aligned and the edges are aligned.
 - The size of the paper can be absolutely any. However, if you haven't made a notebook before, you can use plain lined paper. As a rule, it is 20x28 centimeters in size and is absolutely easy to use, as it has ready-made holes for three-membered rings.
- 2 Place one sheet of colored cardboard on top of a stack of sheets. Place another piece of cardboard underneath. The size of the cardboard should be the same as the stack of inner sheets. Make sure all sheets are aligned.
- 3 Take your 3-hole punch. If you only have a hand held single hole punch, you can also use it. Insert the stack of sheets, making sure all edges are perfectly aligned. Slide the stack in firmly so that the edges of the paper rest against the back of the hole punch unit. The holes should be approximately three to four inches from the side edge of the stack. Press down with the hole punch until it punches the holes.
- If you are using a single hole punch, use a ruler to mark where the holes will be. Your holes should split the paper along the edge into three sections. Punch holes three centimeters from the edges of the stack.
- 4 Take the tape and thread it through the holes. This can be done in a number of ways. Pass the ribbon through the two outermost holes and tie the ribbon over or through the middle hole, cut the ribbon into three different lengths and tie a bow in each individual hole, or thread it through all the holes and then tie.
Method 3 of 4: Playing Cards Notebook
- 1 Measure your playing cards. You will need two playing cards, preferably from the same deck. Use a ruler to measure the length and width of the playing cards. This will help you later when you measure the size of the paper.
- For example, the size of Uno cards is 5.47 to 8.11 centimeters.
- 2 Place 10 sheets of paper in a stack. Make sure all edges are aligned. Measure the length of the playing cards, making notes where the measurement ends.If possible, use a paper cutter to cut the pages into strips where you marked the length of the playing card.
- If not, use scissors to cut strips of paper that are the same length as the playing cards.
- 3 Take the stripes and cut them using the width of the card as a guide. This will create paper rectangles the same size as the playing cards. Repeat the previous step with 10 more sheets of paper until you get as many sheets of paper as you like for a small notebook.
- Do not cut more than 50 pieces of paper, as the notebook will be too thick and difficult to hold together.
- 4 Fold your pages. Lay one card on top and another on the bottom with the pattern you want for the cover. Tap the edges lightly so that they are completely aligned. When all the edges are aligned, place the large paper clips on the sides and bottom of the stack. The side clamps should be as close to the top as possible.
- 5 Stir your rubber glue. When it's mixed, apply a light coat of glue along the top of the stack. It will hold a notebook. Spread every inch of the top, making sure not to miss the slightest spot. Make sure no glue gets on the card drawing.
- You can also apply a small amount of glue to the very top of the side edges. This will ensure that it will not break open when you turn the pages.
- 6 Wait for the glue to dry. When it's dry, apply the next coat. You will need to add a few layers to make sure the glue is held tight enough to keep the notebook from falling apart. In general, five layers are enough. When you see the glue drying at the edge and not absorbing into the paper, then this is the last layer.
- 7 Cut out a piece of colored paper. It will bind your notebook. Cut it so that it is slightly longer than the width of your notebook by about an inch. Turn the notebook upside down so that the top is in the exact center of the colored paper.
- 8 Fold the edges of the colored stripes to fold over the top, front, and back of the notebook. Apply glue to the colored strip and hold it folded along the top, front, and back of the notebook. Hold it for 20 seconds to keep it in place.
- 9 Cut off excess paper. You may have excess paper hanging from the sides of the notebook. Use scissors or a retractable trimming knife to cut these edges.
- 10 Place your notebook underneath a large book. Now it takes some time for the notebook to fully staple. To do this, you need to place it under something heavy and flat, so that the glue holds the pages together, and make sure that the notebook dries evenly and correctly.
Method 4 of 4: Try making different notebooks
 1 Make your own stable stitch pad. This is the most advanced form of writing a notebook, but may be the most useful. You need to take a thimble for this project!
 - 2 Make a notepad in one minute. If you're in a rush and just need to whip up a notepad, why not make one in just a minute? Although not as pretty, it will definitely come in handy.
- 3 Decorate a notebook you already have. If you don't have time to make a notebook, you can always decorate the one that is at hand!
- 4 Make a notebook. If you want something less sophisticated and more functional, make a notebook. She will certainly come in handy on the next test.
Tips
- Take advantage of creative designs and ideas to show your feelings and abilities to draw or write fun things.
- You can also decorate the notebook cover
What do you need
Simple notepad
- Stack of cut sheets of paper
- Two sheets of cardboard
- Three-hole punch
- ribbon
- Decoration items optional
Decorative notepad
- One sheet of medium heavyweight paper (8x12 inches)
- 5-6 sheets of blank or lined paper (8x10 inches)
- Decorative paper
- Lace
- Hole punch, awl or thick needle
- Glue
- Scissors
- Ruler
Playing card notebook
- Two cards of the same size
- Plain white paper
- Ruler
- Paper cutter, retractable finishing knife or scissors
- Pencil
- Rubber glue
- Colored paper
- Paper clips


