Author:
Bobbie Johnson
Date Of Creation:
3 April 2021
Update Date:
14 May 2024
Content
- Method 2 of 5: Get to Know the Elements of Painting
- Method 3 of 5: paint the picture
- Method 4 of 5: Buy other supplies
- Method 5 of 5: Mixing colors
- Tips
- Warnings
- What do you need
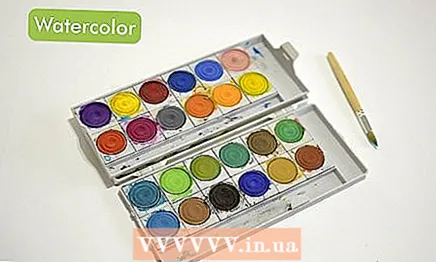 2 Try watercolor paints. Watercolors are usually sold in tubes or cuvettes (containers like boxes). In its pure form, the paint is dense and matte and does not cover a large area. When water is added, it becomes more liquid and transparent. For watercolors, you need special watercolor paper; just any old sheet is unlikely to work. These paints do not allow you to create a thick bright layer - you achieve the effect due to thin translucent layers.
 - The cost of a set of watercolors starts from 200 rubles, and can reach 2000 rubles. For a start, it's worth spending about a thousand rubles on a quality starter set.
- Since watercolor requires special paper that will not wrinkle or swell when in contact with water, the choice of material will be more limited compared to oil and acrylic paints.
 3 Think Acrylic Paints. Acrylic paints are another type of water-based paints that dry quickly and are almost odorless. They are a great choice if you want to create a drawing in one day. Thick layers of paint can be stacked on top of each other for a three-dimensional effect, and since acrylic is water-soluble, it is easy to clean from fabrics and surfaces. The fast drying property is also the main disadvantage of acrylic, as mixing different colors and writing "wet on wet" can be problematic.
 - In the manner of application and appearance, acrylic paints are most similar to oil paints.
- Acrylic paints are usually cheaper than oil paints and require significantly less additional tools and fixtures. At the same time, from the point of view of overlaying layers and technique, they are more intuitive than watercolor paints.
- Acrylic paints are less toxic than oil paints, as they are practically odorless and do not require a well-ventilated area. If you work in a small room or have children or animals at home, then acrylic will be safer than oil.
 4 Consider using oil paints. Probably the most "advanced" of the three options is oil paints. They are dense, dry slowly and offer many different techniques. It takes about three months for them to dry completely, so the choice of this type of paint will be preferable for those who need or want to spend a lot of time working on the canvas. Oil paints have one very unpleasant feature: they are a little toxic, so when working with them, you need to ventilate the room well.
 - Oil paints are the most expensive choice of the three presented, and you will also have to buy additional accessories, such as mineral solvents and gels, for them.
- Oil paints contain the richest color palette of all and once dry, you will see exactly the colors that you mixed.
 5 Buy quality paints. When you choose a paint type, you will need to choose a brand. As an aspiring artist, you might find it tempting to buy cheap paints. However, you will save both money and time (in the long run) by purchasing quality accessories. Good quality paint contains more color pigment, which means you only need one coat where cheap paint requires 2-3. A tube of cheap paint will run out much earlier (and more annoying) than a tube of expensive paint.
 - It is better to buy paints from specialized art stores. In the stationery departments, the cheapest brands are most often presented.
Method 2 of 5: Get to Know the Elements of Painting
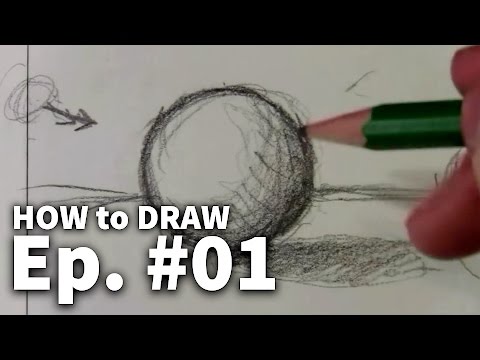
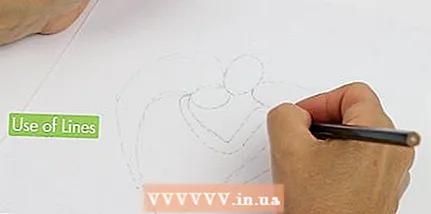 1 Learn to use lines. The most basic line type used in drawing is the outline line; it denotes the outer outline of the object. Some artists outline the outlines of objects, and some try to show the outlines using different colors. Determine if you need to use obvious lines (contours) in your drawing.
  2 Learn to draw shapes. Each object that is drawn can be represented as several shapes stacked together. The biggest mistake of all newbies is the impossibility of presenting an object as a set of forms: they present it as an ode to a large whole form. Instead of focusing on drawing the outline of the subject, focus on drawing individual shapes connected together.
 - 3 Deal with saturation. Saturation is the estimated estimate of a color as it will be when converted to black and white; how light or dark this or that color will be. Saturation is especially important when mixing colors, as they can be deceiving when mixed if not considered in terms of brightness and shadow. Most paintings have saturation in one range: the lower (mostly light colors), middle (middle grays / neutrals), or the upper third (mostly dark colors) of the gray scale.
- If you do not need sharp contrast, then the color saturation of your image will be approximately the same.
 4 Use space efficiently. Since you are working on a flat surface, you will need to create the illusion of distance using space. To show a flat surface, use objects of the same size and stretch them. To create depth, change the shape of objects, make smaller objects farther away and more objects that are closer to the viewer.
 - 5 Learn to create texture. In order for the objects in your painting to look more realistic, you will need to create the illusion of texture. The texture is created with different brush strokes and different positions of paint on the canvas. Short and quick strokes will add a furry effect, while long and smooth strokes will make objects softer and longer. You can also create texture with additional layers of paint.
- 6 Create motion effect with paint. Movement is like an extension of the texture, but at a larger size. A motion effect occurs when a texture is repeated several times in an image. Not all drawings require movement, but if you are going to create a realistic painting, you just need to add this effect.
 7 Take a look at your composition. Composition refers to the placement, arrangement of objects and shapes in an image. To create an interesting composition, it is better to place the figures in the image in such a way that the viewer's eyes are riveted to the whole picture. Do not place a single object in the center of your drawing, as this composition is the simplest. Make the image more interesting by placing the main subject at the intersection of the lines dividing the canvas into thirds, or by adding other interesting objects to the background.
Method 3 of 5: paint the picture
 1 Select an item. The most important decision when drawing is the choice of the subject. For most aspiring artists, it is easier to select a stock image (which is already flat) and draw a copy of it than to try to draw a 3D object. To get started, find something with simple lines and shapes, with fewer colors, which will make it easier to practice your drawing skills. Usually in the first pictures you can try to depict:
 - a bowl of fruit;
- a vase of flowers;
- stack of books.
 2 Draw a sketch. While not a requirement, most artists find it helpful to sketch the rough outline of their future painting on canvas. Use a hard, simple pencil to carefully outline the shapes and forms on the canvas. You will paint over them, but the subtle lines will help you place objects in the right places.
 - 3 Find a light source. The colors of your drawing, the location of the paint on the canvas, all this directly depends on the position of the light source. Look at your subject, determine where the light parts will be and where the dark parts will be. Mix colors with this in mind, create different shades of shadows of the same color for natural transitions.
 4 Start painting the background. In painting, it's best to start from the background and work your way up to the foreground. This will allow you to neatly layered objects in your drawing and create a sense of distance. Use one color at a time, going back and adding new color layers as you go. First write the background, and then you will start adding objects that are closest to the foreground.
 - 5 Add your main object. Once you're done drawing the background, you can start adding objects and shapes. Work with the layers of paint in the same way as you would for the background. Your main subject is the compositional center of the drawing, so it is very important that you work it out as carefully as possible, taking into account all the artistic elements that were discussed in the second part. Analyze it from all angles and focus on creating simple shapes, not the whole object.
- If you are having problems with image accuracy, try turning the work upside down. Drawing an object from a different angle will allow the brain to focus on the constituent shapes, rather than how you visualize the outlines.
- Start with the lightest shades and then work your way up to darker ones. Hard light layers on top of dark ones, so start with whites and pastels before moving on to rich colors.
 6 Add details. When the drawing is nearing completion, work on the details of the background and shapes. Often this will be adding texture with a brush, blurring and glazing, as well as small and detailed shapes that you will depict with a top layer. Now you need to really focus and finalize all the little things.
  7 Finish the job and clean up. When all the details are ready, your job is complete! Correct any possible mistakes in the drawing, sign in the corner and clean up all working tools. It is very important to keep your brushes clean to keep them in good condition for longer. Remove paints and other supplies.
Method 4 of 5: Buy other supplies
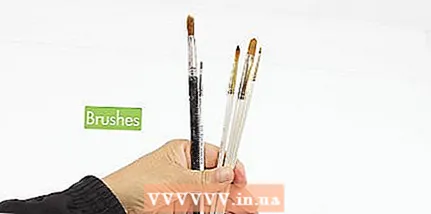 1 Select brushes. There are two main things to look out for when buying a brush: the shape of the bristles and the material from which it is made. Brushes come in three shapes: round (with a pointed rounded tip), flat and semicircular flat (like a flat, only rounded at the end). The material can be sable, squirrel, synthetics, a mixture of synthetics and natural fibers, or pork bristles.
 - For watercolor painting, sable or squirrel brushes with a round tip are best.
- For acrylics, it is great to use synthetic and semi-synthetic brushes with a flat end.
- For oil painting, it is best to choose semi-circular flat brushes made from synthetic blends or pig bristles.
 2 Select your canvas. A stretched canvas would be the best option for acrylic or oil, and it is also inexpensive. However, heavy drawing paper, canvas stretched over a board, and watercolor paper are also good choices. Oil and acrylic can be used on most smooth surfaces such as wood or plastic. Watercolors can only be used on specialty paper or fabric.
 - Do not paint with watercolors on plain printer paper, as the ink will be too heavy and damp and the paper will wrinkle and swell.
- Before painting on wood or plastic, coat the surface with a primer to keep the paint in place.
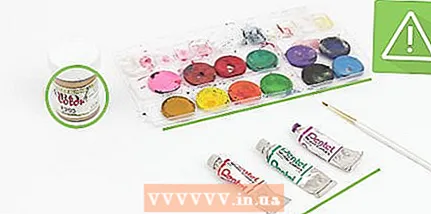
 3 Stock up on the rest of the accessories. In addition to all the tools, you will also need a palette, jars of water (steam is best - one for rinsing brushes, the other for wet painting) and a rag, as well as suitable clothing such as an old shirt or apron. Other additional materials are needed only for oil paints, but not required for acrylics and watercolors. It would also be nice to acquire levkas; It is a white primer for preparing any surface (including canvas and paper) for painting.
 - An optional but desirable piece is the easel on which you will set the canvas as you work. Otherwise, you can simply sit on any flat, stable surface.
Method 5 of 5: Mixing colors
 1 Get to know color wheel. The color wheel is a color map that helps you understand how a particular color is obtained. There are three main sets of colors: primary, secondary, and others. The primary colors are red, blue and yellow. These colors can only be taken ready-made from tubes; they cannot be obtained by mixing other colors. Secondary colors (purple, green, and orange) can be mixed from the primary colors. The rest of the colors are on the color wheel between major and minor (for example, turquoise, or peach).
 - Red + Yellow = Orange
- Yellow + Blue = Green
- Red + Blue = Purple
- 2 Mix colors. Mix colors if you need more shades. There is nothing worse than writing with only those paints that are included in the set. Mix colors to create new ones; mix the two base colors in equal proportions for a pure new color, or add more for a different shade. For example, if you add a little more blue when mixing purple, you get an indigo shade, and if you add a little more red, you can get a deep maroon color.
 3 Create lighter shades. Adding a small amount of white to any color will make it lighter, converting the original color to its lighter tone. Most of the colors straight from the set can be too bright and juicy, and when adding white, you get pastel shades.
 - Adding white to the color you want is more difficult, so try adding a color to white first. This way you will need less paint to get the pastel shade.
- 4 Mix darker shades. In contrast to light colors, they are obtained by mixing any color with black. Then the colors become a little darker, for example, red becomes burgundy and blue becomes dark blue. It will be easier to add a small amount of black to a color than it is to add color. In this case, less is more: always start with as little black paint as possible, so as not to immediately get too dark a shade.
 5 Create different tones. If a color is too bright, add its complementary color to it to tone it down. This will change the original color to its hue. Complementary colors are opposite each other on the color wheel. For example, green is complementary to red, purple to yellow, and orange to blue.
Tips
- Getting a skin tone isn't that hard, but if you just mix orange and white and get a peachy one, you'll see it's flat and unnatural.Take a look at your own skin. The veins give the difference in shades. For light skin, add a little green, and for dark skin, add a little blue.
- Visit local museums and art galleries. If there are no museums around, find out at art schools or universities that have art departments: they may be holding exhibitions of work. Some popular museums in the world offer online tours of their halls, as well as provide an opportunity to view high-resolution photographs of paintings on their websites.
- Do not assume that the picture is gone if you make a mistake. Painting is art, and art can be transformed. If you do something wrong, calm down and take a few steps away from work. If the error is very noticeable, try transforming this snippet into something else. If the error is not visible at a distance, then no one else will see it.
- Explore classics such as paintings by Pablo Picasso, Jan Vermeer, Vincent Van Gogh, Salvador Dali, Frida Kahlo, Jackson Pollock, Edvard Munch and Pierre-Auguste Renoir. They will give you an idea of the different painting styles.
- Try making friends with other artists. Some art schools offer open classes during which artists can work together in the same studio. Talking to others about their favorite styles and techniques, or just watch them work, will broaden your horizons.
- Be spontaneous: if you don't have a painting idea, dip your brush in different colors and randomly apply them to the canvas. You will be amazed at what you get: perhaps it is a passion deep in the subconscious.
- Watch films about art, for example:
- "Girl with a Pearl Earring" about Vermeer. Several scenes talk about color theory and painting techniques.
- "Frida" about the life and art of Frida Kahlo. In it you will see excellent examples of the transfer of facial expressions and imaginary visions, as well as artistic techniques.
Warnings
- Don't give up too early. Painting is usually a lengthy, repetitive process, and the creation of one painting can take from half an hour to several months. Always remember that most artwork looks bad until it is finished. If you don't like what you get, just take your time and keep working on the painting. In watercolor painting, trying to rewrite a failed overlay will look messy, but when working with acrylic, a new layer of paint will help to touch up, hide or emphasize the layers underneath.
What do you need
- Paints - watercolors or acrylics
- Suitable canvas for selected colors: watercolor - watercolor paper, acrylic - canvas on stretcher, canvas on board, acrylic paper or even chipboard
- Synthetic fiber brushes of various sizes
- Jar of water
- Drawing subject (real object, photograph, magazine picture, and so on)
- Palette
- Pencil and eraser for initial sketching (optional)
- Sketch and Idea Pad (optional)
- Easel (optional)


