Author:
Sara Rhodes
Date Of Creation:
12 February 2021
Update Date:
15 May 2024

Content
- Steps
- Method 1 of 3: PDF document
- Method 2 of 3: Image
- Method 3 of 3: How to scan a document into a Word document
- Tips
- Warnings
This article will show you how to convert a scanned document to a Word document on your computer. This can be done using Word if the scanned document is saved in PDF format, or using a free converter if the scanned document is saved as an image. If you have a Microsoft account and a smartphone, use the free Office Lens app to scan your document and save it as a Word document to your OneDrive cloud storage.
Steps
Method 1 of 3: PDF document
 1 Make sure the scanned document is saved in PDF format. Microsoft Word can convert such a document without additional software.
 - If the scanned document is saved as an image (for example, in JPG or PNG format), use the New OCR service.
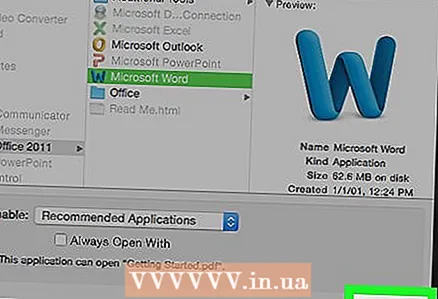 2 Open your PDF document in Word. This process depends on the operating system:
 - on Windows, right-click the PDF, choose Open With, and then click Word from the menu;
- on Mac OS X, click the PDF, and then click File> Open With> Word.
 3 Click on OKwhen prompted. Word will begin converting the PDF to DOC format.
 - This process can take several minutes if the PDF contains large text or many images.
 4 Activate file editing (if required). If you see a yellow warning bar at the top of the Word window, click Enable Editing on the yellow bar to unlock the document for editing.
 - This usually only applies to downloaded files (for example, if you downloaded a scanned PDF from a cloud storage).
 5 Edit the document. The converted document will not be an absolute copy of the original - you will most likely have to add missing words, remove extra spaces, and correct typos.
  6 Save your document. To save the edited document in DOC format, follow these steps:
 - in windows press Ctrl+S, enter a file name, select a folder to save and click "Save";
- on Mac OS X click ⌘ Command+S, enter a file name, select a location to save (from the Where menu), and click Save.
Method 2 of 3: Image
 1 Open the site of the New OCR service. Go to http://www.newocr.com/ in your computer's web browser.
  2 Click on Overview. It's a gray button at the top of the page. An Explorer (Windows) or Finder (Mac) window opens.
  3 Select the scanned file. In an Explorer or Finder window, navigate to the scanned document that was saved as an image and click on it.
  4 Click on Open. It's in the lower-right corner of the window. The file will be uploaded to the website.
  5 Click on Upload + OCR (Download and recognize). You will find this button at the bottom of the page. The text in the image will be recognized and displayed on the page.
  6 Scroll down and tap Download (Download). This link is in the lower left side of the page, above the text box. A menu will open.
  7 Click on Microsoft Word (DOC). It's in the Download menu. The Word document downloads to your computer.
  8 Open the downloaded document in Word. To do this, double click on it. The image is now a Microsoft Word document.
 - You may need to click "Enable Editing" at the top of the page, as the document might be locked for editing by default.
 9 Edit the document. The converted document will not be an absolute copy of the original - you will most likely have to add missing words, remove extra spaces, and correct typos.
Method 3 of 3: How to scan a document into a Word document
 1 Launch the Office Lens app. Click on the red and white icon with a camera and the letter "L".
 - If you don't have this app, download it from the Play Store for your Android device or the App Store for your iPhone.
 2 Allow Office Lens to access your phone. If this is your first time launching Office Lens, click Allow or OK to have the app access your phone's files.
  3 Tap Document. It's a tab at the bottom of the screen.
  4 Point your phone camera at the document. Make the entire document you want to scan appear on the screen.
 - Make sure the document is well lit to capture as much detail as possible.
 5 Press the capture button. It's a red circle at the bottom of the screen. A photo of the document will be taken.
  6 Click on
  . This icon is in the lower right corner of the screen.
 - To scan more pages, click on the "+" symbol at the bottom of the screen.
 7 Tap Word. You will find this option in the Save section of the Export To page.
 - On an Android device, tap the square icon next to Word, then tap Save at the bottom of the screen.
 8 Sign in to your Microsoft account. If you are not logged in yet, enter your email address and password. The Word document will now upload to your OneDrive account.
 - This must be the account you use to sign in to Microsoft Word.
 9 Open Word on your computer. Click on the blue icon with a white "W".
  10 Click on Open other documents. It's on the left side of the Recent section.
 - On a Mac, just click on the folder icon next to “Open” on the left side of the window.
 11 Click on Personal OneDrive. It's near the top of the window. The OneDrive folder will open.
 - If you don't see the OneDrive option, click +> Add Location> OneDrive and sign in to your Microsoft account.
 12 Go to the Office Lens folder. Open the Documents folder and then click on the Office Lens folder. They are in the right pane of the window.
  13 Double click on a Word document that was created with the Office Lens application.
Tips
- Office Lens works better with text on paper than text on screen.
Warnings
- The result of text recognition by the New OCR service depends on the quality of the text in the image. For best results, scan the document to PDF and then convert it using Word (as described in the first section).


