Author:
Sara Rhodes
Date Of Creation:
10 February 2021
Update Date:
16 May 2024
![How to Remove a Mapped Network Drive [Tutorial]](https://i.ytimg.com/vi/EJipW52c4nU/hqdefault.jpg)
Content
This article will show you how to unmount a network drive. This can be done on a computer running Windows and Mac OS X operating systems.
Steps
Method 1 of 2: On Windows
 1 Open the start menu
  . Click on the Windows logo in the lower left corner of the screen.
  2 Open an Explorer window
  . Click the folder-shaped icon at the bottom left of the Start menu.
  3 Click on This computer. It's a computer-shaped icon on the left side of the File Explorer window. You may have to scroll up or down to find it.
  4 Click on the tab Computer. You will find it in the upper left side of the File Explorer window. A toolbar appears at the top of the window.
 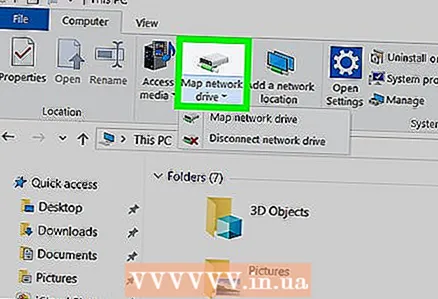 5 Click on Network drive ▼. It's under the Networking section of the toolbar. A menu will open.
 - Click on the bottom half of this icon, not the top half, otherwise a new Network Drive window will open.
 6 Click on Disconnect network drive. It's near the bottom of the menu. A window will open with a list of all mapped network drives.
  7 Select a network drive. Click on the drive you want to disconnect.
  8 Click on OK. This button is at the bottom of the window. The disk will be disconnected.
Method 2 of 2: On Mac OS X
 1 Open Finder. Click the blue face icon in the dock.
  2 Find a network drive. On the left side of the Finder window, find the name of the network drive you want to disconnect. It is usually found in the Sharing section.
  3 Select a drive. Click on the mapped network drive that you want to disconnect.
  4 Click on Disable. It's in the main Finder window. The network drive will be disconnected.
 - If there is no Disable option, click Eject to the right of the network drive.
Tips
- You can reconnect the network drive at any time if the path to the drive folder has not changed.


