Author:
Joan Hall
Date Of Creation:
25 July 2021
Update Date:
11 May 2024

Content
1 Prepare everything you need for your work: polymer clay of several colors, a toothpick, a baking sheet for the oven (which will only be used for working with clay, not for cooking), a thread, a needle with an eye large enough to thread the thread into it.- Polymer clay is sold in all craft stores and can be easily found in online stores.
 2 Mash up the clay. Polymer clay needs to be kneaded so that it warms up and becomes pliable. First, cut a small piece of clay, about the size of a bead of the color you want to work with.Roll it in your hands, make the piece rounded, the clay will thus become heated.
 - If the clay is hard enough, cut it into small pieces with a knife. Place the resulting pieces on a cutting board and add a drop of mineral oil. Then mix all the pieces back into one. Mineral oil will make the clay more pliable.
3 Poke the ball down the center with a toothpick. Be careful - the beads should keep their roundness, the hole should be large enough for the needle to pass through. - Polymer clay practically does not expand and does not shrink in volume during firing. However, the holes in the beads may become slightly narrower, so they should be made larger than the diameter of the needle.
 4 Place the beads on a baking sheet. The baking tray that you will use to fire the polymer clay cannot be used for cooking later on.
 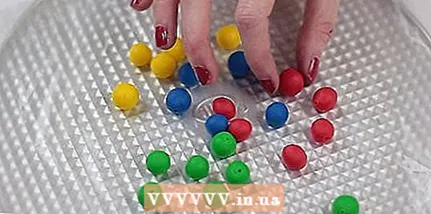 5 Repeat the same for all colors of clay you have. Try to make the beads the same size. 6 Make a pearl necklace. After you have practiced sculpting solid color beads, try mixing different colors of clay to achieve a pearly effect. Take small pieces of clay of different colors and mix them together. You should not knead the clay for too long, as the colors will simply merge and form a new uniform color.
 - Different brands of polymer clay may have different firing instructions, so it is best to mix clays from the same manufacturer.
7 Make double-sided multicolor beads. Roll the clay of each color into an elongated thin "tube", about 0.5 cm wide and 10 cm long. Press each tube into each other, thus getting one long tube. Roll out this new piece slightly, giving it a round shape. Then cut the tube into pearl-sized pieces and roll them into beads. The finished bead should have two multi-colored sides. - You can create a wide variety of patterns by following this pattern. Try cutting the multi-colored roll into thin, round pieces and then stick them with the flat side to the surface of the solid bead. Then smooth the surface by gently flattening the beads with your fingers.
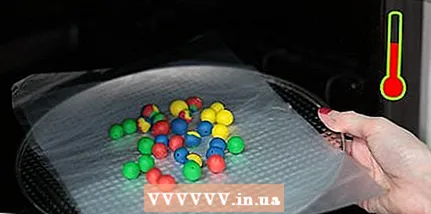 8 Follow the instructions for firing (usually found on the clay packaging). Firing for too long or, on the contrary, insufficient time can lead to chipping of the beads.
 - Regardless of the brand of clay, smells specific to polymer clay firing will come from the oven. These vapors are toxic, so first open the windows and turn on the hood in the kitchen.
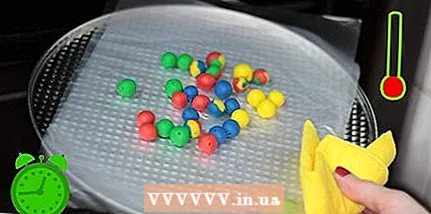 9 Remove the beads from the oven and let them cool before connecting them. The beads must cool completely before you can touch them. If they are still warm, do not touch them - they have not yet hardened and touching them will ruin the surface. 10 Collect the beads. Thread the needle. Then string the beads onto the needle according to the desired bead design. When all the beads are on the thread, remove the needle and tie the ends of the thread tightly. Make sure you can pass the bead easily enough through the eye of the needle.
  11 Put on your new beads!
Method 2 of 2: Modeling polymer clay pendants
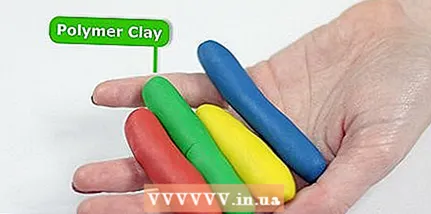 1 Buy polymer clay in a variety of colors. You can use different colors for a particular job. Polymer clay mixes very well, so remember that you can always easily mix different colors of clay for your work.
 - There are several different brands of polymer clay on the market. You can buy several to see which one you like best. Some brands of clay may be softer. It is worth remembering, however, that different brands of clay may have different firing recommendations, so they probably should not be mixed.
- You can also make polymer clay yourself at home.
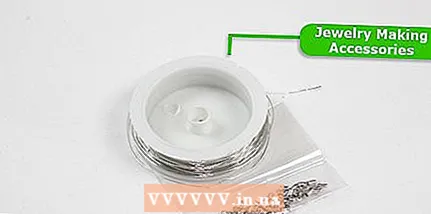 2 Find accessories for making jewelry. You need to decide what type of suspension you want to make.To make a pendant for a necklace or multiple dangling earrings, you will need heat-resistant fasteners. This can be a piece of wire that you can insert into the piece before firing to secure it. This wire will have an eyelet protruding from the pendant through which the pendant can be attached to a necklace thread, chain or earrings.
 - All the necessary supplies for making jewelry can be found at any craft store.
- 3 Mix colors. Choose your favorite clay colors and mix to create a shimmering effect.
- If you mix clays of different colors for a longer period of time, you can get a completely new permanent color. It can be fun, with only red, yellow and blue clay, to make your own clay in a different color by simply mixing the available colors.
 4 Modeling. Using only your fingers, you can sculpt pendants, beads, and various figures. Start with simple shapes, adding small pieces of clay on top to create a pattern.
 - Come up with your own unique shapes. The options for what can be made from polymer clay are endless - only your imagination is needed. You can sculpt some abstract multicolored figurine or sculpt a tiny figurine of your favorite animal. As you can see, the field for creativity here is limitless.
- Try covering square or round pieces of clay with small blotches / dots of different colored clay. After covering, gently smooth the surface or leave it rough.
- If you have exhausted your ideas, you can find some fresh ideas for creativity on thematic Internet sites - there are a lot of them.
- 5 Insert metal parts into molded objects before firing. Some metal parts need to be fixed in the product by firing. Make sure that all parts of the product are heat resistant.
 6 Place the food on a baking sheet covered with a sheet of foil. This will protect both the baking sheet and the underside of the items.
  7 Fire items according to package directions. Most types of clays are fired at 135 ° C for 20-25 minutes.
  8 Let the items cool completely. If you are making a necklace, thread the thread through the loop on the pendant. If you are making earrings, simply attach the wire you purchased for the earrings to the eyelets protruding from the pendants.
Tips
- Some people prefer to use a spaghetti maker to produce thin slabs of clay. It can also be used to mix different colored clays and soften clays. However, it is worth remembering that the spaghetti pot used to work with polymer clay cannot be used for cooking afterwards.
- You can also paint finished products with acrylics. Fire the clay as usual, let it cool completely. Then you can color the products as you like.
Warnings
- The fumes from clay firing are toxic! Make sure that the room where you are firing the clay is thoroughly ventilated.
- In no case should polymer clay get into food! Kitchen utensils can be used with polymer clay, but after you have worked with polymer clay and these utensils, they can no longer be used for cooking.


