Author:
Joan Hall
Date Of Creation:
3 July 2021
Update Date:
10 May 2024
![Howto: Reducing Picture Size for an Email attachment [No Quality loss] | WAQ](https://i.ytimg.com/vi/o4UDW3Dp64c/hqdefault.jpg)
Content
If you send a message that exceeds the size limit for the sender's or recipient's mail server, the message will be returned to you and not delivered. Such a letter is called "returned". Optimizing the size of images and attachments for email helps you avoid exceeding the maximum message size for most email accounts. Follow these steps to automatically reduce the size of images and attach them to emails.
Steps
Method 1 of 2: Online
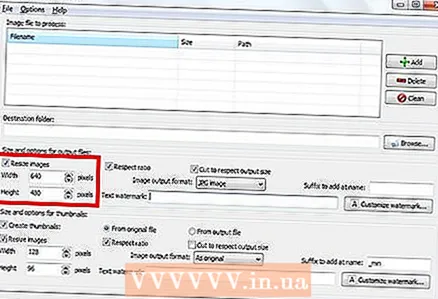 1 Resize photos using a service like Shrink Pictures. Upload a photo, set options and create a resized photo.
  2 Then download the photo and email it.
Method 2 of 2: In Outlook
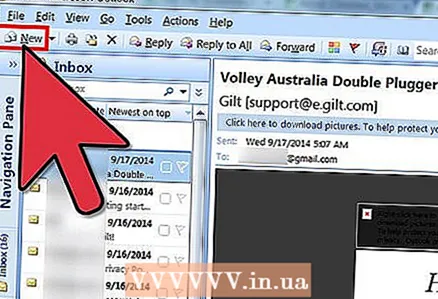 1 Create a new email in Outlook.
 2 Go to the "Message" tab and click on "Attach File" in the Include group.
 3 Click on the "Enable" section dialog box on the "Insert" tab.
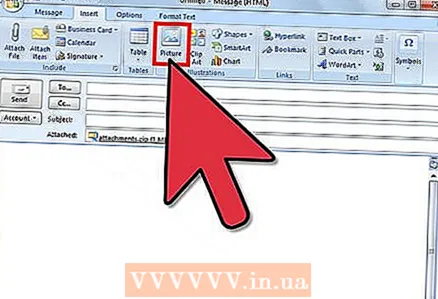 4 Open the Attachment Options panel in the Images section and select the size of the image you want to attach from the drop-down list.
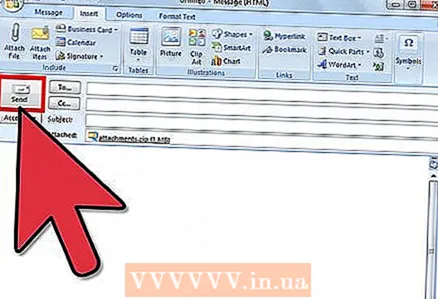 5 Click "Send" when you're done composing your email.
Tips
- If you insert an image into the body of a message using the Picture command in the Illustrations group, the auto-size reduction feature will not work.
Warnings
- Only the copy of the uploaded image will be changed, not the original image itself.


