Author:
Lewis Jackson
Date Of Creation:
12 May 2021
Update Date:
12 May 2024
Content
This wikiHow teaches you how to use your Windows PC to shut down another Windows computer on the same local area network (LAN).
Steps
Part 1 of 4: Find the target computer's IP address
- Make sure that your computer meets the requirements for remote shutdown. To remotely shut down the computer with another computer on the same LAN, the target computer must meet the following criteria:
- Enabled and connected to the same local LAN as the computer that you will use to shut down this computer.
- Have the same administrator account as the computer that you will use to shut down the computer.
- Open Start
on the computer you want to shut down. Click the Windows logo in the lower left corner of the screen.
- Open Settings

(Setting). Click the gear icon in the lower left of the Start window. - Click
Network & Internet (Internet & networks) is in the top row of Settings options.
- Click the card Status (Status) in the upper left of the window.
- Click View your network properties (See network properties). This link is at the bottom of the page.
- You may need to scroll down to find this link.
- Scroll down to the "Wi-Fi" heading near the center of the page.
- See the heading "IPv4 address". The series of numbers and the period to the right of the "IPv4 address" header is the current computer's IP address. Here you will use this IP address to specify the computer to shut down.
- It is possible that the IP address will end with a slash and another number (for example, "192.168.2.2/24"). If so, please omit the trailing slash and number when entering the IP address.
Part 2 of 4: Enabling PC for remote shutdown
- Open Start
. Click the Windows logo in the lower left corner of the screen.- Make sure you are still using the target computer.
- Open Registry Editor as follows:
- Import regedit.
- Click ''regedit the top of the Start window.
- Click Yes when it appears.
- Navigate to the "System" folder. Use the folders in the upper-left corner of the Registry Editor window to:
- Double click the folder "HKEY_LOCAL_MACHINE" to expand it.
- Double-click the "SOFTWARE" folder.
- Scroll down and double-click the "Microsoft" folder.
- Scroll down and double-click the "Windows" folder.
- Double-click the "CurrentVersion" folder.
- Scroll down and double-click the "Policies" folder.
- Click the "System" folder.
- Right-click on the "System" folder. A drop-down menu will appear.
- Choose new (New) from the drop-down menu. A menu will pop up.
- Click DWORD (32-bit) Value. This option is in the pop-up menu. A DWORD value icon will appear on the left side of the page.
- Type LocalAccountTokenFilterPolicy and press ↵ Enter. The DWORD value will be identified.
- Double-click the "LocalAccountTokenFilterPolicy" value to open it. A window will pop up.
- Activate value. Change the "Value data" field to 1, then click OK at the bottom of the pop-up window.
- At this point you can exit Registry Editor.
- Turn on Remote Registry access. To allow the Registry Editor setup to work from other computers on the same network, do the following:
- Open Start

. - Import services, then click Services (Services) at the top of the Start window.
- Scroll down and double-click Remote Registry (Remote registration).
- Click the "Startup type" drop-down box and select Manual (Handmade).
- Click Apply (Apply).
- Click Start (Start), and then click OK.
- Open Start
- Restart the computer. Click Start
, choose Power
and click Restart in the pop-up window. After the target computer restarts, you can switch to the computer you want to remotely shut down. advertisement
Part 3 of 4: Using the remote shutdown interface
- Open Start
on the other computer. You can do this on a computer on the same LAN and have administrator rights. - Find Command Prompt. Type command prompt to find.
- Right click
Command Prompt. The option is at the top of the Start window. A drop-down menu will appear.
- Click Run as administrator (Run as administrator). Options are in the drop-down menu.
- Click Yes when asked. Command Prompt will open in administrator mode.
- Enter your computer's credentials. Import net use address (remember to replace "address" with the IP address you wrote down earlier), click ↵ Enter then enter your email address and administrator login password when prompted.
- For example, you can enter net use 192.168.2.2 come in.
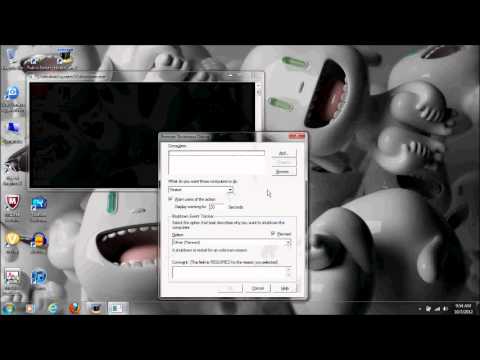
- Open the remote shutdown interface. Type shutdown / i then press ↵ Enter. A window will pop up.
- Choose a calculator. Click the computer's IP address or name in the "Computers" text box at the top of the window.
- If you don't see your computer's name or IP address, click Add ... (Add), then enter your computer's IP address and click OK. Next, you can click the name of the computer in the "Computers" text box.
- Click the "What do you want these computers to do" drop-down box. This option is in the middle of the page. A drop-down menu will appear.
- Click Shutdown (Shutdown) in the drop-down menu.
- Set a time limit. Enter the time limit (in seconds) in the "Display warning for" text box.
- Uncheck the "Planned" box on the right side of the page.
- Enter interpretation. In the "Comment" text box at the bottom of the window, enter the text you want the target computer to display before shutting down.
- Click OK at the bottom of the window. The specified computer will be turned off. advertisement
Part 4 of 4: Creating batch files for shutdowns
- Open Notepad. Click or double-click the blue notebook-shaped Notepad application icon.
- You may need to find Notepad in Start.
- Enter the command "shutdown" with your computer's IP address. Please enter the following command, remember to replace the necessary contents with the information of the target computer:
- You must replace "address" with the IP address of the target computer.
- You can change "01" to any numeric value. This is the number of seconds it waits before the computer shuts down.
- Press ↵ Enter, then add another desktop line. You can repeat this process with multiple computers on the same network if you like.
- Click File (File) in the upper-left corner of the Notepad window. A drop-down menu will appear.
- Click Save As ... (Save as). This option is in the drop-down menu File. The "Save As" window will open.
- Click the "Save as type" drop-down box near the bottom of the window. A drop-down menu will appear.
- Click an option All Files (All Files) is in the drop-down menu.
- Add an extension ".bat" to the file. Click the "File name" text box, enter a name for the file, followed by the extension .bat.
- For example, if you want to create a batch file called "shutdown", you need to type shutdown.bat.
- Click Save (Save) in the lower-right corner of the window. The batch file will be saved to the default location (eg, "Documents").
- Execute file. Double-click the batch file to execute it. All connected and active computers listed in the file will be turned off. advertisement
Advice
- If you know the name of the computer you want to remotely shut down (for example, "DESKTOP-1234"), you can enter this name after the "" tag instead of using the IP address.
Warning
- If computers on the LAN are not using static IP addresses, their IP addresses may change when the router is restarted or when you switch networks. In this case, you will need to double check the IP address of the target computer on the LAN.


