Author:
Louise Ward
Date Of Creation:
7 February 2021
Update Date:
15 May 2024

Content
When your walls really need new painting, you may just want to grab a brush and paint right away.But before you begin, you should learn some basic knowledge in painting walls to save valuable time and effort. The key to a flawless, spotless finish is in the preparation stage - after cleaning the wall and priming, you can focus on the outer edges of the wall and paint inwards with paint colors that can cause the room is eye-catching after finishing.
Steps
Part 1 of 3: Preparing the work area
Disassemble any wall accessories. Remove all handles, power outlet covers, light switches, thermostats and other wall mounted objects. The work process will be much more efficient if you have a clear and unobstructed surface to be painted.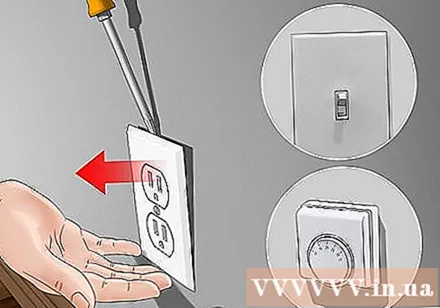
- Most wall mounted devices can remove the screw and lift it off. You need to pay attention to small parts such as socket covers and insulation panels to then reattach.
- Items that cannot be removed can be covered with paint masking tape.
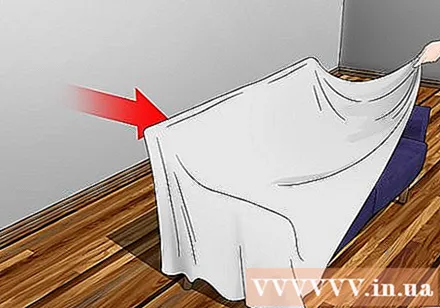
Clean up furniture in the work area. Find a place to store all belongings, equipment, and supplies until the job is done. If you don't have enough workspace, simply move the item away from the wall you are about to paint. Cover with tarpaulins or plastic fabrics to protect the rest of the furniture.- The paint stains on the upholstery fabric are almost impossible to remove, so you should protect your furniture even if you think the gap is already quite safe.
- Unplug electrical appliances and place them elsewhere to avoid damage.

Spread the canvas on the floor. Spread a tarpaulin or plastic cloth to catch paint from falling or splashing when starting work. For maximum protection, the canvas needs to cover the full length of the wall.- Do not cover the floor with thin materials such as newspaper or bed sheets. These materials are often too thin to prevent the wet paint from seeping through.
- There is no need to cover the entire floor. You just need to move the canvas when painting from one end to the other.

Gently clean the wall. Dip a clean rag or sponge in a solution of warm water and mild soap, then wring out the water. Wipe from top to bottom to remove dust and dirt that may affect the paint's adhesion ability.- Gently wipe your hands - just clean the wall, don't get it soaked.
- A small amount of sodium phosphate (TSP) will help remove stains that have stuck in areas like the kitchen or basement.
Cover nearby surfaces with paint masking tape. Paint shielding tape can be used to protect the top and bottom edges as well as around doors. This type of tape also helps shield parts that are difficult to remove, such as light switches. Be sure to stick the tape edges correctly; otherwise, your final product will be smudged.
- You can buy paint shielding tape at home repair shops or most supermarkets.
- Buy different sizes of tape. This will give you more flexibility when applying tape to prevent the paint from accidentally sticking to other parts of the wall.
Part 2 of 3: Primer
Buy a tank of primer. A standard white primer is usually best, as the new paint color will stand out then. Usually 4 liters of primer is sufficient.
- Always use primer when painting interior walls. The primer not only helps the paint to stick, but also reduces the amount of coating while still achieving color with the same density.
- Primer is especially useful when you want to coat light colors over dark colors.
Roll the primer on the wall. Roll a layer of primer evenly from the ceiling to the floor, covering the widest areas near the center of the wall. The primer doesn't need to be too thick - if the primer is smooth and even, the topcoat will easily adhere.
- Try not to leave any unpainted pieces, as these patchy patches may affect the final paint color.
Use a hand-held paint brush to fill the gaps. Use the brush tip to apply primer to small cracks and other difficult areas. Pay special attention to corners, recesses, edges, and around wall objects. Try to paint with a thickness equal to that of roller-painted areas.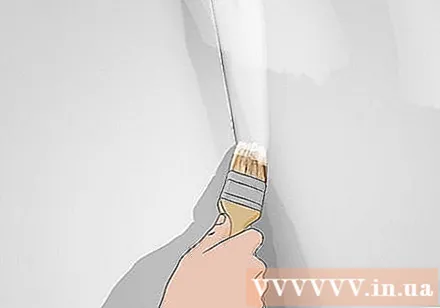
- Apply the primer in a long, smooth motion, then smooth it by sweeping in different directions.
- Be sure to use duct tape to shield the paint for correct lines and angles.
Wait for the primer coat to dry completely. Wait about 4 hours for the primer to stabilize. The primer must be dry before starting to apply the topcoats. It may be more convenient to use primer in the afternoon or evening, so you can continue painting the next day.
- If the primer is applied to the wet primer, the topcoat may become cloudy and smudged, resulting in damage to the paint.
- The primer will dry quickly if the work area is well ventilated by opening windows or using ceiling fans or air conditioners.
Part 3 of 3: Paint the wall
Choose the right paint. There are many types of interior paints you can choose from. You should consider not only the color but also the texture of the paint. For example, pastel colors can brighten a room or toilet, while darker colors can give a more spacious feel to common areas like the kitchen.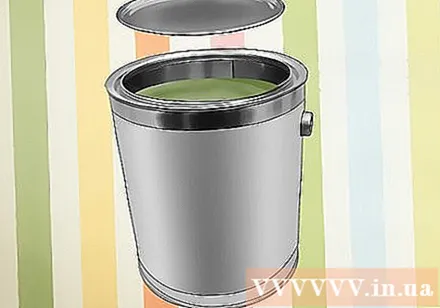
- Prepare enough paint to finish the job without having to run to buy more. 4 liters of paint is usually enough to cover about 40 m2 of a wall.
Mix the paint thoroughly. Use an electric paint mixer or hand-held paint mixer to blend the paint evenly, even if the paint is pre-mixed when purchased. This will prevent the oil and color from separating, resulting in a better coating and a smoother finish. Once the paint has achieved a uniform texture, you are ready to paint.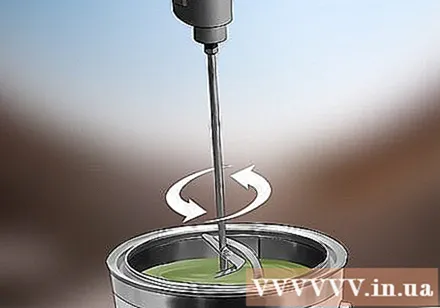
- To prevent the paint from falling and splashing around, you should pour it into a larger bucket before you start mixing.
- It is essential to mix paint before starting large projects, regardless of whether you use a brand new paint bucket or a paint can that has been on the shelf for a long time.
Start painting the edge of the wall by hand. Dip the brush about 5 cm deep in the paint and let the paint drip down, then tilt the brush up against the wall, starting at the upper corners of the room. Paint along the adhesive tape covering the paint from top to bottom in a smooth and straight motion until the perimeter of the wall is completed.
- Paint too into the wall about 5-8 cm from the edge of the wall so that it is easy to paint with a roller for the rest.
- Stop occasionally to dip more paint when the brush starts to dry.
Paint the center of the wall. After painting the outer edges of the wall, use a wide roller to handle the center of the wall. The best method to paint with a roller is to paint alternately in a "M" or "W" shape, painting back and forth on part of the wall until the paint is covered. You can then move on to another part, repeating the same movement.
- A long handle paint roller can help you reach high walls near the ceiling. Make sure the paint overlaps the edges when painting.
- Use only enough paint to cover the primer. If the paint roller is too drenched in paint, ugly paint splashes will appear on the topcoat.
Paint one or two more coats. Depending on whether the paint color is dark or light, you can apply a second or even third coat. Apply more coats in the same way as above, starting from the outer edge of the wall and painting gradually inside. Remember to wait about 2-4 hours for the previous coat to dry before applying the next coat.
- Most wall types do not need more than two coats of paint. However, extra coatings can be useful on walls with rough textures or when applied on a darker finish.
- To avoid exposing seams between coats, be sure to paint the entire wall, including the area around the edge.
Leave on overnight for the coating to stabilize. Do one last look for thin, rough spots, paint drips or other problematic areas before you can tell you're done. The waiting time for the primer to dry is more than twice as long as the wait for the primer to dry. Meanwhile, you should try not to touch the paint to avoid accidentally smudging the paint.
- Usually interior paint takes 24-48 hours to dry completely.
- Don't forget to remove the masking tape once you're satisfied with the look of the wall.
Advice
- Priming, coating and waiting for the paint to dry will take a long time. You need to schedule this work on the weekends or on holidays so you don't have to rush.
- Fill holes and smooth around wall edges, corners or fillings with high grit sandpaper before priming.
- Multiply the length by the width of the wall to get the correct amount of paint needed in large projects.
- For a better color, try dyeing the primer by adding a small amount of the primer.
- Peel off the adhesive tape while the paint is still wet to prevent the paint from cracking or peeling.
- When painting your walls, you should consider painting the door as well.
Warning
- Take care when standing on ladders and using tools. Accidents often happen due to carelessness.
- Keep children and pets away from freshly painted walls until dry.
- If there is a power cord in the electrical outlet or switch is exposed, be careful not to touch it while painting.
What you need
- Interior paint
- primer
- Paint roller
- Hand paint brush with soft bristles
- Tarpaulins or plastic fabrics
- Adhesive tape to shield the paint
- Country
- Mild water soap
- A clean rag or sponge
- Sodium phosphate (optional)
- Long roll roller (optional)
- Furniture cover (optional)


