Author:
Louise Ward
Date Of Creation:
7 February 2021
Update Date:
15 May 2024
![[Tutorial] How to use Lucky Patcher.](https://i.ytimg.com/vi/7bORF6R7HhQ/hqdefault.jpg)
Content
This wikiHow teaches you how to use Lucky Patcher on an Android phone. Lucky Patcher allows us to tweak apps to remove license verification, Google Ads (Google Ads), change permissions, install patches and create custom APK files. You need to use an Android device that has been rooted for root intervention before you can modify apps on your phone using Lucky Patcher.
Steps
Method 1 of 5: Delete license verification
Root Android device. You need to use a rooted Android device to be able to modify apps on your phone using Lucky Patcher. The rooting process will vary by Android device, but this operation is potentially harmful to the phone and is out of warranty. Be extremely cautious and follow the most updated instructions for your particular phone.
- See more online on how to root an Android device not using a PC for details.

Open Lucky Patcher. App has yellow smileys. Lucky Patcher will open with a list of applications installed on your phone.- See more about how to download Lucky Patcher on Android for more information.
Tap on certain apps. This is the application for which you want to remove license verification. A menu of different options will appear.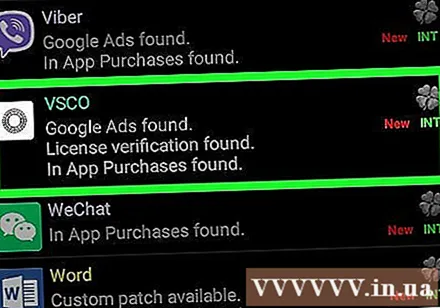
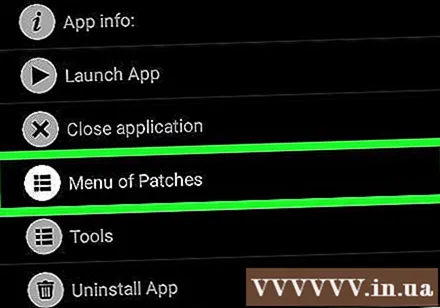
Click Menu of Patches (Patch list). A list of patches that can be installed for the application will appear.
Click Remove License Verification (Clear license verification). A menu of different patches to remove license verification will appear.
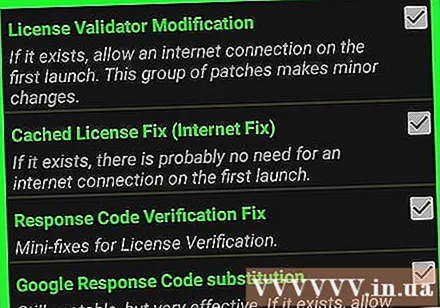
Click on the patch you want to use. Next to the different patches is the checkbox. Click the check box to select the patch you want to use.
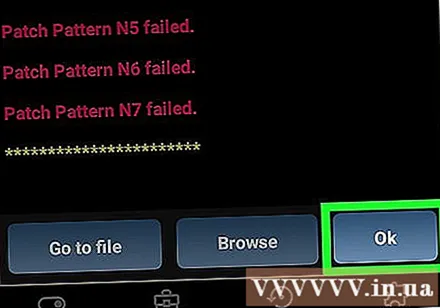
Click Apply (Apply). The application patching process to remove license verification will start and take a few minutes.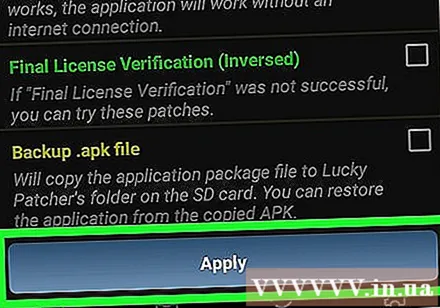
Click OK. If the patch works, you will see a success screen with the results displayed. Please press "Ok" to continue. advertisement
Method 2 of 5: Remove Google ads
Root Android device. You need to use a rooted Android device to be able to modify apps on your phone using Lucky Patcher. The rooting process will vary by Android device, but this operation is potentially harmful to the phone and is out of warranty. Be extremely cautious and follow the most updated instructions for your particular phone.
- See more online on how to root an Android device not using a PC for details.
Open Lucky Patcher. App has yellow smileys. Lucky Patcher will open with a list of applications installed on your phone.
- See more about how to download Lucky Patcher on Android for more information.
Tap on certain apps. This is the app for which you want to remove Google ads.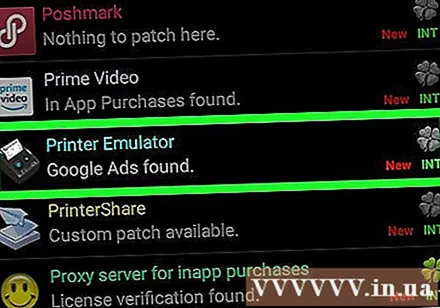
Click Menu of Patches. A list of patches that can be installed for the application will appear.
Click Remove Google ads (Remove Google Ads). A menu of two options will appear.
Click Patch to remove Google ads (Patch to remove Google ads). This is the first option in the pop-up menu.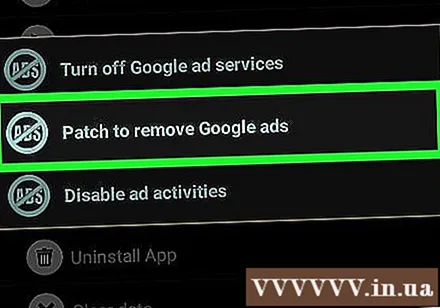
Click Apply. The app patching process to remove Google Ads will start and take a few minutes.
Click Ok. If the patch works then a successful screen with the results will appear. Please press "Ok" to continue. advertisement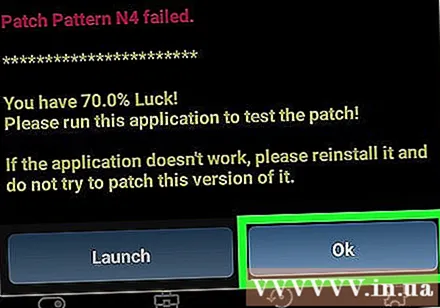
Method 3 of 5: Apply a custom patch
Root Android device. You need to use a rooted Android device to be able to modify apps on your phone using Lucky Patcher. The rooting process will vary by Android device, but this operation is potentially harmful to the phone and is out of warranty. Be extremely cautious and follow the most updated instructions for your particular phone.
- See more online on how to root an Android device not using a PC for details.
Open Lucky Patcher. App has yellow smileys. Lucky Patcher will open with a list of applications installed on your phone.
- See more about how to download Lucky Patcher on Android for more information.
Tap on certain apps. This is the application for which you want to apply custom patch.
Click Menu of Patches. A list of patches that can be installed for the application will appear.
Click Custom patch (Custom patch). You will probably see a menu with custom patches. If there is only one custom patch available, you will be asked if you want to apply it.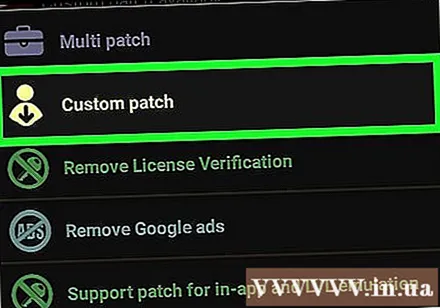
- To download the latest custom patches, press the "⋮" button in the upper right corner, then select "Download custom patches" from the settings menu.
Click on custom patch. A window will pop up with a description of the use of the patch.
Click Apply. Custom patches will be applied. This may take a few minutes.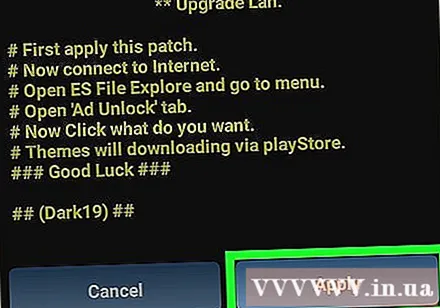
Click Ok. If the patch works then a successful screen with the results will appear. Please press "Ok" to continue. advertisement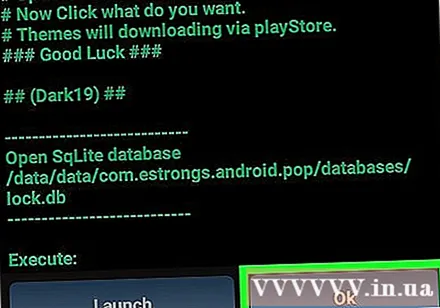
Method 4 of 5: Change app permissions
Root Android device. You need to use a rooted Android device to be able to modify apps on your phone using Lucky Patcher. The rooting process will vary by Android device, but this operation is potentially harmful to the phone and is out of warranty. Be extremely cautious and follow the most updated instructions for your particular phone.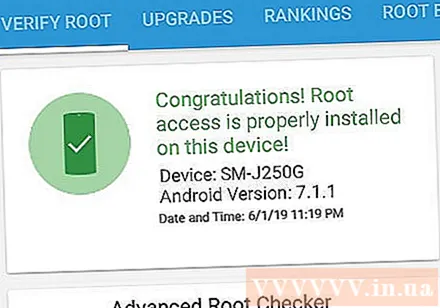
- See more online on how to root an Android device not using a PC for details.
Open Lucky Patcher. App has yellow smileys. Lucky Patcher will open with a list of applications installed on your phone.
- See more about how to download Lucky Patcher on Android for more information.
Tap on certain apps. This is the app for which you want to change permissions.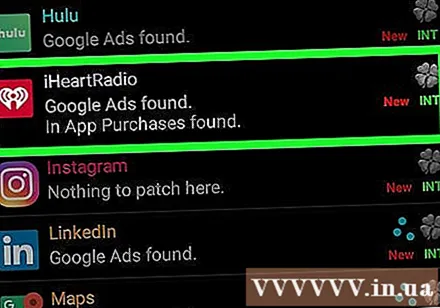
Click Menu of Patches. A list of patches that can be installed for the application will appear.
Click Change permissions (Change of permissions). A list of permissions will appear.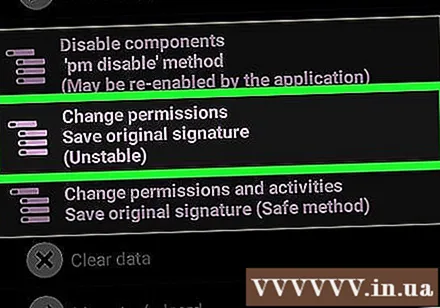
Tap on individual permissions. If the text about a permission is green, the permission is activated. If the permission text is red, that permission is disabled.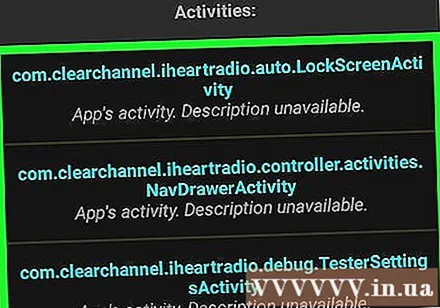
Click Apply. Application will restart with permission changes. advertisement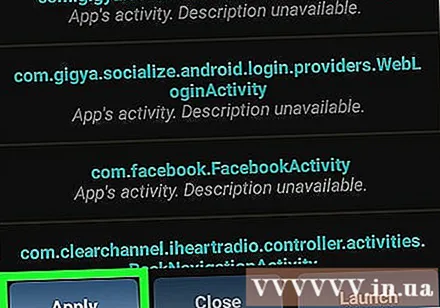
Method 5 of 5: Create modified APK file
Root Android device. You need to use a rooted Android device to be able to modify apps on your phone using Lucky Patcher. The rooting process will vary by Android device, but this operation is potentially harmful to the phone and is out of warranty. Be extremely cautious and follow the most updated instructions for your particular phone.
- See more online on how to root an Android device not using a PC for details.
Open Lucky Patcher. App has yellow smileys. Lucky Patcher will open with a list of applications installed on your phone.
- See more about how to download Lucky Patcher on Android for more information.
Tap on certain apps. This is the application for which you want to create the modified APK file.
Click Create Modified APK File (Create modified APK file). This option is in the menu that initially appears when you tap the application.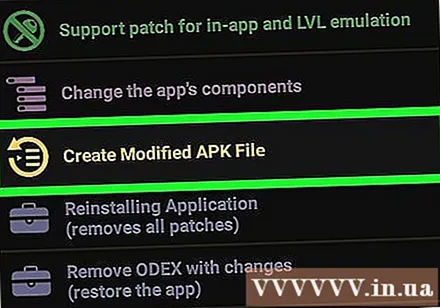
Click on a patch to modify the APK file. A list of patches that you can use to create the modified APK file will appear.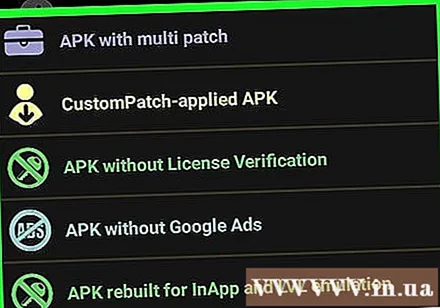
Click Rebuild The App (Rebuild application). This blue button is at the bottom of the screen. The patched application's APK file is separate from the original application. You can find the APK file in the directory / sdcard / LuckyPatcher / Modified /.
Click Ok to confirm that the APK file was created. You can also click "Go to File" to go to the directory where the APK file is located. advertisement