Author:
Peter Berry
Date Of Creation:
12 February 2021
Update Date:
15 May 2024

Content


Making a pistol in the Origami style


Steps
Method 1 of 2: Make a paper tube pistol
Collect the ingredients. Before you start assembling a gun, you need certain ingredients. To do this, collect the following: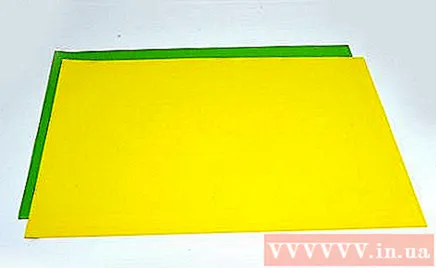
- Some durable paper (21.5x28cm, any color)
- Duct tape
- Drag
- Ruler
- Highlighter
- The lake is hot
- Rubber band
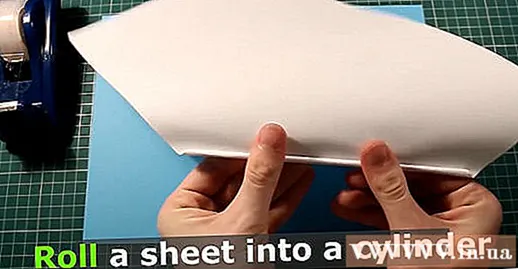
Curl the first sheet of paper into a cylinder, starting at the corner, and rolling upwards. To get started, select a sheet of paper. Round the paper into a thin tube. Gently round the paper into a cylindrical shape, leaving room in the middle if possible. It will look like a toilet paper roll core. This is a mold that helps you roll the remaining paper tubes, which are necessary for making paper pistols.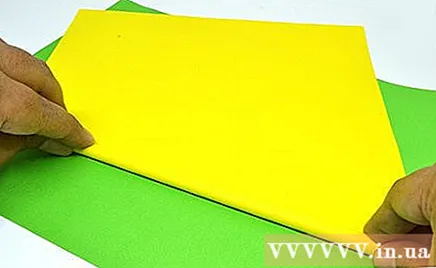
- It should be about the same diameter as a pencil. If you have trouble, you can also use a pen or pencil to scroll properly.
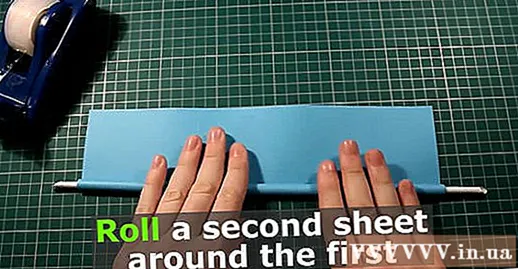
Roll the second sheet of paper around the first. To make a gun, when shooting, you will have to slide the first tube into the second - the bigger one. To make the second tube, roll the second scroll around the first tube you did above. When this second sheet is completely rolled up, gently slide the top tube out of the new tube. You now have a new tube, slightly larger than the first. Likewise, the tube will look like a toilet paper roll core.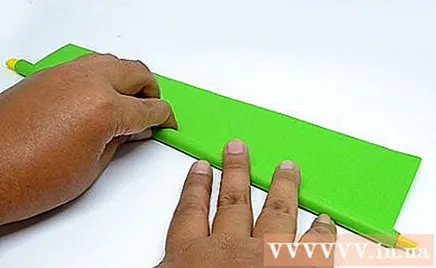
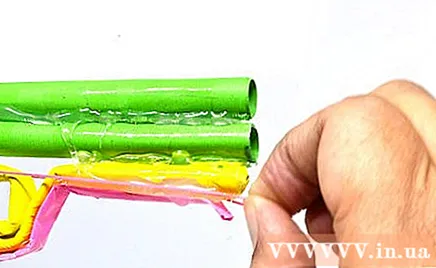
Adjust and fix the tube with tape. Once the tube is completely rolled, fix it with clear tape. Tape one end of the tube to prevent it from coming out. Next, use pruning scissors so that the edge of the tube is smooth and level without sticking out any odd parts.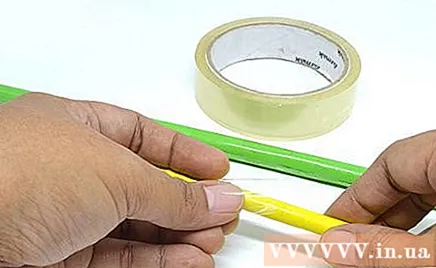
Roll two more rolls like that and cut them into certain lengths. Continue to roll the tube as before. Next, use scissors and a marker to cut tubes to the following lengths: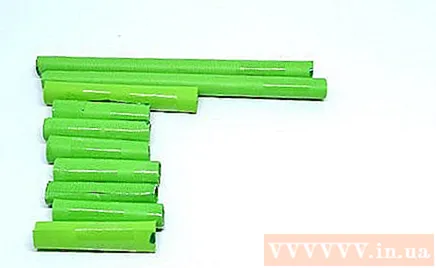
- Gun barrel: Two 15 cm tubes.
- Handle: Seven 5 cm tubes.
- Trigger: One 8 cm tube.
Make a handle by gluing the entire 5 cm tube together at a slight angle with a hot paste. Stack the tubes on top of each other and then make slight adjustments by moving the lower tube slightly diagonally to the right (imitating a regular pistol grip shape). Use hot glue to glue them, one tube press on the other, forming a long, thin handle for your gun.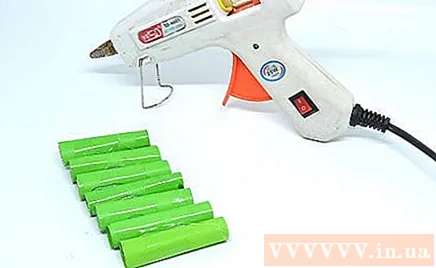
- You can also stick straight and cut one end diagonally, forming a slight angle. Trim the angle with scissors to smooth the edges.
Stick the 8 cm section over the handle, leaving the extra 3 cm on the right edge. This excess tube should be on the side on which the handle is tilted. In other words, if you hold the shot, the remainder will be directed towards you. It will be the "trigger".
Use glue to glue two tubes of 15 cm together and then attach them to the upper part of the gun. This is the barrel of your gun and so, of course, it's pointing in the opposite direction from you. Line up the back of the barrel with the center of the handle and then fix with the hot tank.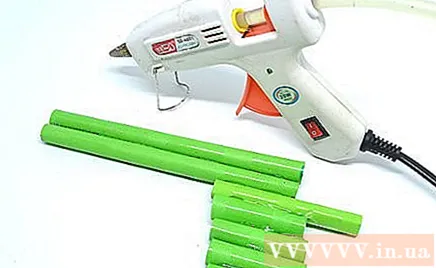
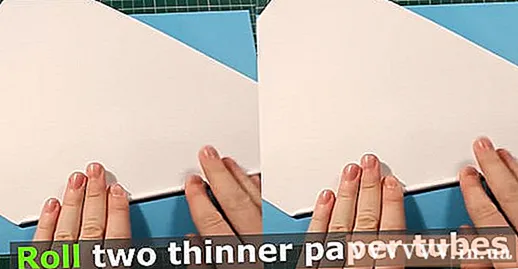
Roll the two thinner paper tubes. This time, don't bother leaving room in the middle of the tube. Simply roll a few sheets of paper into a tube that is a little thinner than the previous set of tubes (it would be great if you could use paper of different colors). These new pipes need to be able to slide in the old one.To make them thinner, roll without using any tube as a template. You should also trim the last 10-13 cm of the paper triangle to reduce the thickness at the tube body.
Break the thin tube into a U-shape so it can slide into the trigger and the top tube of the handle. Trim the excess so that only 0.5 cm of the tube protrudes from the explosion chamber and nothing protrudes the back of the handle. The curved segment of the U will be on the barrel of the gun. This will be your trigger - when you pull the trigger back, this small residue causes the back of the tube to explode.
- Make sure the tube can slide freely from front to back and back. After all, this is your trigger.
Option: make a barrier. Turn the tube into an S-shape, smoothing the bend if necessary. Slide one end into the top second tube of the handle (just below the trigger), turning the "S" curved part into a small bump. Use hot paste to paste the rest of the tube to the bottom of the barrel, removing the excess.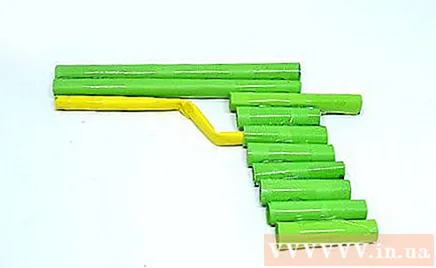
Flatten a thin tube with your finger and use it to "lock" the back of the handle, cover the front and below the ring (if any). The goal here is to lock up any unnecessary openings in the handle tubes, especially the one located just below the trigger.
- DO NOT close the explosion chamber. It needs to be opened to load and fire.
- After all, you are trying to create a "frame" for the lower part of the gun. That's why a different color makes the gun look even better.
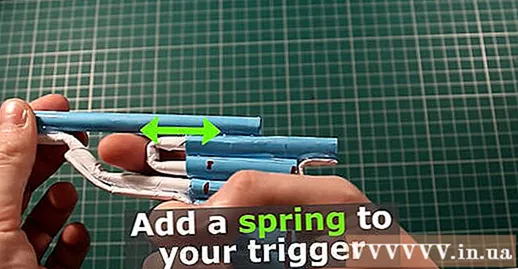
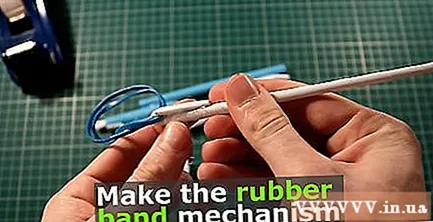
Take the spring from an old pen and insert the top tube of the barrel. Remove the trigger and set the spring so that it will rest against the outer ring. Thanks to that, the trigger automatically turns back on after firing.
Make a rubber trigger and a shot machine. Fold a piece of puzzle paper in half, making a thin, long strip of paper. Rolled up into a low tube. Fix the tube with clear tape and trim the edges. It should look like a small toilet paper roll core. Next ...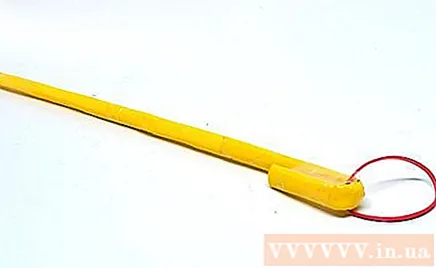
- Use scissors to cut open the paper tube. Put the rubber strap in.
- Put the tube back on. You should now have a small, low roll of paper with a rubber band running through it. This will be your trigger.
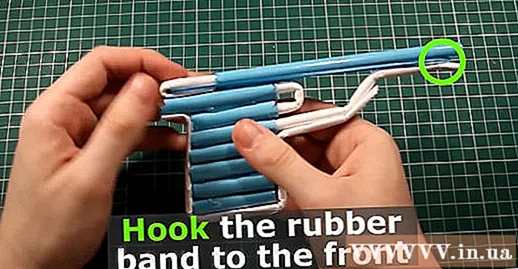
Slide the rubber trigger into the lower tube of the gun barrel. Cut the end so that the end of the rubber strap is as close to the back of the barrel as possible and no part of the tube will be protruding before the barrel.
Loop the rubber strap up, out in front of the barrel and hook into the gap between the two tubes. Make sure that the trigger back is directly above the opening of the explosion chamber. When pulling the trigger, the tube part is pushed forward, unlocking the trigger, releasing the rubber strap and firing your bullets.
Load paper bullets and shoot. Now, the gun is ready. Roll the piece of paper into small balls. Put the bridge on the other end, opposite the handle and trigger of the gun and loop the rubber strap. Pull the trigger to release the rubber strap, push the trigger forward and fire the bullet. The ball would have been shot out of the gun. advertisement
Method 2 of 2: Make a pistol in the Origami style
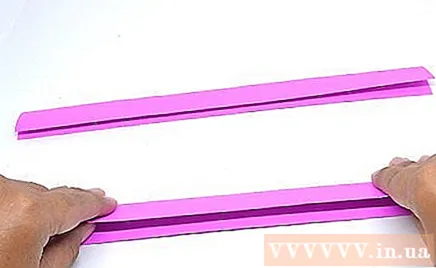
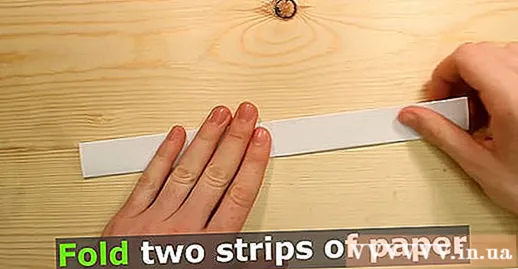
Prepare two pieces of paper and fold them into long thin strips. To start making an origami gun, you need to prepare two sheets of paper. Use large rectangular origami paper. Fold in half and tear into two smaller and wider rectangles. You would fold them like this:- Fold the rectangle in half by width, making it smaller and narrower. Open again.
- Use the middle fold as a guide. Right now, the paper is being divided into two halves. Fold this half inward so that the outer edge of the paper is aligned with the center fold. Same with the other half. The two edges must meet on the center fold of the paper.
- Now fold the paper inward along the fold. You should end up with a long, thin strip of paper.
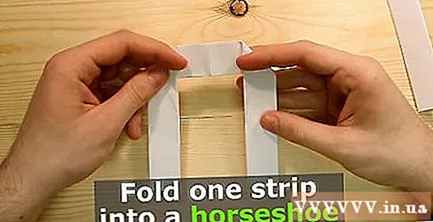
Fold a strip of paper into a horseshoe shape. Take a strip of paper and fold it in half from one end to the other. Open. The center fold divides the paper in two halves. Fold the right end of the paper at a 90 degree angle. Continue to do the same with the other end. Now, the paper will look like a small paper horseshoe.
- The width of the center cross should be twice the width of the paper strip. Place the strip to the right of the center line and fold the "foot" of the horseshoe right where it will contact the strip.
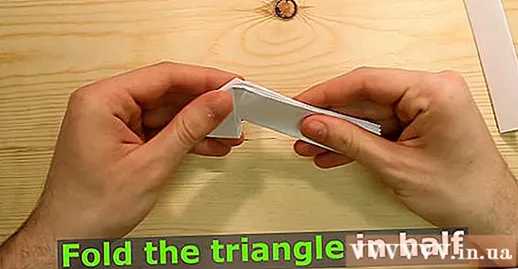
Fold the legs of the horseshoes so they cross inward. Let the folds start at the same position and change the angle so that the horseshoe looks like a drop. They will form a balanced triangle in the middle.
Fold the triangle in half, making it a flat "handle" for your gun. It should be a bit like an "L" with a long and slightly curved edge at the end. You should also fold your long thin strip of paper in half.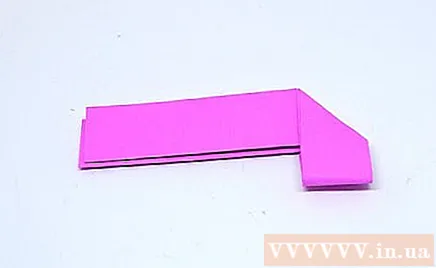
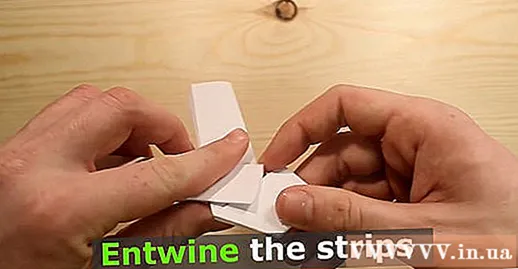
Pass the other strip of paper into the first strip by inserting the end of the paper into the open part of the handle. It may not be that simple, and so do it slowly. Fold the first piece of paper in half lengthwise. You will slip it into the handle:
- Slightly pull open the handle. The part that bends down will have two small gaps. Pass the other end of the strip over them.
- Pull both ends of the strip over the two gaps of the horseshoe until a wide angle is about 110 degrees. The ends of the paper strip will form the gun "barrel".
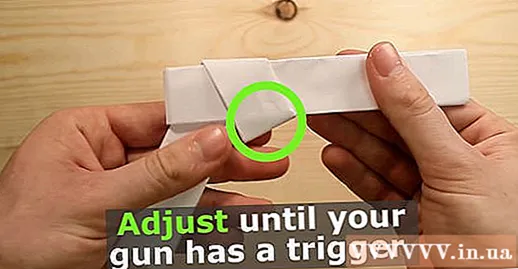
Adjust until the gun triggers, using staples to fix the handle and gun barrel. You should now be able to see the outline of the gun. There should be a strip of folded paper that protrudes right below the barrel of the gun. Gently pull down until it tilts downwards. You could break open and snap into this handle like a trigger.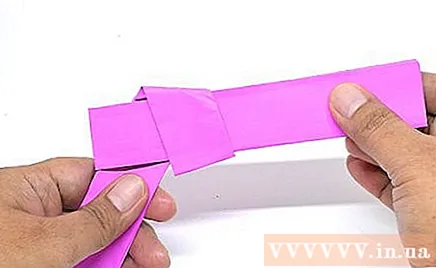
Use a specialized knife to cut a small piece about 1 cm above the handle of the gun. This will be the place to "load" bullets. The cut should be about 0.5 cm deep and 1 cm wide. Cut between your "trigger" slant.
- You may have to cut twice - one through the barrel and one through the mouth below. If so, try to pull a bit so that they form a "trigger" or a small lever that in movies, people still pull back before shooting. This small cut will hold the rubber strap in place.
- Make sure it's a cut deep enough to hold the rubber strap (bullet).
Cut a small cut in the barrel of the gun. Just big enough to hold the rubber strap on the other side. You can then attach the wire between this cut and the first cut. When pulling the trigger, the cut is moved enough to release the rubber strap and help the gun fire bullets!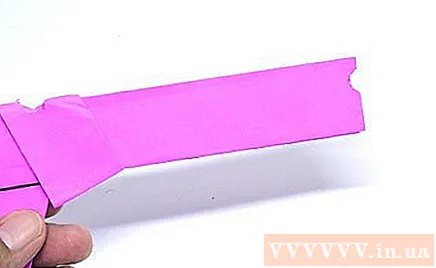

Advice
- Fold firmly and roll the paper evenly for best results.
- Stack plastic cups in a pyramid shape to use as a target.
Warning
- Do not shoot other people with a paper gun.
- Do not make or bring paper guns to school. With schools with strict rules, you may be expelled or suspended.


