Author:
Monica Porter
Date Of Creation:
16 March 2021
Update Date:
15 May 2024

Content
- Some single-sided boxes are pre-attached with cardboard pieces. Even though this design has kept the box firm during work, it can still help to stick the edges of the box to make it even more secure.

- This is the size of the window you would cover with cloth, parchment paper, or tissue. If the box is too big, make the window small to make sure the cloth or paper can still cover.
- You can also draw a window at the top of the box to focus light on the product you intend to shoot from top down.
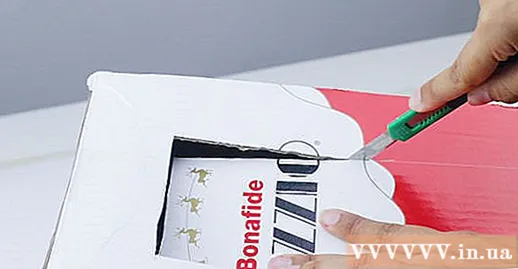
Cut out the window of the box. Use a multi-purpose knife or sharp scissors to cut along the line you have drawn. Cut around in straight segments until the middle piece of cardboard falls off, revealing a void like a small window frame. Do the same with the other side to create another window frame.
- To cut straight, hold a ruler and press on the line drawn with a pencil and cut along them. This does not affect the functionality of the box, but also makes the box look better.

- White poster paper works great for this because it is flat and doesn't wrinkle easily inside the box. This type of paper is often sold cheaply at craft stores. If you can't find it, you can use a temporary large piece of white cardboard or glossy business card paper.
- White poster paper gives the viewer a "infinity" feeling as if the object you are photographing is in an empty space. Try using a variety of colors to achieve many interesting effects.
- The most important part of the material you choose is the matte finish. Anything that is too glossy can cause light reflection, and adversely affect the intended use of the product shooting box.

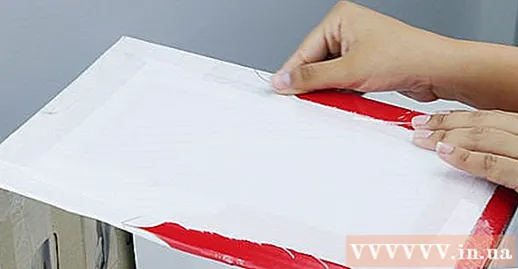
Stick the poster paper on the inside of the box. Attach a long piece of tape or tape to the edge of poster paper. Be careful not to let the tape touch anything else, press it inside the cardboard box as close as possible to the inside of the top. Use another piece of tape so that the bottom edge of the poster paper stays firmly on the bottom of the box.
- Minimize the wrinkling or folding of poster paper. Try to bend the paper slightly to the bottom corner on the inside of the box.
- Don't worry about wrapping the box as long as you have a wide enough section to take the photo without seeing any exposed cardboard.
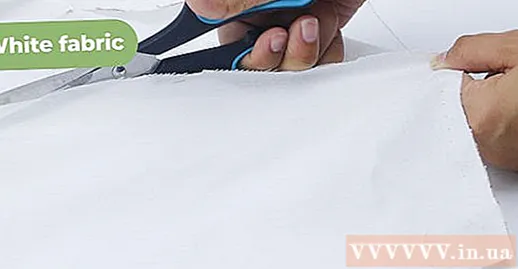
- To make it easier to do this, you can align the original trimmed pieces to create the window. Place it on a piece of cloth or tissue and cut it around, taking care to leave some space on each side for the tile to stick to the box.
- You can use plain white cloth, tissue paper, stencils or anything like that. The material you choose should just be non-reflective and let in a little bit of light, but not at all.
Stick or attach the fabric or tissue in the correct position. Starting at the top edge of the material of your choice, use a piece of tape or some hot glue to attach the material to one of the windows. Drop the cloth to cover the windows, and use additional tape or glue to stick to the remaining edges. Repeat for all the windows you have cut until they are completely covered. advertisement
Part 2 of 2: Using the box
Try adjusting the camera settings. The photo you take doesn't always look balanced and well-lit, so the first series of shots could be overexposed or out of color completely! Change your camera's shutter speed, light sensitivity and white balance settings until the image looks normal.
- If you are using a camera app in your smartphone or camera, do not make any adjustments in the settings.
- Often an image that looks too yellow or green is a sign that your white balance adjustment is not correct. If the photo looks too dark or too bright, try adjusting the brightness by changing the sensitivity, shutter speed, or aperture. Keep trying until you get the perfect shot!
Take a photo. Once you have gathered all the items you need and the camera settings are complete, now is the time to take the photo. Move the camera until there is nothing but white background in the frame, hold it firmly and take a few shots!
Use open cardboard flap pieces to block direct light from the light to the camera. Any light that does not pass through the window may cause flash and reduces the effect of the product capture box.
advertisement
Advice
- Make sure you are on matte paper and not on glossy poster paper. Glossy poster paper can reflect light and cause glare.
- Try using poster paper or even fabric of different colors to get the effect you want.
- Wear a one-color long-sleeved shirt when taking pictures to prevent your hands or camera from appearing in mirror images of objects you are taking.
Warning
- Make sure the light does not cause a fire!
- Be careful when using a multi-purpose knife. Avoid cutting the wrong meat and hands.
What you need
- Cardboard box
- White cloth, tissue paper, and stencils
- White glossy poster printing paper
- Tape
- Ruler
- Pencil
- Multi-purpose knife or scissors
- Desk lamps or other directional lighting
- Camera or smartphone


