Author:
Lewis Jackson
Date Of Creation:
13 May 2021
Update Date:
12 May 2024

Content
This wikiHow teaches you how to connect a Logitech wireless mouse to a Windows or Mac computer. You can connect a standard wireless mouse using the USB receiver that came with the mouse, while the Bluetooth mouse needs to be connected through the settings on your computer.
Steps
Method 1 of 3: Connect to a wireless receiver
. The Start menu button is in the lower left corner of the taskbar.
(Setting). This icon is shaped like a gear and is located in the Start menu.

. The Bluetooth icon is located in the menu bar in the upper right corner.
Click Open Bluetooth Preferences (Open Bluetooth preferences). This option is at the bottom of the Bluetooth menu. A list of all Bluetooth devices paired with your Mac will appear.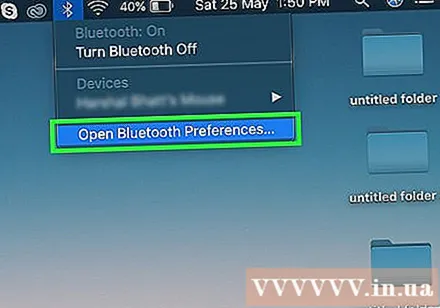

Turn on Logitech mouse. The On / Off switch is located on the bottom of the mouse.
Click the Connect button. The Connect button is below the wireless mouse. You may need to use a paperclip or a small applicator to press the connect button.
- Some Logitech wireless mouse models also have a Channel button. If this is the case with your mouse, click the Channel button to select the channel before pairing via Bluetooth.

Click the button Connect is located opposite the wireless mouse on the screen. Once detected by your Mac, the wireless mouse will appear in your computer's list of Bluetooth devices. Click the "Connect" button located opposite the option. Then, the message "Connected" will appear in the list of Bluetooth devices on your Mac. advertisement


