Author:
Laura McKinney
Date Of Creation:
9 August 2021
Update Date:
10 May 2024
Content
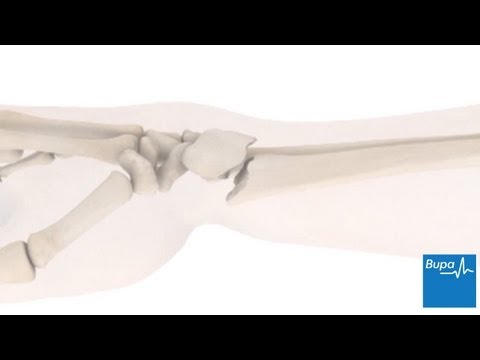
A wrist fracture can include a rotating and / or cylindrical fracture as well as many other bones in the wrist. This is a fairly common injury. In fact, the rotating bone is the most susceptible to fracture in the arm. One in ten fractures in the US are rotational fractures. You can break your wrist when you fall or hit something. People particularly at high risk of wrist fractures are athletes playing high impact sports and people with osteoporosis (thin and brittle bones). When treating a wrist fracture, you may need to wear a brace or cast until the bone heals. Read on to learn some ways to treat a broken wrist.
Steps
Part 1 of 4: Getting treatment
See a doctor. A wrist fracture is a condition that requires medical attention to heal properly. If the pain is not very painful, you can wait until you see your doctor. If you have any of the following symptoms, seek medical attention right away:
- Severe pain and swelling
- Numbness in your wrists, hands, or fingers
- Distorted, bent, or crooked wrists
- Open fracture (a fracture where a piece of bone sticks out of the skin)
- The fingers are pale

Understand the treatment process. Most wrist fractures are initially treated with a splint, a hard plastic, fiberglass or metal rod fixed to the wrist. A brace is usually used for a week until the swelling subsides.- Once the initial swelling has subsided, it is common to have a plaster or fiberglass cast after a few days or a week.
- You may need a second cast in 2-3 weeks if the swelling continues to decrease and the original cast becomes looser.
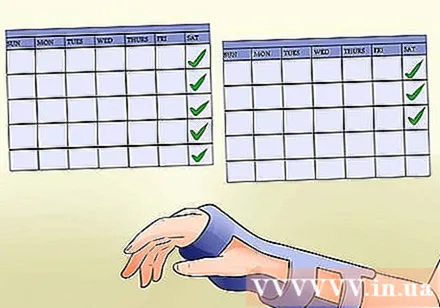
Wait 6-8 weeks after applying the cast. Most wrist fractures will heal within 6-8 weeks with proper treatment. This means that you will need to be cast for most of the time.- Your doctor will usually do x-rays at this stage to make sure your wrists are healing properly.

See a physical therapist. After removing the powder, you may be referred to a physical therapist. Physiotherapy can help you regain wrist strength and mobility after the injury.- If you don't need to do physical therapy with a specialist, your doctor may recommend exercises for you to do at home. Be sure to follow your doctor's instructions so that your wrist can fully regain function.
Part 2 of 4: Reducing pain and swelling
Wrist highs. Raising your wrists above heart level can help reduce swelling and pain. It is important to raise your wrists for at least the first 48-72 hours of the cast. Your doctor may advise you to raise your wrists for longer.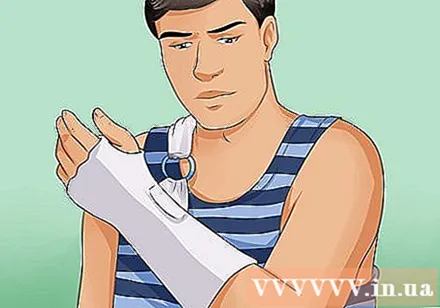
- You may also need to rest your wrists while sleeping or throughout the day. Try putting your hands on a stack of pillows.
Apply ice to your wrists. Ice therapy can help reduce swelling and pain. Remember to keep the dough dry while applying the ice.
- Put ice in a plastic zippered bag. Remember that the ice pack should be sealed to avoid water leaks. Wrap a towel around the ice pack to ensure condensation doesn't get into the powder.
- You can also replace an ice pack with a bag of frozen vegetables. Choose small, evenly sized vegetables, such as corn or beans. (Of course, you shouldn't eat it after using a vegetable bag.)
- Hold the ice pack on your wrist for 15-20 minutes, every 2-3 hours. Apply ice for the first 2-3 days or as advised by your doctor.
- Shop gel ice packs are also very helpful. These ice packs can be frozen and used repeatedly, do not melt and leak water into the powder. You can find ice packs at medical equipment stores and drugstores.
Take an over-the-counter pain reliever. Wrist pain can often be treated with over-the-counter pain relievers. Talk to your doctor about which pain reliever is right for you. Some pain relievers can affect any illness or medications you are taking. Your doctor may recommend a combination of ibuprofen and acetaminophen / paracetamol to ease pain and reduce swelling. These drugs are more effective when combined, rather than just one.
- Ibuprofen is an NSAID (a nonsteroidal anti-inflammatory drug). This class of drugs reduces fever and reduces swelling by preventing the body's production of prostaglandins. Other NSAIDs include naproxen sodium and aspirin, but aspirin is more effective against blood clots than other NSAIDs.
- Your doctor may not give aspirin to your doctor if you have hemophilia, asthma, anemia, or some other medical condition. Aspirin can interact with many diseases and drugs.
- When giving pain relievers to young children, you need to make sure you are taking a medicine that is formulated for children and taking the correct dose for the child's age and weight. Aspirin is not recommended for children under 18 years of age.
- There is a risk of liver damage from taking acetaminophen, so take only what your doctor recommends.
- Do not take over-the-counter pain relievers for more than 10 days (for children, 5 days) unless directed by your doctor. If the pain persists after 10 days, see your doctor.
Move your fingers and rotate your elbows. It is important to exercise non-cast joints, such as your elbows and fingers, to maintain blood circulation. This will help speed up the recovery process and increase mobility.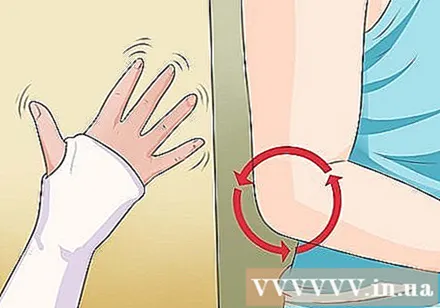
- If you feel pain when moving your elbow or finger, contact your doctor.
Avoid using anything to poke the dough. You may feel an itchy area under the cast and want to scratch. Don't! This action could damage the skin or damage the powder. Do not poke inside the dough with anything.
- Try picking up the dough or blowing it up in a "low" or "cool" setting using a hair dryer.
- Also, do not sprinkle the powder inside the dough. Anti-itch powder can cause irritation when stuck underneath the powder.
Use moleskin patches to prevent rubbing. The edges of the powder can rub against the skin or cause irritation. You can apply moleskin (a soft cloth with adhesive back) to the affected area. The moleskin patch is available in pharmacies.
- Apply the moleskin to clean, dry skin. Replace the patch when it becomes dirty or loses its adhesive.
- If the edges of the dough are too rough, you can file a smooth nail file with your nail file. Do not peel, cut or break the dough.
Know when to call the doctor. Most wrist fractures will heal within a few weeks with proper care. Call your doctor if you experience any of the following:
- Numbness or throbbing in your hand or finger
- The fingers are cold, pale, or bluish-purple
- Pain or swelling increases after the cast
- Skin scratches or irritation at the edge of the powder
- There are cracks or soft spots on the dough
- The dough is wet, loose, or too tight
- The powder smells bad or causes persistent itching
Part 3 of 4: Daily activities with hands in cast
Avoid getting the powder wet. Most of the cast is plastered so it is easily damaged by water. Wet dough is a favorable environment for mold to grow inside the dough. Wet powder can also cause ulcers on the skin below the powder layer. Therefore, you should take care not to get the dough wet.
- Cover a strong plastic bag (such as a garbage bag) out of the bath powder. Keep your hands away from the shower or tub to reduce the risk of water getting into the powder.
- Wrap a small washcloth or towel around the top of the powder layer to prevent water from dripping into the powder layer.
- You can purchase a waterproof pad to protect the powder at your doctor's office or medical equipment stores.
Dry the powder as soon as it gets wet. If the dough gets wet, soak the water with a towel, then use a hairdryer to "low" or "cool" setting for 15-30 minutes.
- Call your doctor if the powder is still wet or soft after you've tried to dry it. You may need a new powder.
Put your socks on your hands. If your fingers are cold while the cast is on, you may have problems with circulation (or maybe it's just cold indoor air).Try raising your wrists and putting a sock on your hand to keep your fingers warm.
- You can move your fingers to help restore blood circulation.
Choose clothes that are easy to wear. During the cast, you may have trouble getting buttoned or zipped clothes on. Wearing a shirt that fits snugly or has tight sleeves is not a good idea, as you won't be able to get through the cast hand.
- Wear loose, stretchy clothing. If you wear t-shirts or skirts, you won't have to fumble about buttoning or zipping.
- Wearing a sleeveless or short-sleeved shirt is a good idea.
- Use healthy hands to gently insert the cast hand into the sleeve. Try to limit your use of castings.
- Wear a towel or blanket to keep warm instead of a jacket that is often difficult to wear. A pullover or sleeveless cape may be an easier option than an out-of-the-box jacket.
- Don't be afraid to ask others for help when needed.
Ask for help taking notes in class. If you're at school and have broken your dominant wrist, you may need to ask someone to take notes or use some other means while your wrist is not healed. Talk to your teacher or the school's student support department.
- If you can practice writing with your non-dominant hand, it may help, but it's also difficult and not a long-term solution.
- If your non-dominant arm breaks, use a heavy object like a book or a paperweight to hold the page while you write. Try to avoid using painful hands.
Use healthy hands in daily activities. When possible, use your non-injured hand for everyday activities, such as brushing your teeth or eating. This will help reduce inflammation in the broken wrist.
- Do not lift or handle objects with your sore hands. You may be injured again and it will take longer to heal.
Avoid driving or operating machinery. This is especially important if you have broken your dominant wrist. It is not safe to drive with your hands on, and your doctor will usually advise you not to drive.
- Although the law does not prohibit driving with your hands in a cast, you should use your judgment to decide whether or not to drive.
- You should also avoid operating other machines - especially machines that require both hands.
Part 4 of 4: Recovery after dough removal
Take care of your arms and wrists after removing the powder. You should feel dry and maybe slightly swollen after the powder is removed.
- The skin where the powder was recently removed may also dry or flake. The muscles appear smaller than before, and this is normal.
- Soak your arm / wrist in warm water for 5-10 minutes. Use a towel to gently dry.
- Apply moisturizer to your wrists and arms to soften your skin.
- To reduce swelling, you can take ibuprofen or aspirin as recommended by your doctor.
Return to normal activities as advised by your doctor or physiotherapist. It may take a while for you to return to normal activities. Specifically, you need to wait 1-2 months to be able to repeat light exercises like swimming or cardio exercises. For more intense activities like playing sports, you may have to wait 3-6 months.
- Be careful not to injure your wrist further. Wearing a brace can help prevent future wrist injuries.
Remember that recovery takes time. It doesn't mean that your hands are healed by removing the powder. Severe fractures can take up to 6 months or more to heal.
- You may continue to have pain or stiffness in your arms for months or years after the break.
- Your age and overall health also affect your recovery. Children and adolescents often heal more quickly than adults. Elderly people and people with osteoporosis or osteoarthritis may not recover quickly or completely.
Advice
- Try to raise your arm above heart level when the pain is severe. This position will help the blood and fluid flow to the heart, reducing pain and swelling slightly.
- Try to raise your arms while sleeping. Lie on your back and place a pillow under your wrist.
- If you need to fly with the cast, check with the airline. You may not be able to fly for 24-48 hours after the cast.
- You can write the cast by hand. Use a brush to avoid getting ink on clothes or paper.
- If you have difficulty opening the bottle, you can hold the bottle between your thighs / knees and open the cap with your good hand.
Warning
- Seek medical attention for broken wrists. You can experience serious complications if not treated properly.


