
Content
- To step
- Method 1 of 3: Keep an eye on the females and catch up with them
- Method 2 of 3: Preparing for insemination
- Method 3 of 3: Inseminate the female bovine
- Tips
- Warnings
- Necessities
Artificial insemination (AI) is the second most common way of raising livestock - in fact, it is the only alternative way to natural breeding of livestock through mating. AI is much more common in milk production than in meat production, but its use is also increasing in the meat industry due to increased accessibility and the availability of proven superior bulls. Knowing how AI works in livestock is important to achieve a high level of success in breeding livestock where having your own bull is not profitable or recommended. The following steps provide a reasonably detailed picture of what is involved in the artificial insemination of livestock. To understand the process of AI and to get a certificate for artificial insemination, you visit a bull seed company. See if they offer programs to obtain AI certification or become a certified AI technician. Take part to learn more about artificial insemination. This is useful if you don't have a bull to breed with yet. Also consider hiring an experienced and certified technician to inseminate your cows. It's better to hire these craftsmen than to teach yourself how to do it.
To step
Method 1 of 3: Keep an eye on the females and catch up with them
 Keep an eye on your cows and / or heifers for signs of heat. Females become in heat about every 21 days and can then be fertilized for 24 hours.
 - Check out other articles on how to determine if a cow or heifer is in heat and what the psychological, physical and behavioral signs of fertility are.
- Most fertilization periods begin or end around dawn or sunset.
- Check out other articles on how to determine if a cow or heifer is in heat and what the psychological, physical and behavioral signs of fertility are.
 Inseminate the females twelve (12) hours after the heat. This is the period in which the cow ovulates, when an egg enters the fallopian tube to be fertilized by a bull's sperm.
  Guide the cows or heifers calmly and correctly between the cattle fences (an alley with a top fence is sufficient). If there are other cows behind the cow, make sure they are behind another fence to avoid getting squashed when they try to move forward. If you have a palpation cage bottle neck system, use it for insemination. Some sheds are designed in such a way that all cows can be secured next to each other in a front gate. This is very useful for the AI technician, who has to inseminate more than 50 cows in a day!
 - If the insemination is done outdoors, it is best to do it on sunny, warm days and not on rainy, windy or stormy days. If you have an indoor facility, that's an advantage!
Method 2 of 3: Preparing for insemination
 In a thermos, prepare a water bath with a temperature of 34-35 degrees Celsius. Use a thermometer for accuracy.
 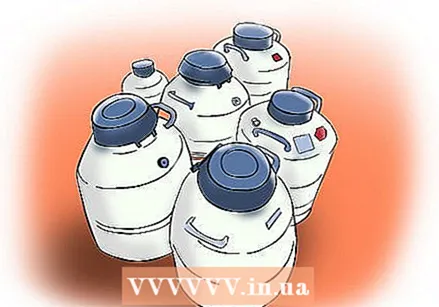 Determine which container contains the seed you need. A seed inventory is displayed on the holder, which shows the location of each bull, so you don't have to search unnecessarily long.
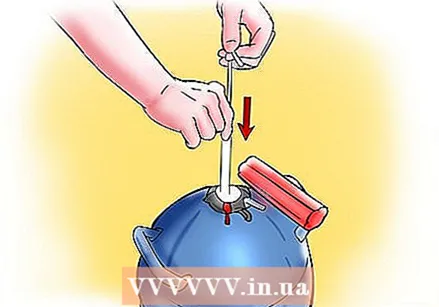
  Remove the ampoule from its storage location to the center of the holder. Lift the ampoule just high enough up the neck of the holder to grab the desired seed tube. Do not lift the tops of the tubes higher than the frost line, or 5-7.5 cm from the top edge of the container.
  Take the desired tube and then immediately lower the ampoule to the bottom of the holder. Keep the tube as low as possible in the holder while you remove the straw with seed with tweezers.
 - You only have 10 seconds to remove the seeded straws!
 Shake the straw to remove excess liquid nitrogen. Nitrogen quickly evaporates to a gas when exposed to air and warmer temperatures.
  Place it directly into the prepared thermos with warm water and let it sit there for 40-45 seconds.
- The warm water should be about 35ºC for optimal thawing of the seed straws.
 Return the tube to the holder by pulling the ampoule up and over the tube and returning it to the storage position, immediately after placing the straw in warm water.
- Any time it takes longer than 10 seconds to find a straw, the tube should be placed back in the holder to cool completely. Plate a seed unit never back into the holder after removing it from the tube.
 Have your insemination syringe ready by assembling it beforehand (this should be done before / after preparing the thermos with warm water). If it's cold outside, preheat the syringe inside you all over, close to your body, so it warms up properly. It also helps to rub the syringe on a paper towel to warm it up. If it is warm outside, keep it in a cool place. The insemination syringe should not feel very hot or very cold.
  Remove the straw from the thermos and wipe it dry with a paper towel. It must be completely dry before you continue to work with it. Gently tap your wrist while holding the pleated end to move the bubble in the straw. Your taps should move the bubble to the end you are holding.
  Place the straw in the slot. Cut about 1 cm from the pleated end of the straw. Use sharp scissors or a specially designed cutter for this purpose. Cut through the area where the bubble is.
  Wrap the insemination syringe in a clean paper towel or protective cloth. Tuck it into your clothes, against your body, to move it to the cow and maintain a constant temperature.
Method 3 of 3: Inseminate the female bovine
 Move the tail so that it rests on your left forearm or tie it up so that it does not interfere with the insemination process. Lift the tail with one hand (preferably the right one) and gently reach into the cow with the other hand (which should be covered with a lubricated glove) to remove any feces. Feces can interfere with the process of sensing the cow's vagina and inserting the insemination syringe.
 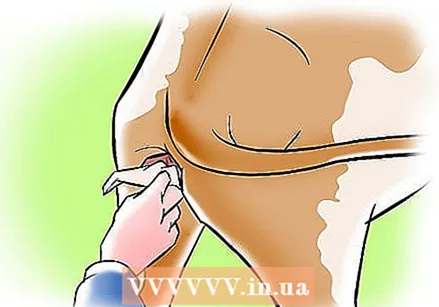 Clean the vulva with a clean paper towel or an old cloth to remove any remaining faeces and dirt.
 Take the syringe out of your coat or all over, unpack it and insert it into the cow's vulva at a 30 degree angle. This way you avoid entering the bladder through the urethra.
  With the fingertips of your left hand (which is in the cow's rectum), feel through the wall of the rectum and vagina to the end of the insemination syringe and continue until you find the cervix.
 Grasp the cervix with the hand that is in the cow's rectum (as you would grab a rod under your hand) and hold it steady as you push the syringe into and through the cervix.
 When the syringe is all the way through the cervix, check the location with your index finger. The syringe should be only 0.5-1 cm in the uterus.
  Slowly push the syringe out at the end where your right hand is, so that about half of it is injected.
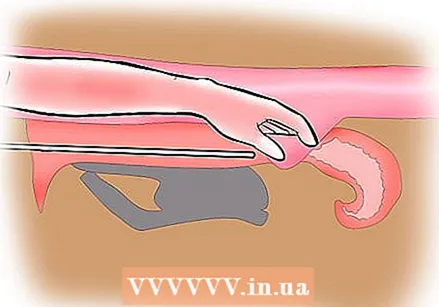 Recheck the location of the semen to make sure you are spraying into the cow's uterus and not one of the blind spots (see tips below), then squirt the other half of the straw's contents.
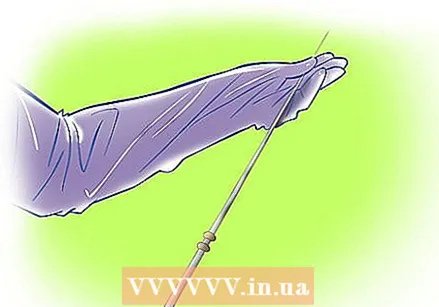 Slowly remove the insemination syringe, hand and arm from the cow. Check for blood, infection, or semen receding from the vagina.
  Check the straw again to make sure you used the correct seed for the cow.
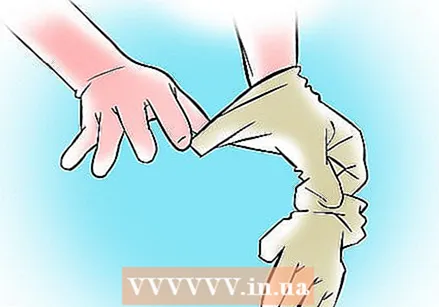 Dispose of the straw, glove, and paper towel properly.
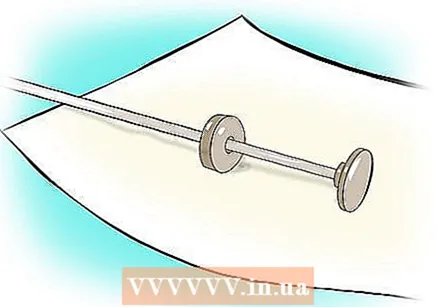 Clean the insemination syringe if necessary.
 Record breeding information in the system that you have at hand for this.
 Release the cow (if necessary, depending on the setup you are using) and bring in the next cow to be inseminated.
 Check the temperature of the water in the thermos again before going through the steps above for the next cow.
 Repeat the above steps for the next cow.
Tips
- Always keep insemination equipment clean, warm and dry.
- Insemination equipment should never come into contact with lubricants, as most lubricants are spermicides.
- Liquid nitrogen is the best way to keep seed cold and long-term.
- Never let the end of the insemination syringe go far beyond the cervix, or you risk infection or piercing the uterine wall.
- Always hold the pipette tip up at a 30 degree angle, not down, to avoid entering the bladder.
- Take your time raising livestock. There's nothing worse than rushing to get it done, as rushing often results in a lot more mistakes.
- Take only one seed straw at a time from the container. You only do one cow at a time, so it is best to thaw each seed unit individually.
- Use your fingers to find the insemination syringe and guide it through the cow's vagina. Avoid two blind spots on the way to the cervix.
- There is a blind, round pocket at the back of the cervix, it is 1-2 cm deep. This pouch surrounds the entire, domed back of the cervix.
- The cervix is not a straight and narrow passage. It contains finger-like protrusions that bend the passage. These also cause dead ends and blind spots, which can pose problems for people learning how to inseminate livestock.
- Insert your gloved hand in the same way as performing rectal palpation on cows and heifers.
Warnings
- Low conception rates are common in cows inseminated by inexperienced technicians.
- Beware of the blind spots listed above under Tips.
- In fact, AI is much more difficult than it sounds. Many mistakes can be made in positioning the insemination syringe, for example in the cow's urethra, because the location of the syringe is easily displaced and it is impossible to control its placement.
- Never inseminate cows yourself unless you are experienced and have the necessary knowledge.
Necessities
- KI holder with ampoules and tubes
- Liquid nitrogen
- Straws with the desired seed
- Insemination syringe
- Paper towel
- Scissors to cut the straws
- Thermos bottle (preferably with a wide opening)
- Lubricant
- Shoulder length gloves
- Tweezers
- Thick gloves


