Author:
Morris Wright
Date Of Creation:
21 April 2021
Update Date:
14 May 2024

Content
- To step
- Method 1 of 4: Half single crochet (crochet)
- Method 2 of 4: Granny connection (hooks)
- Method 3 of 4: Overcasting (sewing)
- Method 4 of 4: Invisible stitch
- Tips
- Necessities
- Crochet methods
- Sewing methods
You can connect Granny Squares with each other by sewing or by crocheting. You can do it in many different ways, but here are a few simple yet beautiful ones to get you started.
To step
Method 1 of 4: Half single crochet (crochet)
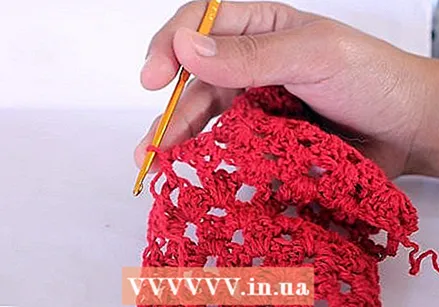
 Combine the squares. Place two granny squares on top of each other right sides together.
 - This way you get a strong seam that is strong enough to hold large sections together.
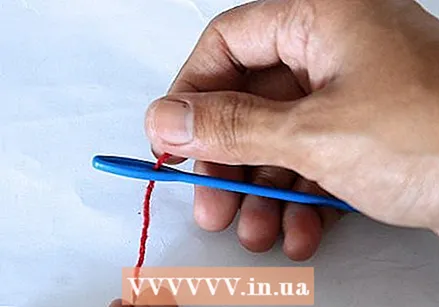
 Tie the thread to your crochet hook. Make a sliding loop on one side of the yarn and insert your crochet hook through the loop.
 - You make a sliding loop by placing two loops next to each other. Pull one loop through the other to get a single loop with a loose knot around it.
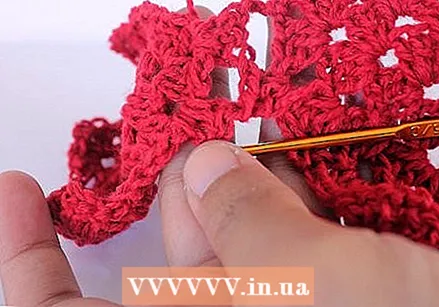
 Work in the back loops of both squares. Insert your crochet hook through the back loops of each square, start at the top right. Hook into your thread at the back, and pull it through so that you get a second loop on your crochet hook.
 - You can see that the first loop on your crochet hook is the one you made with your sliding loop. This loop is now hanging on the crochet hook.
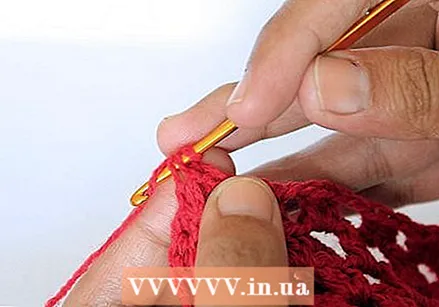 Pull the second loop through the first to make a slip stitch. Use your crochet hook to pull the second, new loop through the original loop on your crochet hook. This is how you make the first slip stitch of your connecting chain.
  Continue like this for the rest of this side. Put your hook through the next two loops from the whole side each time, making a slip stitch in front of each stitch.
 - Make sure you don't crochet too tight. If you do that, the seam will be too tight and your workpiece will become less elastic.
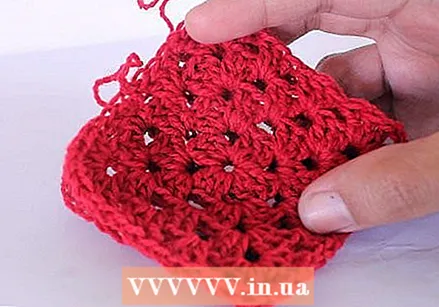
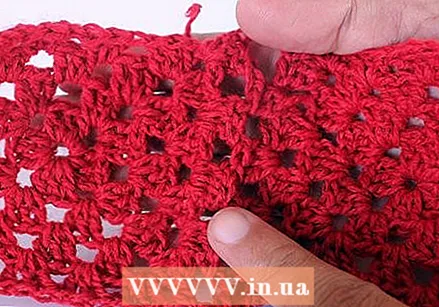
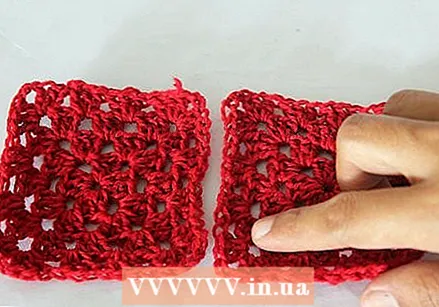
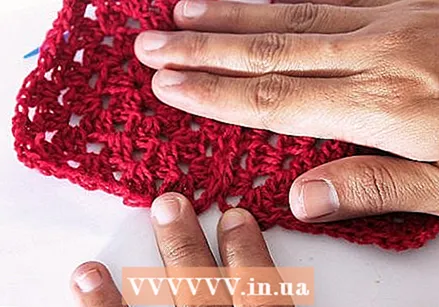
 Add as many squares and rows as you need. You can attach more squares to other sides of your original two squares in the same way. Keep growing your blanket, scarf or whatever you make by adding a new square every time.
 - Finish the workpiece with an edge or by tucking the loose thread invisibly in the last seam, so that the seam does not come loose.
Method 2 of 4: Granny connection (hooks)
 Combine the squares. The first square of the row should be on the left and the second on the right next to it. Place the second square on top of the first, back to back.
 - Note: If you have a particular order or pattern in mind, you should have it ready before you start stitching your rows together.
- Stack the first row. The last square of that row should be on the bottom and the first on top. The smaller the stack, the easier it works.
- This method gives an elastic and decorative seam between the squares.
 Attach the yarn to your crochet hook. Make a sliding loop on one side of the thread and insert your crochet hook through the loop.
 - You make a sliding loop by placing two loops next to each other. Pull one loop through the other and gently pull them apart so that you get a single loop with an easy-adjust knot.
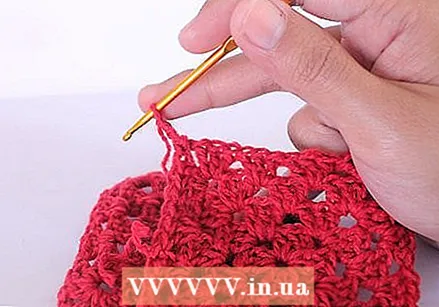 Work three chain stitches in the corner of the top square. Attach your thread with a slip stitch in the corner arch of your top granny square, and work three chain stitches in it.
  Make three double crochets in the corner of the bottom square. You connect the bottom square with the top one by crocheting three double crochets in the corner arch of the bottom square.
 - You may have to hold the squares differently while you hook them together. If you find it difficult to hook them together when holding them together, you can also unfold the squares so that you have the common sides facing you. You now have the "top" square on the right, and the "bottom" is now on the left.
 Crochet double crochets in the next loop of the top square, and then again in the next loop of the bottom one. Make three double crochets in the next arc of the top / right square. When you have finished it, make three double crochets again in the next arc of the bottom / left square.
 - Continue in this manner with the common sides of these squares. Alternate between the back and the front, making three double crochets in each arc between the edges of both squares.
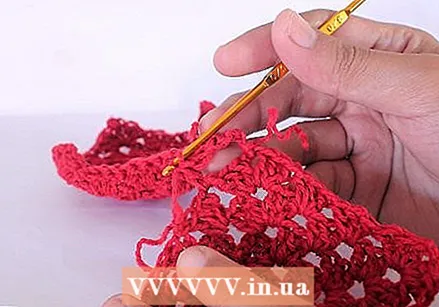
 Make one double crochet in the corner of the bottom square. When you are at the end of this seam, make a double crochet in the last corner arc.
 - Fasten off to complete this seam.
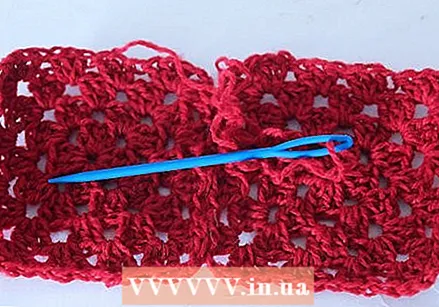
 Repeat this with all other squares in this row. Connect the squares of all other rows in the same way.
 - Repeat this procedure for each stack (or row) of granny squares as well.
 Place the rows next to each other. Always work with two rows at the same time. Place the rows on top of each other wrong side together.
 - You connect the rows in the same way as the separate squares.
 Connect the rows with sticks. Follow the same pattern you used when connecting the loose squares. Chain three in the corner of the front row, then three double crochets in the corner of the back row.
 - Make groups of three sticks, alternately in the arcs of the front and back rows, until you get to the end.
- The seam between two squares in a row should be treated the same as any other arches, so make three double crochets in it as well.
 Make another granny round around your entire project. When you have worked all your squares and rows together, you can work groups of three treble crochets in the arches around the entire circumference to finish it off and fix any imperfections.
Method 3 of 4: Overcasting (sewing)
 Combine the granny squares. Place two granny squares on top of each other right sides together.
 - This method is quick and easy, and if you don't tighten the stitches too tightly, you will get an elastic and soft seam.
 Thread your yarn through the needle. Use a large embroidery needle for your yarn. Insert one end of the yarn through the eye of the needle and pull it in far enough so that you don't lose the thread while sewing.
 - You don't have to tie a knot in the thread, but you can if you find it difficult to keep the thread in the needle. Then tie the short end of the thread on the other side, just past the eye of the needle.
 Start in the top right corner. Pull the thread through the back loop of both the top and bottom squares.
 - Don't pull the thread all the way through the loops, as you don't have a knot at the end to hold it in place.
- When you pull the thread through, leave enough space at the end to either tie a knot or tie another square; it depends on whether your square is at the end of a row or somewhere in the middle.
 Sew the thread through all the back loops on one side. Bring the needle over the edge of both squares and insert it into the next back loop of the square. Put it one more time through the loops of both the top and bottom squares.
 - Repeat these steps with the next pair of back loops. In fact, you are now sewing the squares together with an overcasting stitch, which is a stitch that goes over the edge of the material instead of the edge.
- Continue like this to sew the top edge of these two squares together.
 Add more squares as desired. After you have sewn the two squares together you can use the same technique to attach squares to the other sides of these squares. You can attach squares on all sides as it suits you.
 - When you are all done, tie off your thread at the back of your last square.
Method 4 of 4: Invisible stitch
 Arrange the squares in order. To start, put two of your squares next to each other. You are going to attach these two together first.
 - It is wise to explain all your squares first, so that you can see what the total effect will be.
- The squares should all be right side up.
- It is also recommended to start with the squares that should be in the middle row of your overall project.
- This method also produces an elastic seam, but unlike the overcasting stitch, it is invisible on both sides of the work.
 Put your thread through the needle. Take a large embroidery needle. Put one end of the thread through the eye of the needle and pull enough thread through it to make sure you don't lose the thread while sewing.
 - Do not tie a knot in the thread yet.
- Choose yarn that is slightly thinner than the yarn you used for your granny squares.
 Insert your needle through the bottom left corner of the first square. Take the right square from your first pair. Pass the needle through the cross thread on the side of the square, bottom left.
 - By "cross thread" is meant the connecting thread between the threads at the front and those at the back of the square. You can only see that cross thread on the side.
- Insert your needle into the bottom right corner of the second square. Take the square that should be directly to the left of your first square. Put the needle through the cross thread at the bottom right of this square.
- Don't pull it tight just yet.
 Continue like this along one side. Work your thread through the next cross thread along the common side of the first square. Then you work it through the common side of the second square.
 - Keep sewing through the cross threads on both sides so that you connect the squares on that common side.
- Leave the stitches loose for now so that it works easier.
 Pull the connecting stitches tight. Take the two loose ends of the connecting wire. One hangs at the bottom and the other at the top. Pull the top and bottom tight to seal the seam, pulling the two squares so close together.
 - This step makes the seam "invisible", as it were hidden between the two squares.
 Repeat this process with the next two squares. Grab the next two squares in the row and repeat the procedure to join them together.
 - The next pair should be attached to the first pair later.
- Use the wire hanging from the first pair to join the second pair together. This way the second pair is immediately attached to the first pair.
- Attach the following squares either horizontally or in vertical pairs. If you are working vertically you have to do it in pairs, just like you did when you attached the second pair to the first. If you extend the work horizontally, you can do that by attaching a single square again with an invisible stitch to the empty right or left side of the original square.
- When you are done, hide the thread invisibly at the back of the last square.
Tips
- It is recommended that you learn how to crochet chain, single crochet and double crochet before attempting to join your granny squares.
Necessities
Crochet methods
- Yarn
- Crochet hook
Sewing methods
- Yarn
- Embroidery needle


