Author:
Eugene Taylor
Date Of Creation:
8 August 2021
Update Date:
10 May 2024
Content
- To step
- Method 1 of 3: Preparing your computer
- Method 2 of 3: Collect the correct material
- Method 3 of 3: The burning process
- Tips
- Warnings
At one point or another you will want or need to burn a DVD, be it data, a video file, or a copy of your favorite movie. There are many different types of software that you can use for this, and this article will cover DVD burning regardless of the type of software you are using.
To step
Method 1 of 3: Preparing your computer
 Defragment your computer regularly. When your computer writes information to the hard disk, it does not always end up in the same place, but is spread over the storage medium. This causes programs to run slower, because your computer has to spend time getting these file clusters back from the entire hard drive. Defragmenting will sort all your files (as well as the free space) in an orderly manner. If you burn DVDs often, this can help speed up the process and reduce the occurrence of errors.
  Make sure you have a hard drive with enough space. If you record images with a camcorder and transfer them to the computer for editing, or want to burn movies to DVDs, it is recommended to keep 120GB or 160GB free for video files only; a video of 90 minutes can take up 3GB or on the hard drive, and if you plan to keep recordings, you can quickly run out of space.
 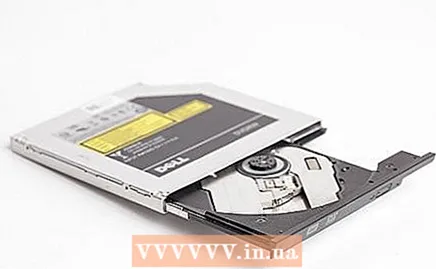 Check for hardware updates. Check the manufacturer's website to see if any updates are available for your DVD burner. If you are using Windows, Windows / Microsoft Update can be used to check for any hardware updates, to see if any hardware drivers have been released.
  Configure your DVD burner so that it becomes the main device. This will make the burner function better. To check the driver configuration, open the BIOS Setup program (press DELETE or a function key during boot) and look in the drivers section. According to Smart Computing: “If your DVD burner is not a master device on both IDE channels, open your PC and switch the connector of the cable between the burner and the other device connected to that channel. needed to switch jumpers (for instructions, see the manuals for both devices), but sometimes a cable connection switch can solve the problem (as long as the motherboard supports Cable Select, which most do). "
Method 2 of 3: Collect the correct material
 Buy the right kind of DVDs. When you want to use recordable DVDs, you will be amazed at the amount of options. If it ends with an "r" it means that the DVD can only be burned once. If it ends with "rw" then the disc is rewritable. If there is a dash (-), it means that the DVD is supported by the DVD forum. The plus (+) formats are not authorized or supported by the DVD forum, but do not need to be "finalized" before they can be used on other DVD players.
 - DVD-R is most sure to work in existing DVD players as well. The best thing to do is to test the DVD player in question to find out which formats are accepted before purchasing DVDs.
- Check your burner to see what formats it supports. Know the burner model you have and ask at the store or manufacturer which sizes are suitable for your burner.
- If you're just starting out, invest in a few DVD-RWs so you can test one. If all goes well, repeat the burning process on a DVD +/- R. It may cost a little more to buy DVD-RWs, but if you're not sure about usability, you'll end up with a mountain of unusable DVDs.
- Check the burning speed of the DVD - is it higher or lower than the maximum speed of your burner? If this is lower, it may be necessary to run the burner at a lower speed, which is not so bad at all if you want to reduce errors (this will be explained in more detail later), but can be very inconvenient if you have the time. falls short.
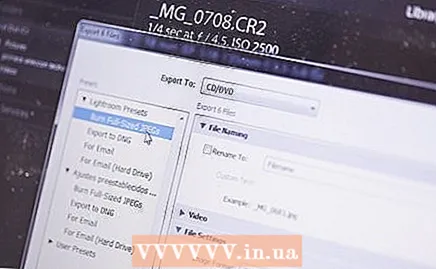 Use software that suits your purposes. If you want to burn a data DVD, you don't need more than generic DVD burning software (you don't need special decryption or region-specific software). If you want to burn a video file to a DVD, find a program that can encode it to MPEG-2 format. And if you want to burn a movie that requires a DVD-9 disc, and therefore holds more data than a standard DVD-R disc, then you need to compress the file and decrypt the digital rights management before converting the file. can be converted to MPEG-2. See warnings below.
 - Before you start using the software, check whether any updates have been published online.
 Clean the DVD player. Dust and dirt can interfere with the burning process, so be sure to keep the DVD player's lens clean. Recommended every 6 months.
Method 3 of 3: The burning process
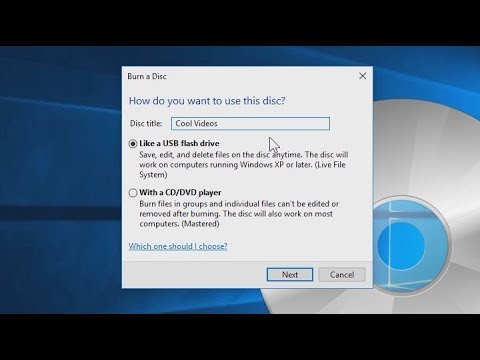
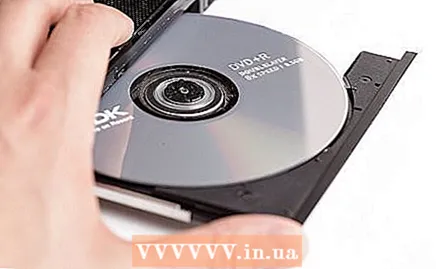 Put the DVD in the burner. If you put a label on it, make sure it is a label that completely covers the DVD; lack of symmetry or imbalance can cause the DVD to be misaligned during the burning process, especially at higher speeds. If you are writing directly on the DVD, use a water-based pen; the alcohol in other types of pens can damage the disc and with it your data.
  Specify the target size. Most programs assume you are burning to a standard DVD, which has 4.3GB of storage (although they advertise 4.7G - but that's on the decimal system and your computer uses the binary system). However, if you are using a Dual Layer DVD, Mini DVD or CD-R, you will need to change this setting.
  Choose the format of the video file. NTSC is used in the US, while PAL is most commonly used in Europe and Asia.
  Burn less quickly. Recording at the fastest possible speed can lead to more errors. Cutting it down to 4x can result in more consistent burning sessions.
  Select the recording quality. The higher the quality, the longer it takes to encode the file and the more space it takes up on the DVD.
  Set a menu if possible and if desired.
 Save the converted files in a specific location. After the burn process is complete, you can optionally delete the files you have already burned.
  Be patient. Filling up a standard data DVD should take no more than 20 minutes, but burning a multimedia disc takes a few hours. The part that takes the longest is the encryption. Do not use the computer during this period - not for email, games, and do not touch the mouse or keyboard.
  Take good care of your burned DVD. Keep them in cases designed specifically for DVDs - since DVDs are actually two discs that are chemically joined, they don't handle the same amount of pressure as CDs, so DVD cases are specially designed to minimize disc bending.
Tips
- If the burn process stops because there is not enough space, you may need to free up space on the hard drive. Find out which folder your program is using for temporary files and delete unnecessary files from that folder. Optionally, you can move the location for temporary files to another drive with more space.
- To keep your computer from busy with too many other tasks, you can shut down the Internet, turn off the firewall, and turn off antivirus, anti-spyware, and other security software during the burning process.
- While editing, keep the end goal in mind. You probably won't be able to store more than 90 minutes of good quality video on a single DVD, and certain conditions, such as fast motion, smooth transitions, and title effects, in addition to poorly lit video, can take up a disproportionate amount of space.
Warnings
- Do not give or sell copies of commercial DVDs to others. That is illegal.


