Author:
Tamara Smith
Date Of Creation:
24 January 2021
Update Date:
16 May 2024

Content
This wikiHow teaches you how to use extra space on your Solid State Drive (SSD) as virtual RAM on a Windows PC. If you have a Mac with an internal SSD drive, macOS will automatically manage the virtual memory settings.
To step
 Right click on This PC. It is the icon on your Windows desktop that resembles a computer. A menu will open.
  click on Properties.
 click on Advanced system settings. You can find this on the left side of the window. This opens the System Properties dialog box.
 - Enter your administrator password if prompted.
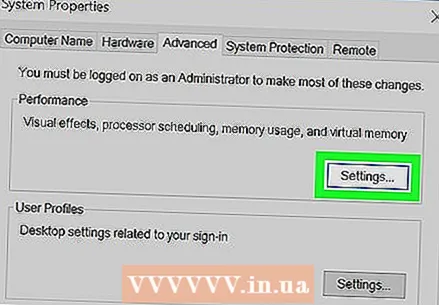 click on Settings under the heading "Achievements". It is the first button of "Settings" in the "Advanced" tab. A list of performance options appears.
 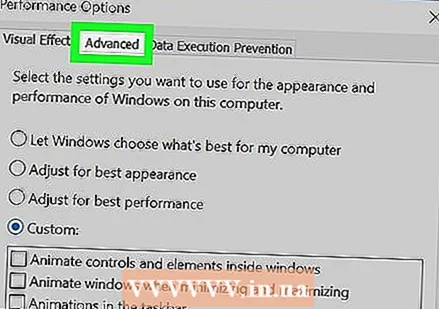 Click on the tab Advanced. It is the second tab in the window.
 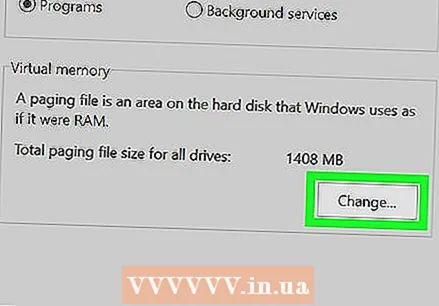 click on Modify…. It's under the heading "Virtual Memory". This opens the "Virtual Memory" dialog box, where you can set how much of your hard drive is used as RAM.
 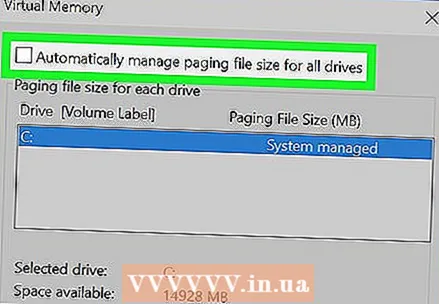 Uncheck "Automatically manage paging file size for all drives". Now you can edit the options in this screen.
  Click on your SSD drive. This selects the disk as the location for your paging file (virtual RAM).
  Select Size chosen by system.
- If you have specific instructions on how large a swap file should be, select Custom size and then enter the minimum and maximum page size in the appropriate open fields.
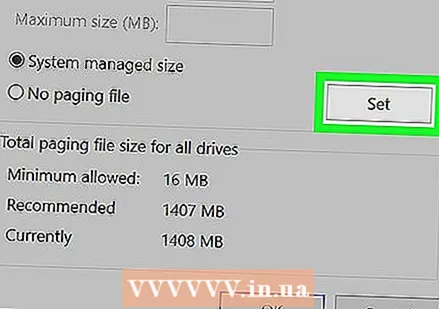 click on Set up.
 click on OK. A pop-up message will appear to let you know that you must restart your computer for the changes to take effect.
 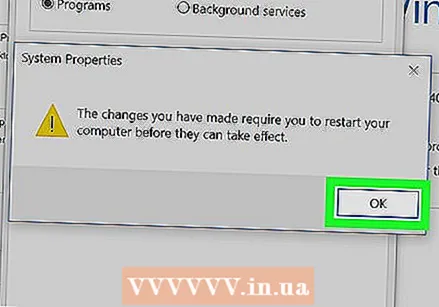 click on OK. The PC will now shut down and restart. When the PC restarts, it will use part of your SSD drive as virtual RAM - this should speed up your computer.


